


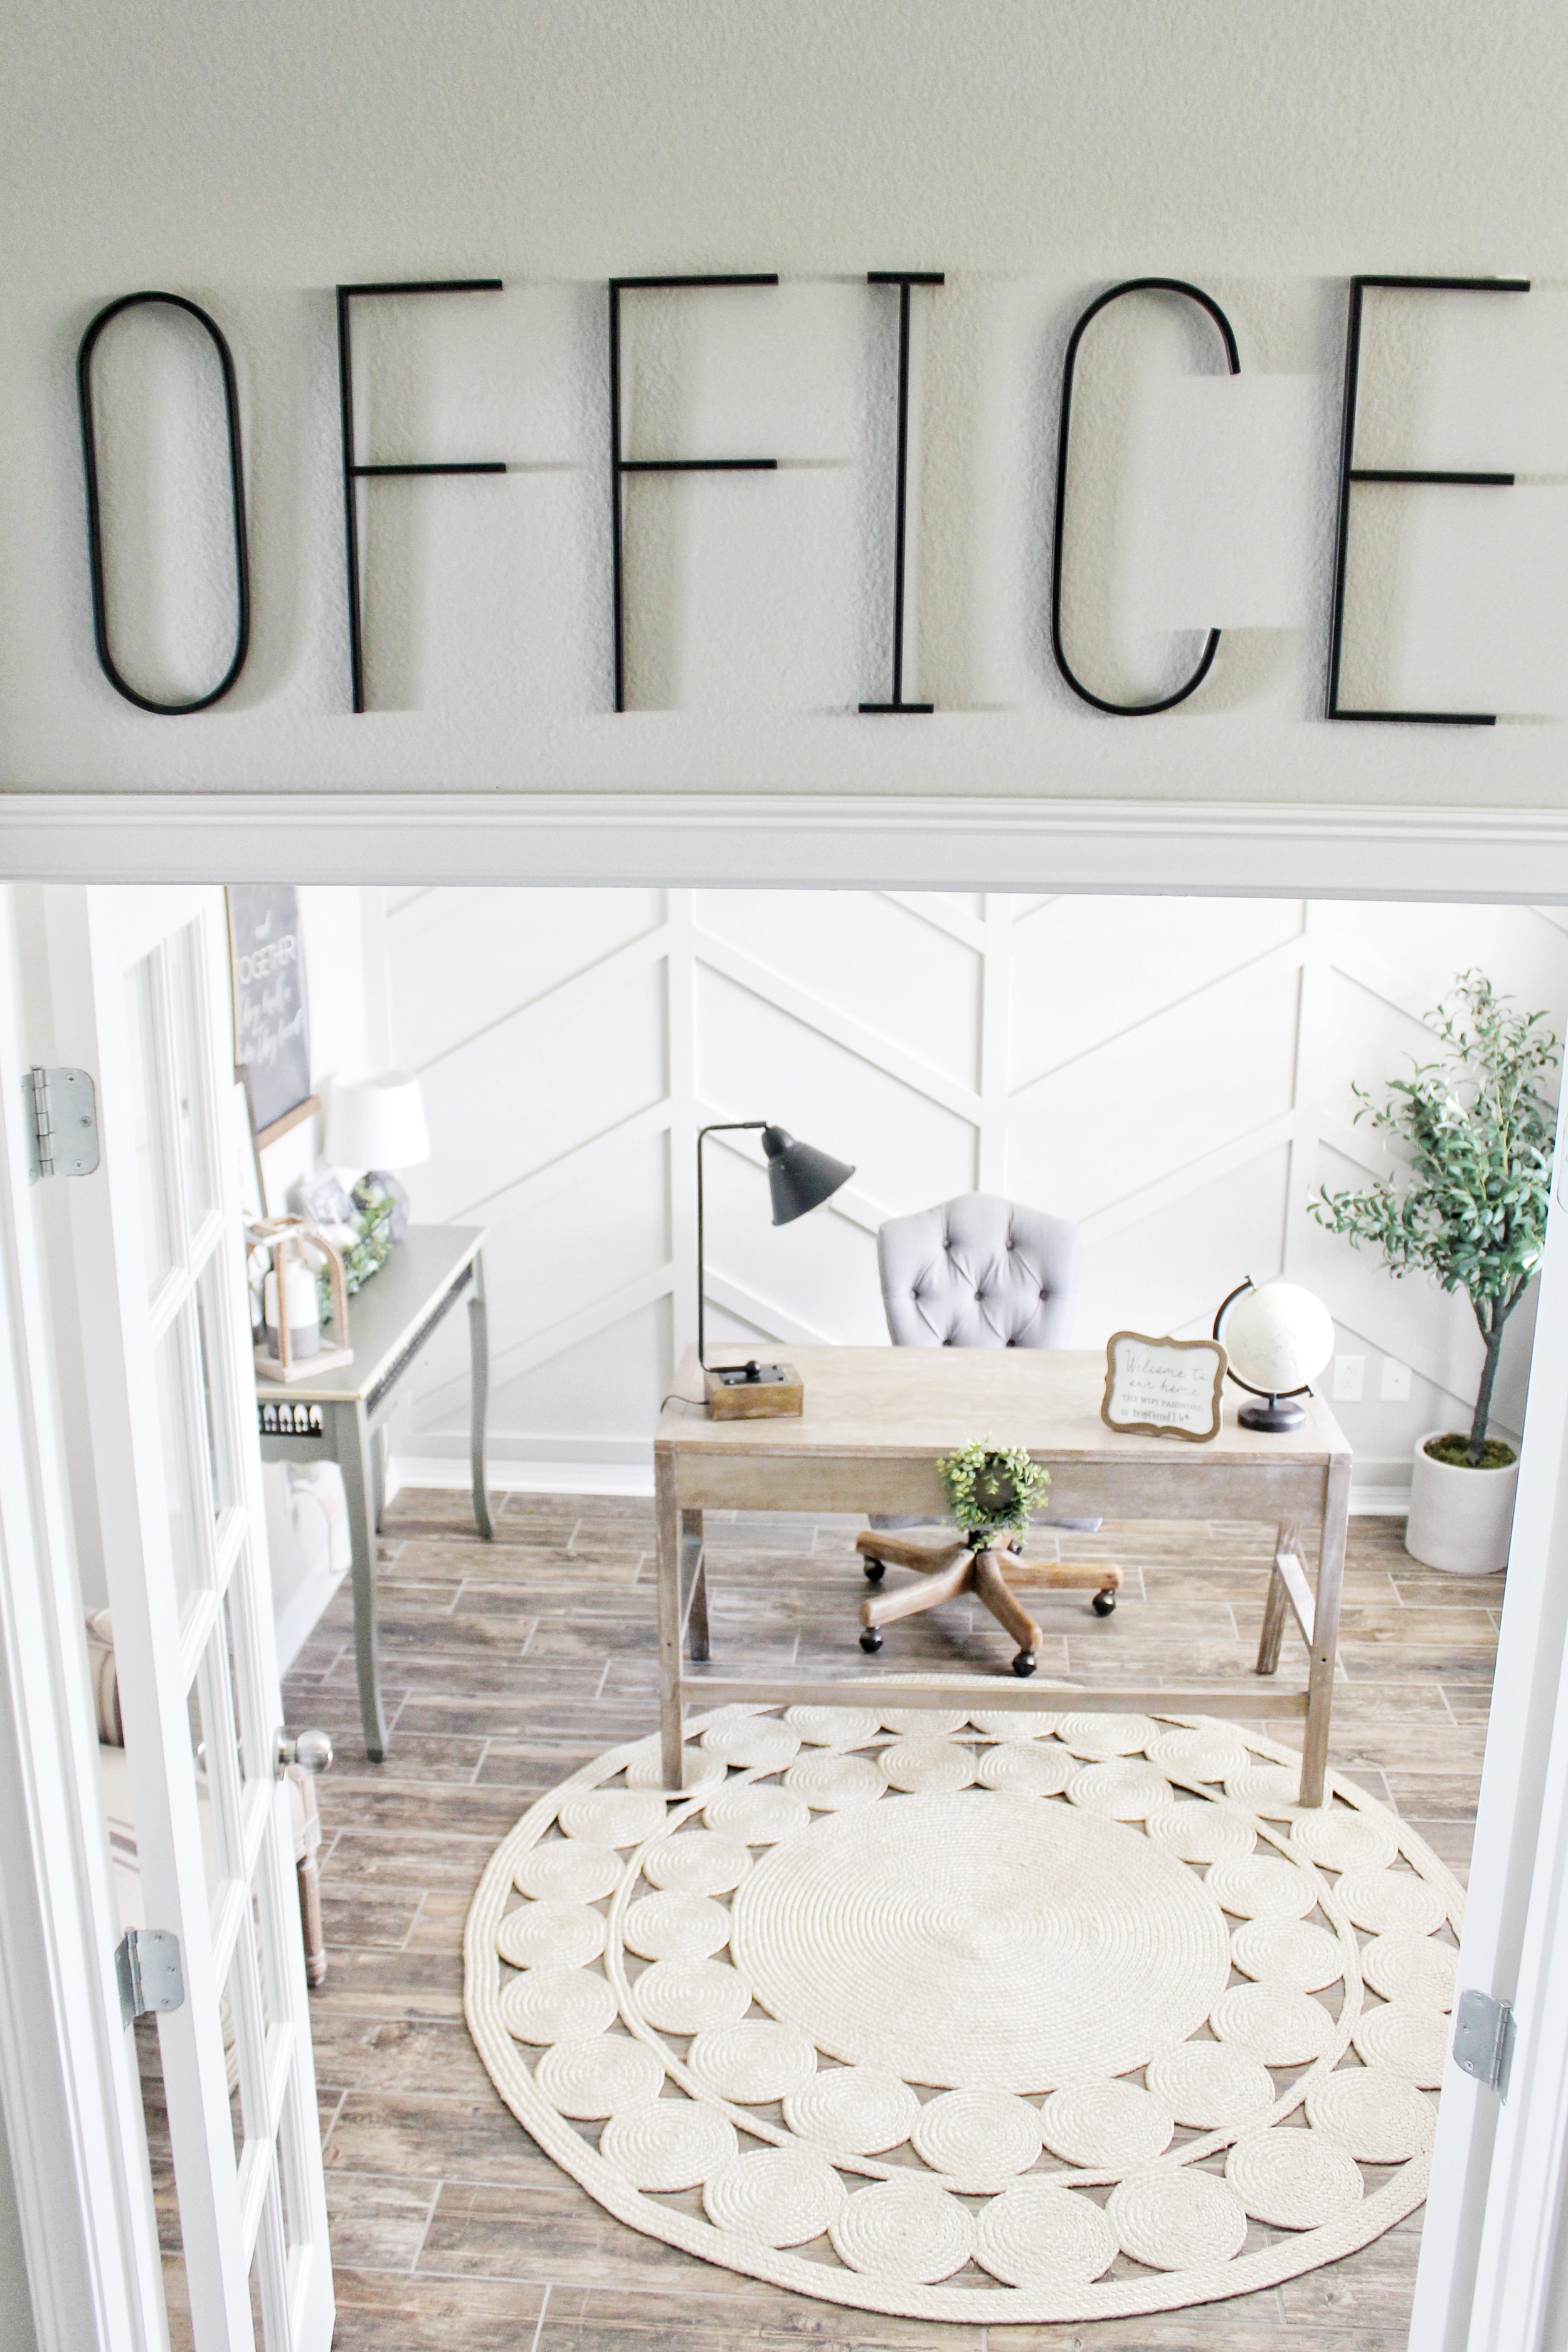
Herringbone Accent Wall
So here it goes, our first official blog post. I thought it was only fitting to make it about our herringbone accent wall we recently did in our office. It was one of our favorite projects we have done, and to our surprise-one of the easiest! I know what you’re thinking “Easy?! Yeah, ok Kelsey” but no really, I swear. We were anticipating it being a lot more difficult than it was, I mean look at all those angled cuts! If we’re saying it’s fairly easy-I promise it is!
We followed the tutorial from Christine at HoneyBuiltHome, it was SUPER helpful- go check it out here!
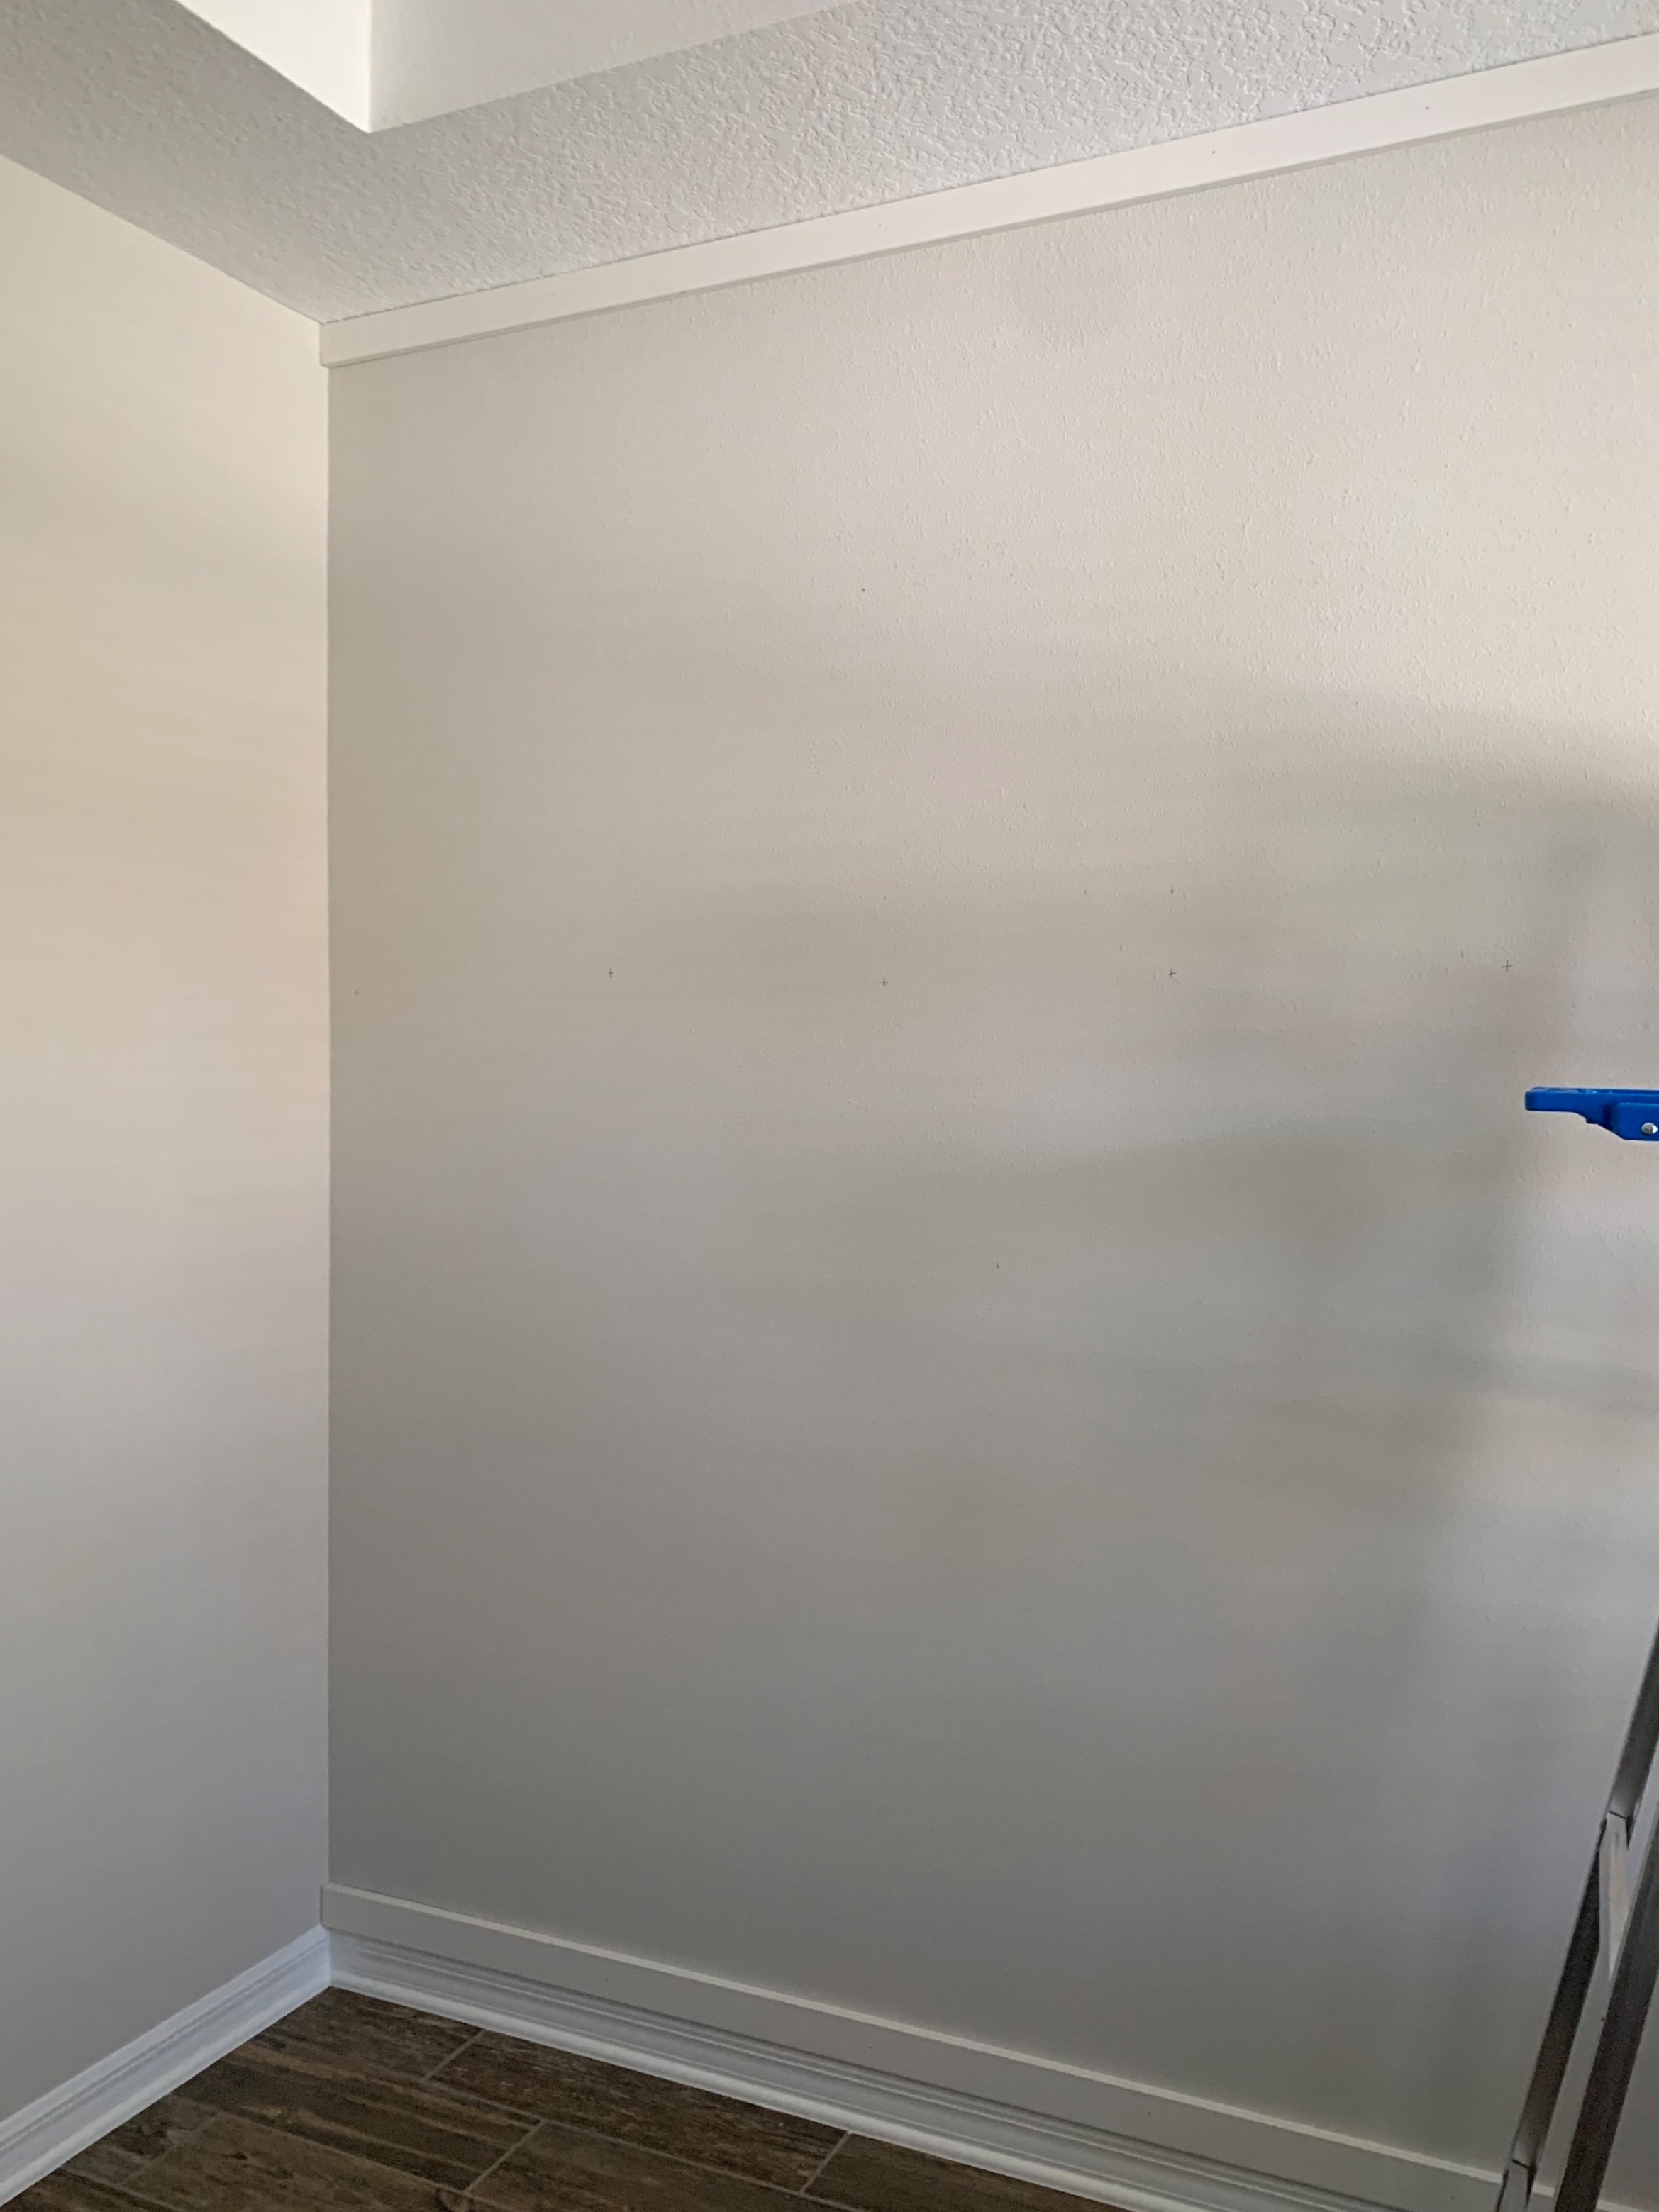
Just so you can compare your wall/supplies to ours. Our wall measured 125 inches x 108 inches.
Click links for each product.
-
18- Gauge Brad Nailer– We use this one from Amazon, can’t beat that price and it works well! You will need to hook it up to an air compressor though.
-
19 MDF boards– (0.656-in x 2.5-in x 8.08-ft) can also be purchased at Lowe’s (thats where we got ours).
-
Miter Saw– This isn’t the one we have, but is available with Prime and reasonably priced.
-
Stud Finder– This isn’t the one we use, but I don’t recommend the one we use, so heres this one.
-
Caulk Gun and Caulk– (We used this caulk because it is specifically for trim/molding and is paintable-important!)
-
Wood Glue– We only used this to reinforce the boards that weren’t getting nailed into studs.
-
Spackle– There might be better ones out there, but this is the kind we have used for all of our projects. Also, you may want to get a putty knife (we just use our fingers lol).
-
Sanding Block– any low to medium grit sanding block would work though. You’ll also need an old towel (or tack cloth if you want to be correct lol) to wipe away dust after sanding.
-
Gallon of paint -We used the same as the rest of the walls in our home, Sherwin Williams Agreeable Gray in a flat finish. We wanted it to just match our other walls, and I’m glad we went this route!
-
Painting supplies- trim brush, roller, drop cloth, painters tape.
-
Measuring tape and level- for good measure. Get it? 😉
Now that the product details are out of the way, lets get down to business.

Step 1: Use the stud finder and mark all of your studs. We always try to nail into studs whenever we can, but during this project it wasn’t possible half the time, but thats what the wood glue is for! Extra reinforcement is always good.
Start with the top and bottom frame pieces. Depending on your baseboards, the bottom board will hang over, which isn’t something that bothered us and won’t be noticeable at the end.
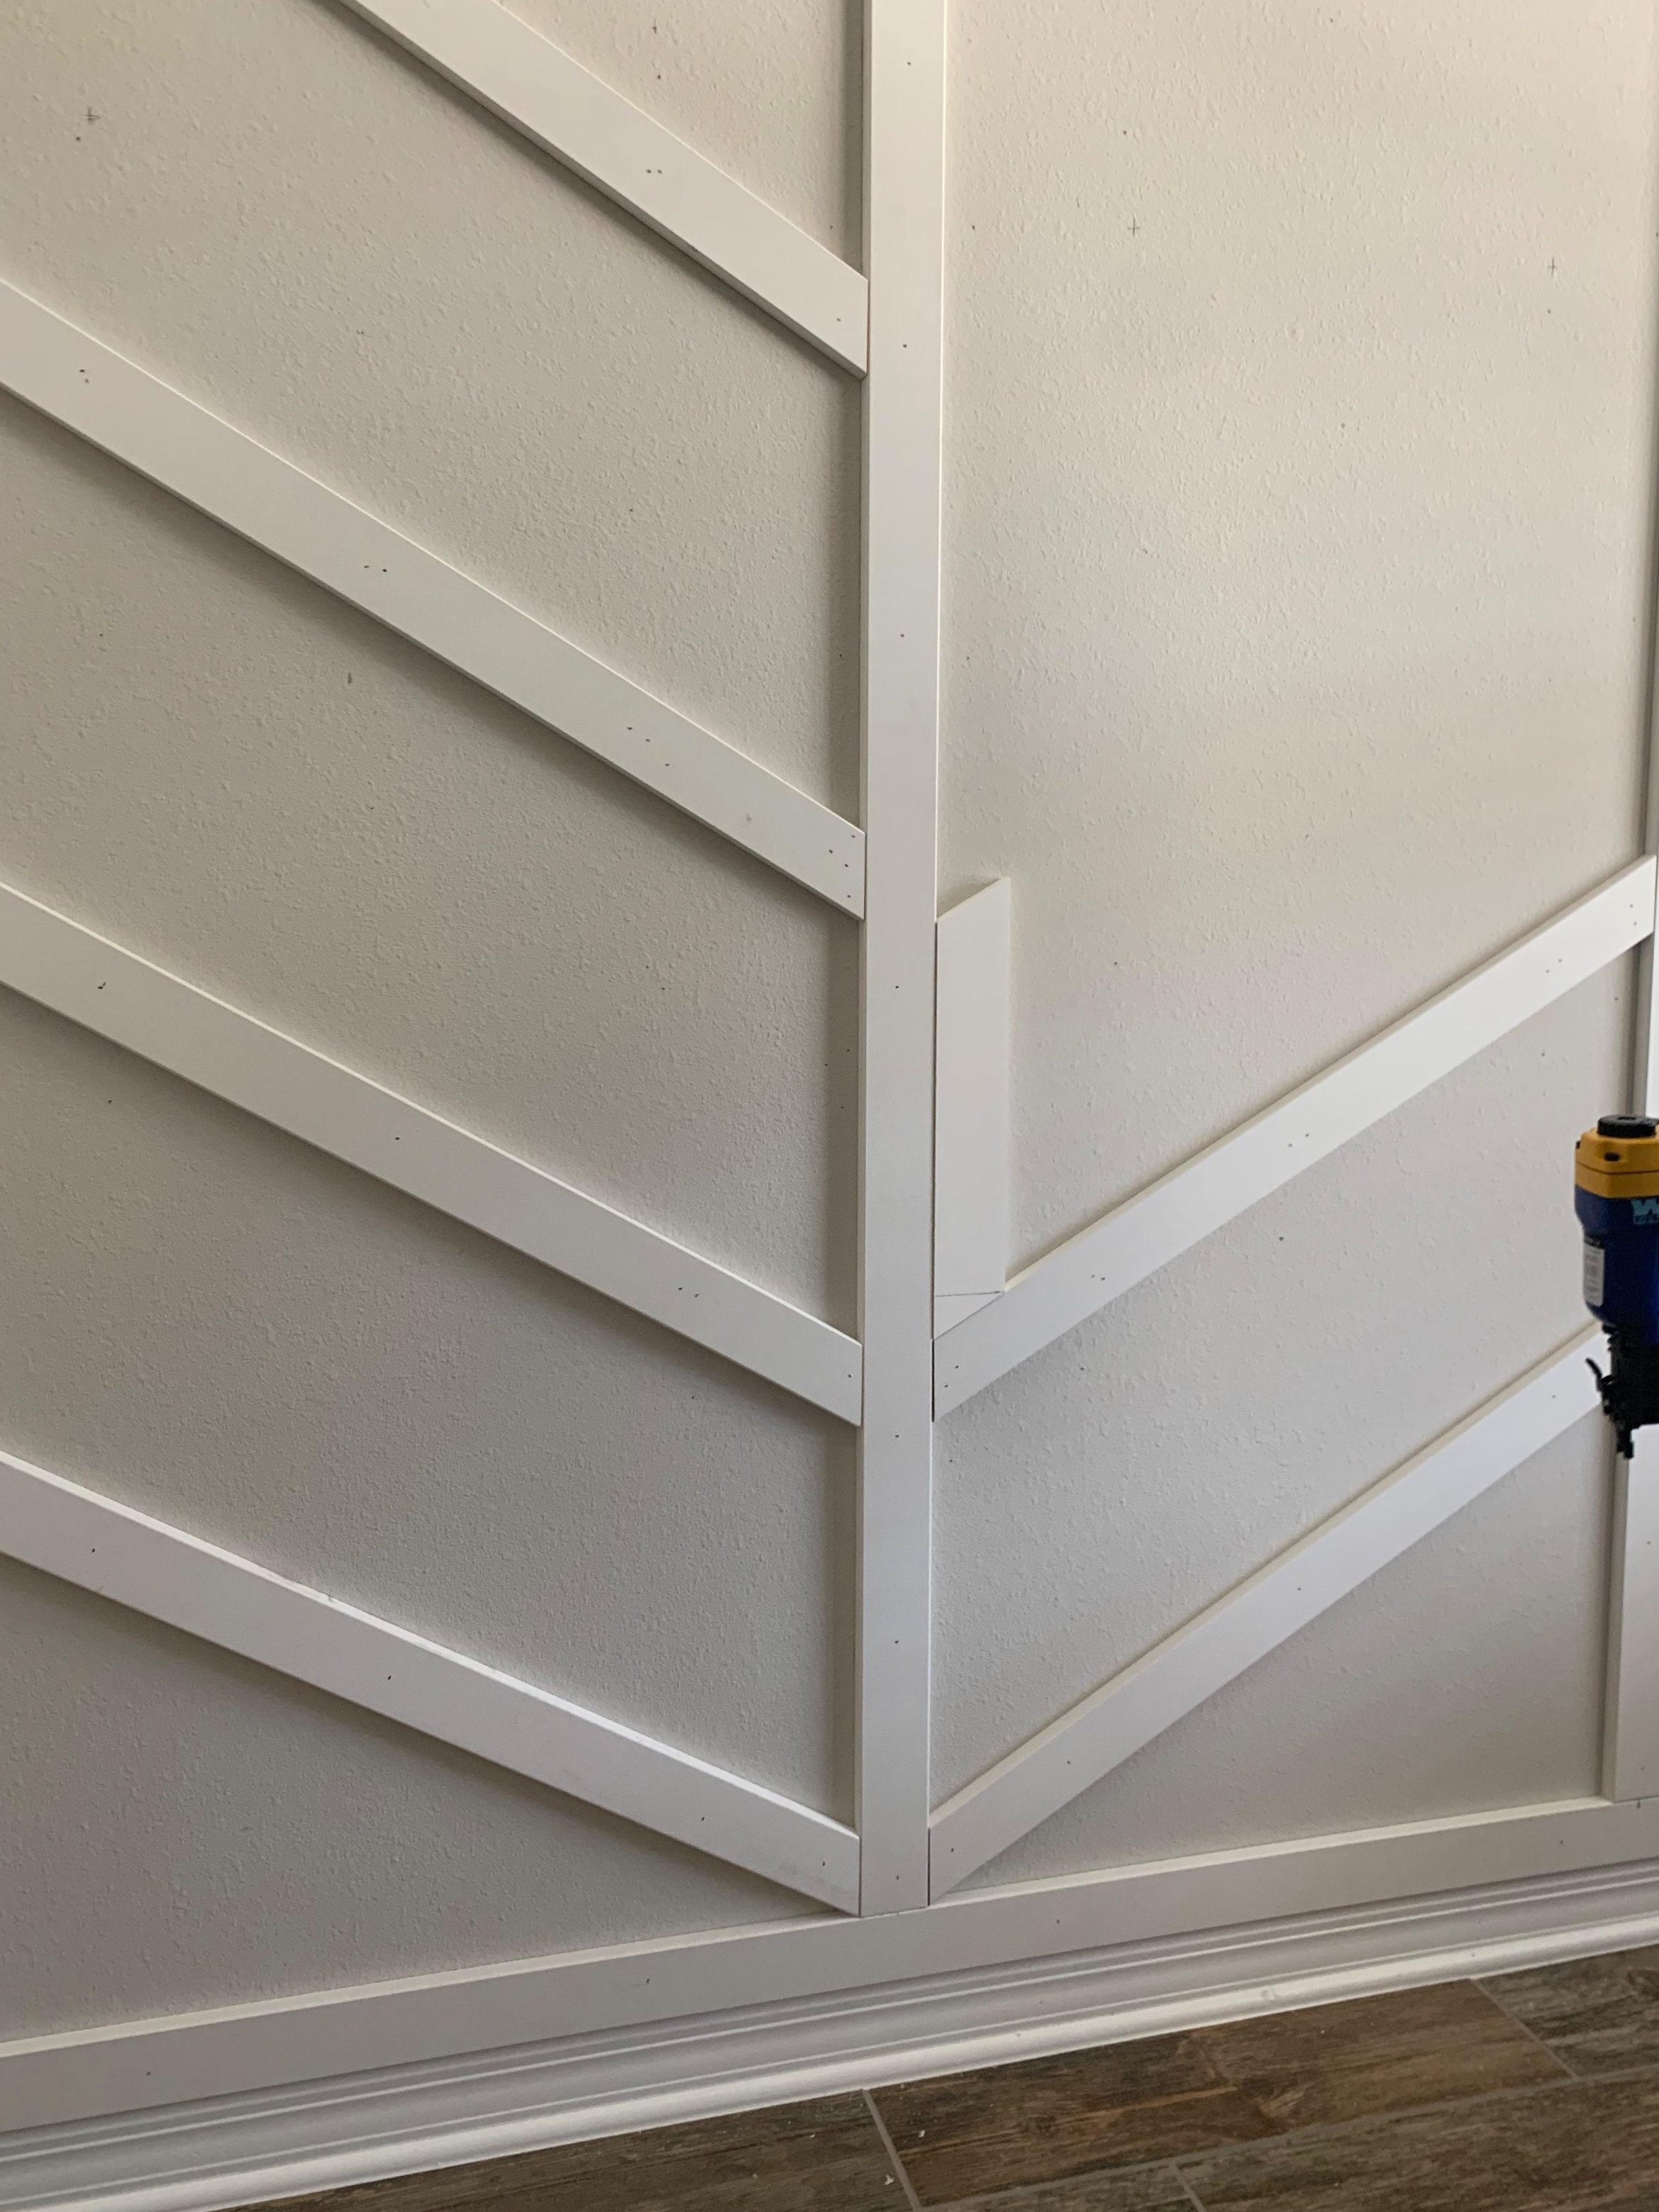
Step 2: We started by framing out the wall with the MDF boards. We did the top first, then the bottom, and then the sides. For us, one MDF board didnt go all the way across the top and bottom, which was fine, so we used a second for each and you’ll just caulk down the seam later. You can see the seam in the picture below.
-
We didn’t use the wood glue here, just nailed where the studs were.
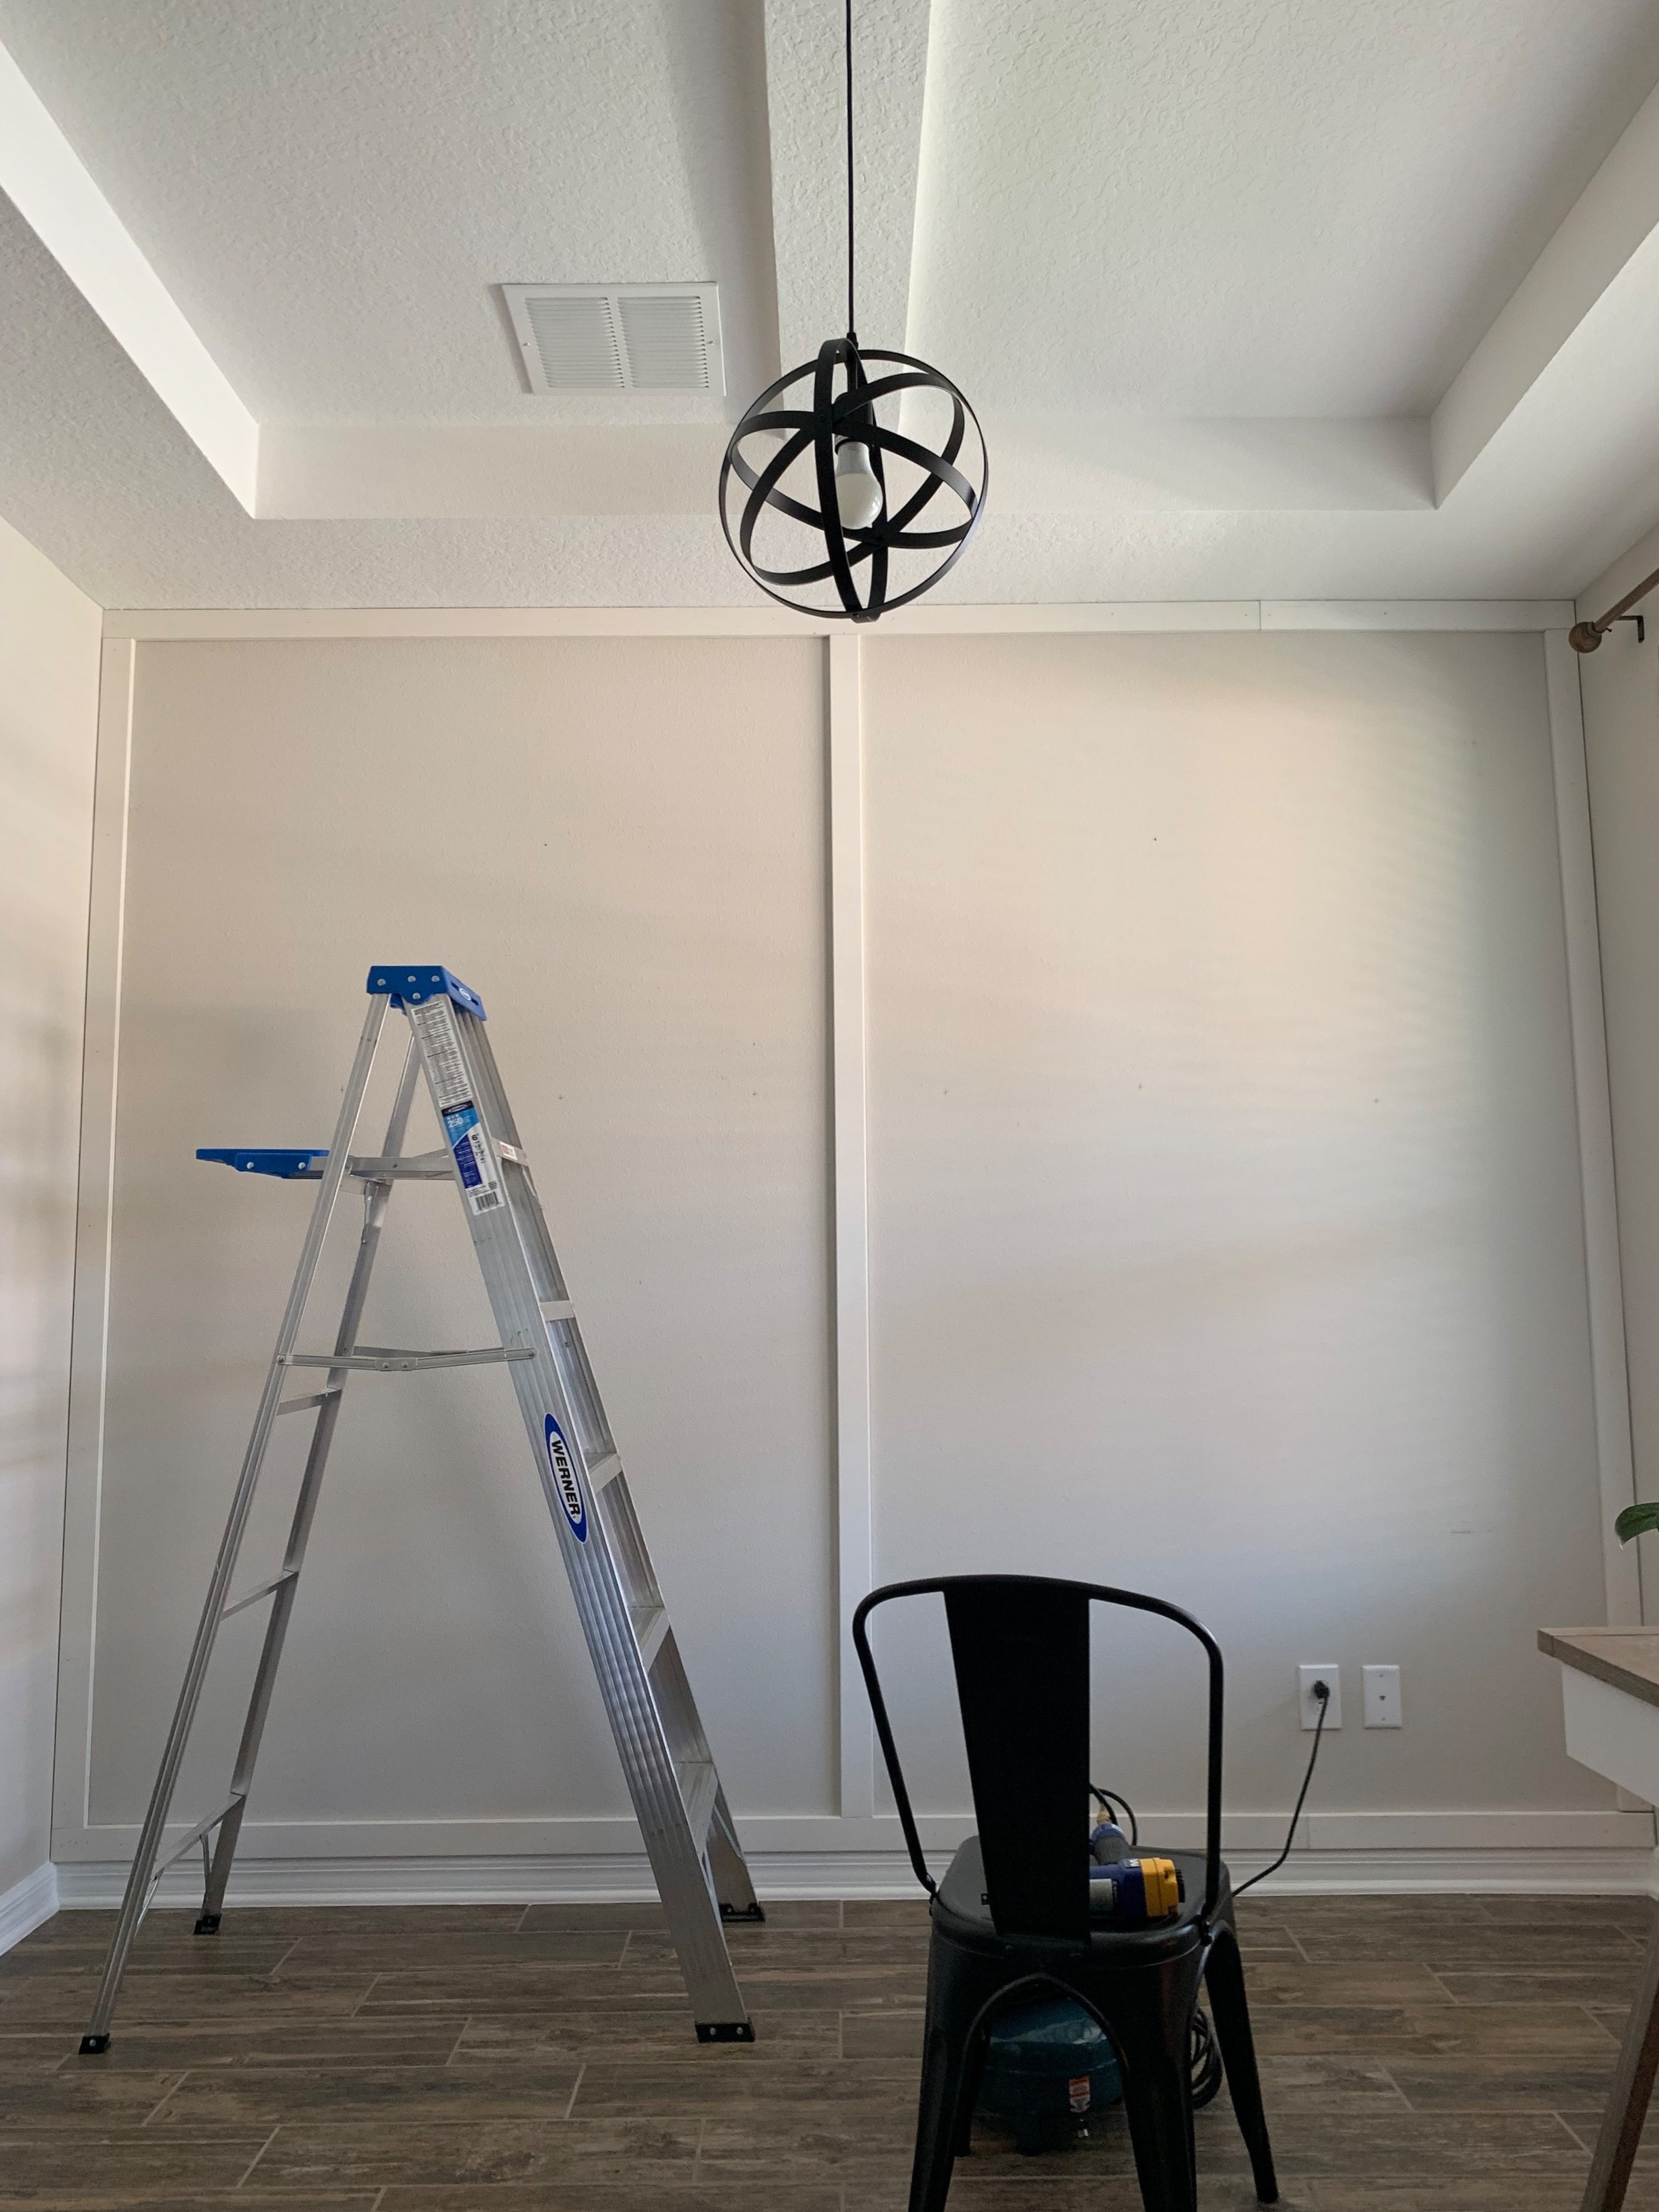
Your wall should look like this with one board directly in the center.
Step 3: After you have the wall framed out with the MDF board, you’ll want to measure the center of the wall and place a vertical board there. You’ll need to use your miter saw to trim it down so it sits tightly in between your top and bottom boards. For us, there was no stud here, so we reinforced the board with some wood glue before we nailed that baby up. See above picture.
Step 4: Once you have the center board in place, you’ll need to again measure the center point of your two new panels (right and left of the center board) and place vertical boards in the center of those also. See below.

Measure the center point of both panels next. You’ll be placing a vertical board at each point.
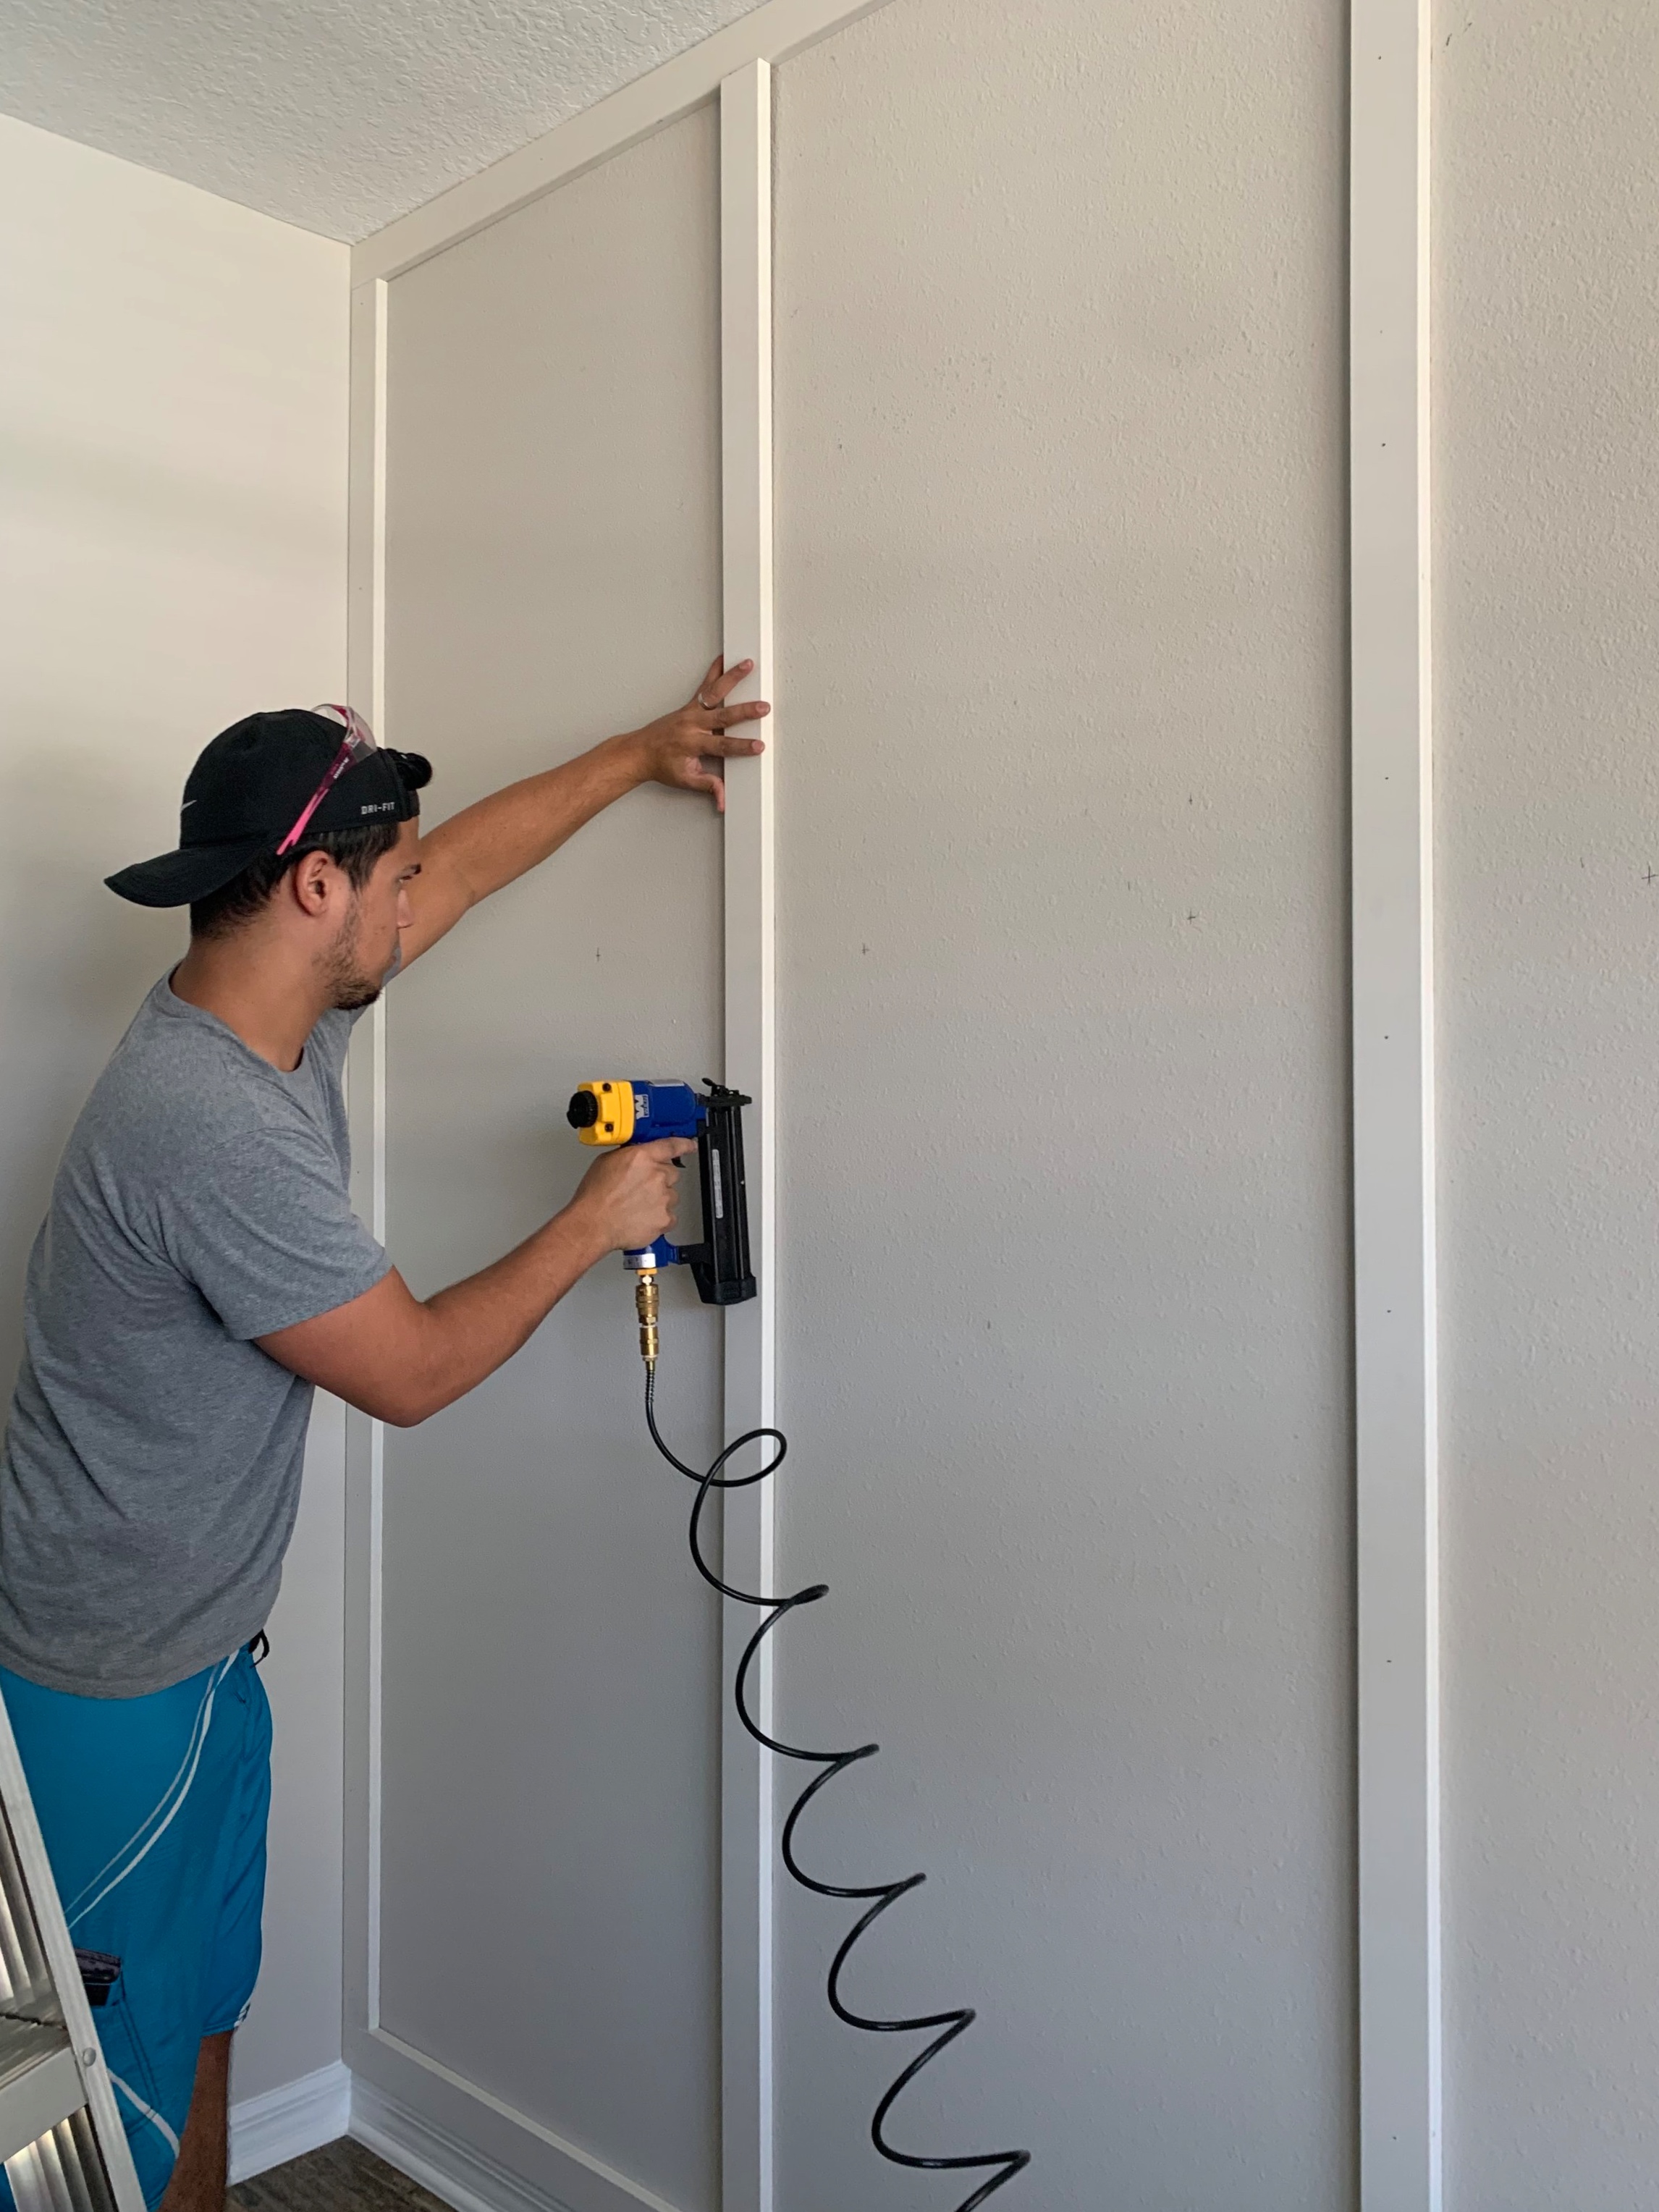
No stud here (except for Ryan) so we ended up reinforcing all vertical boards with wood glue.
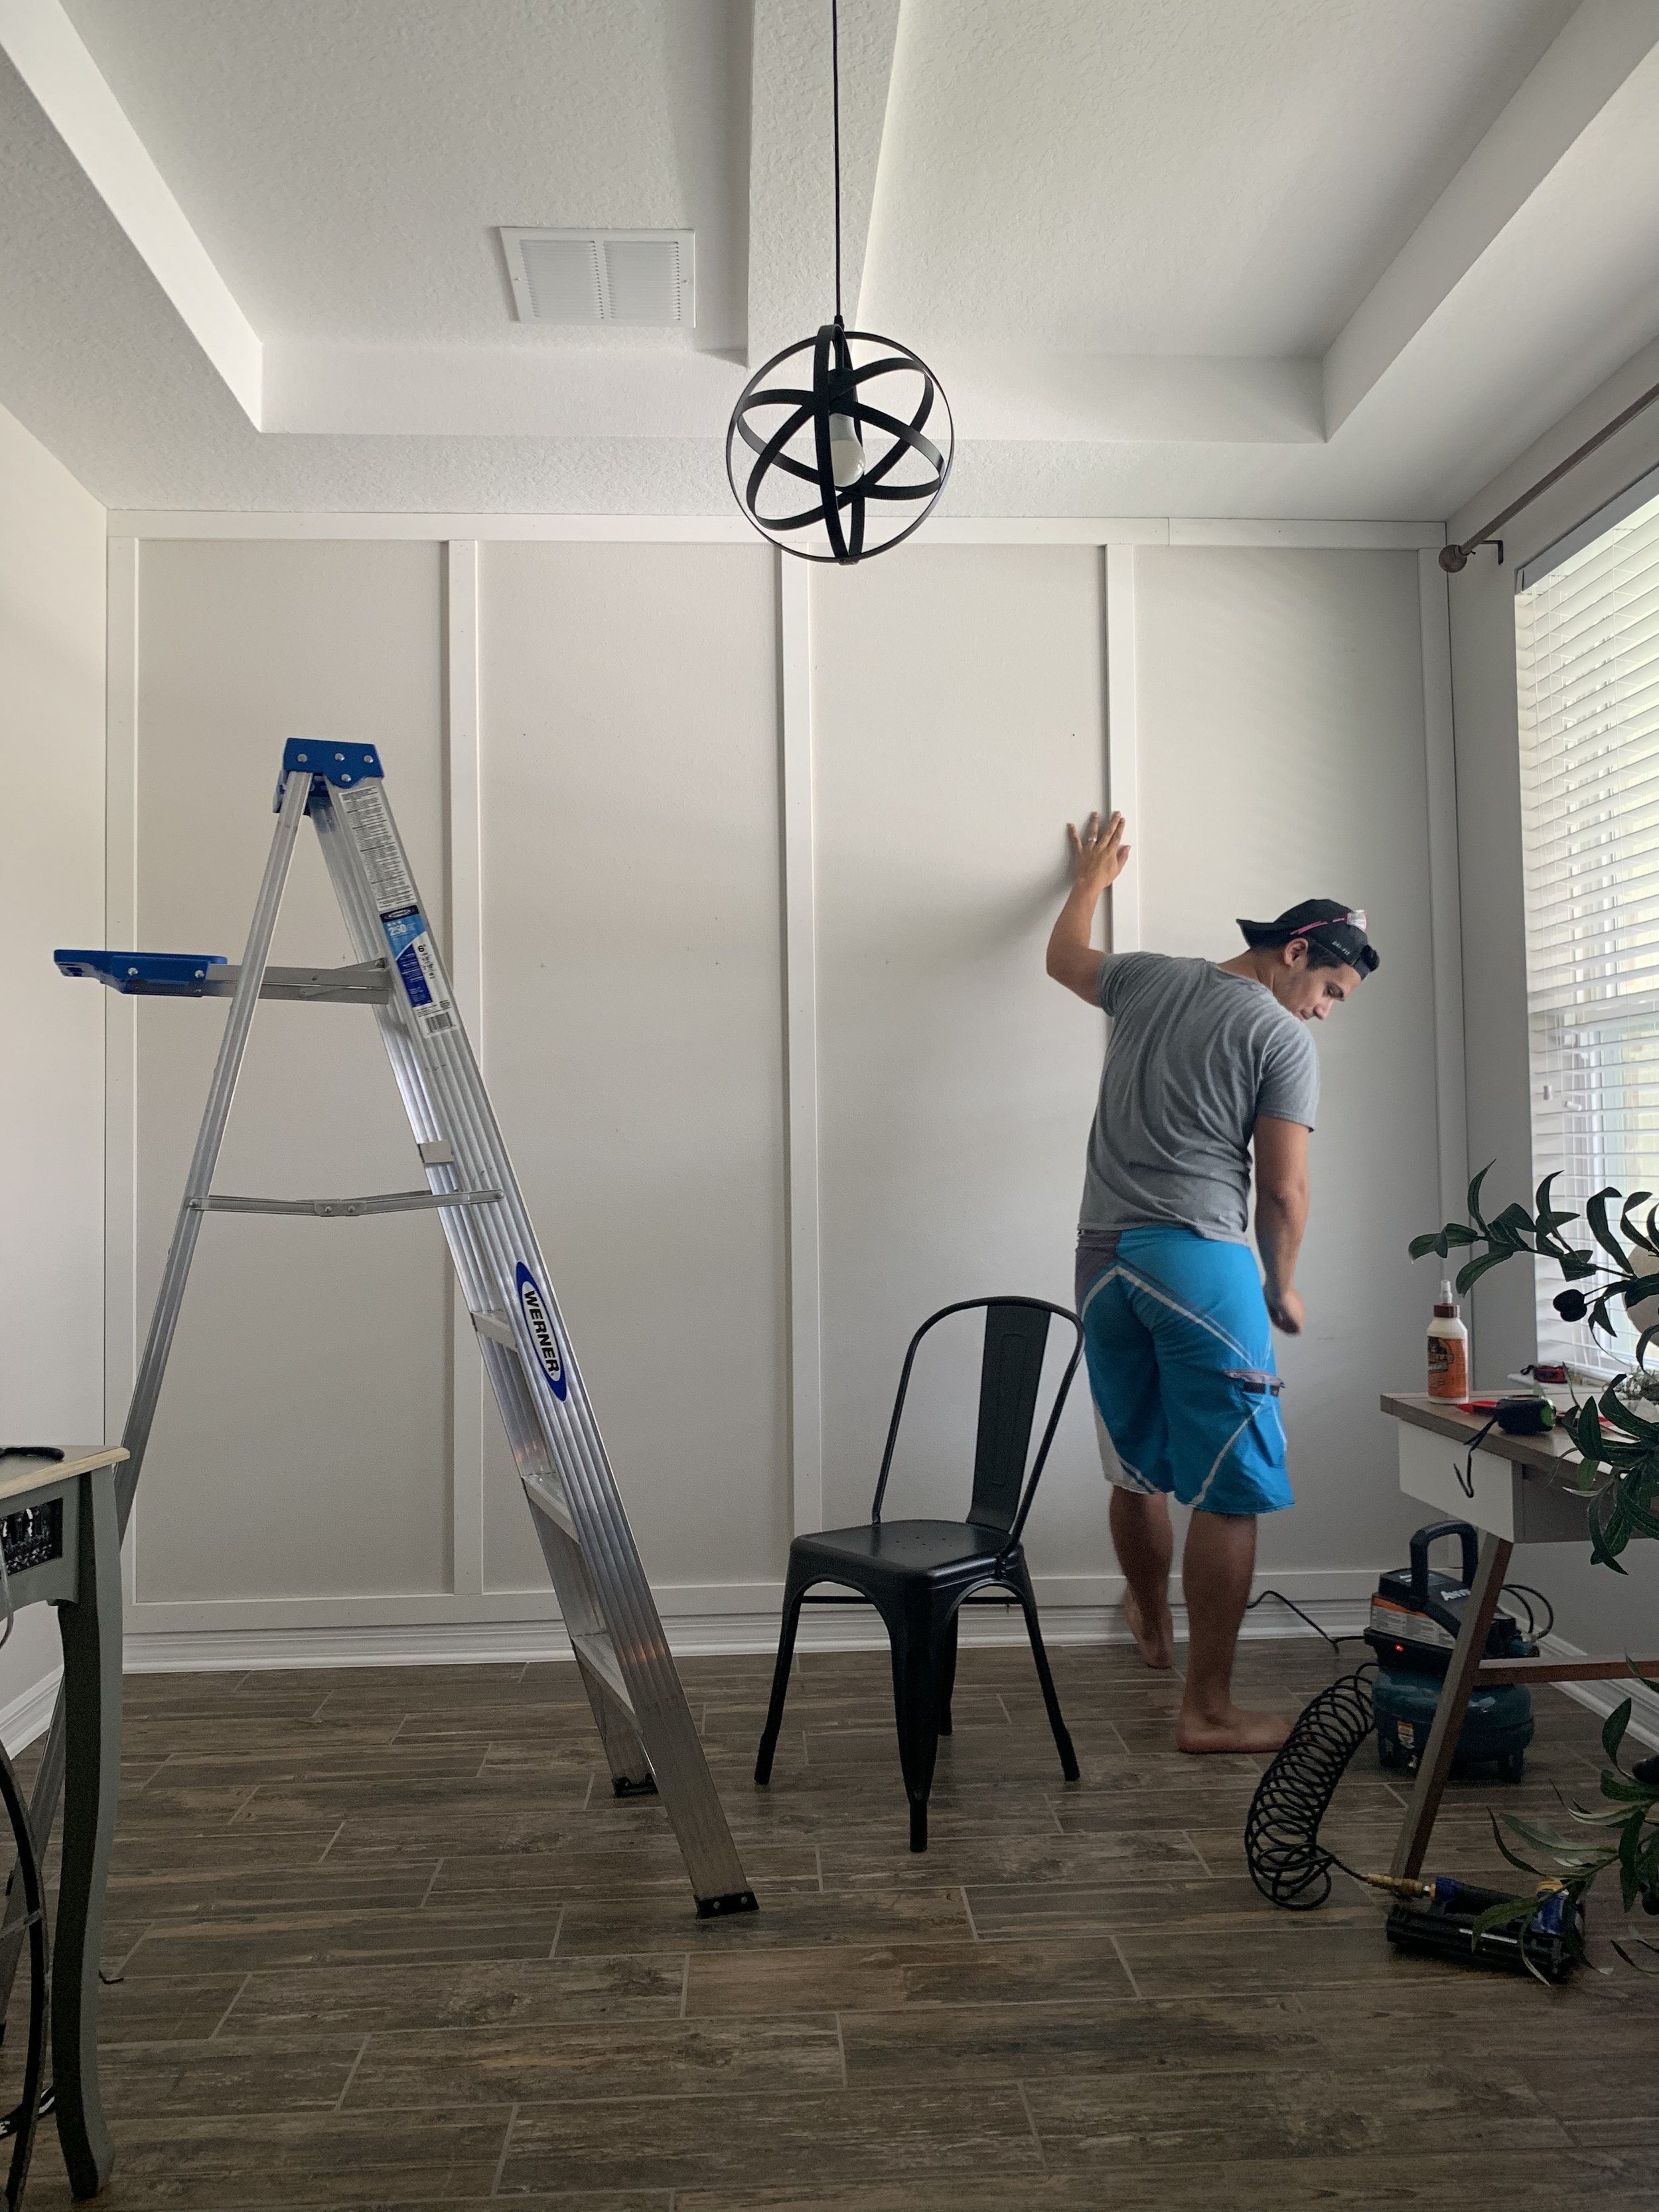
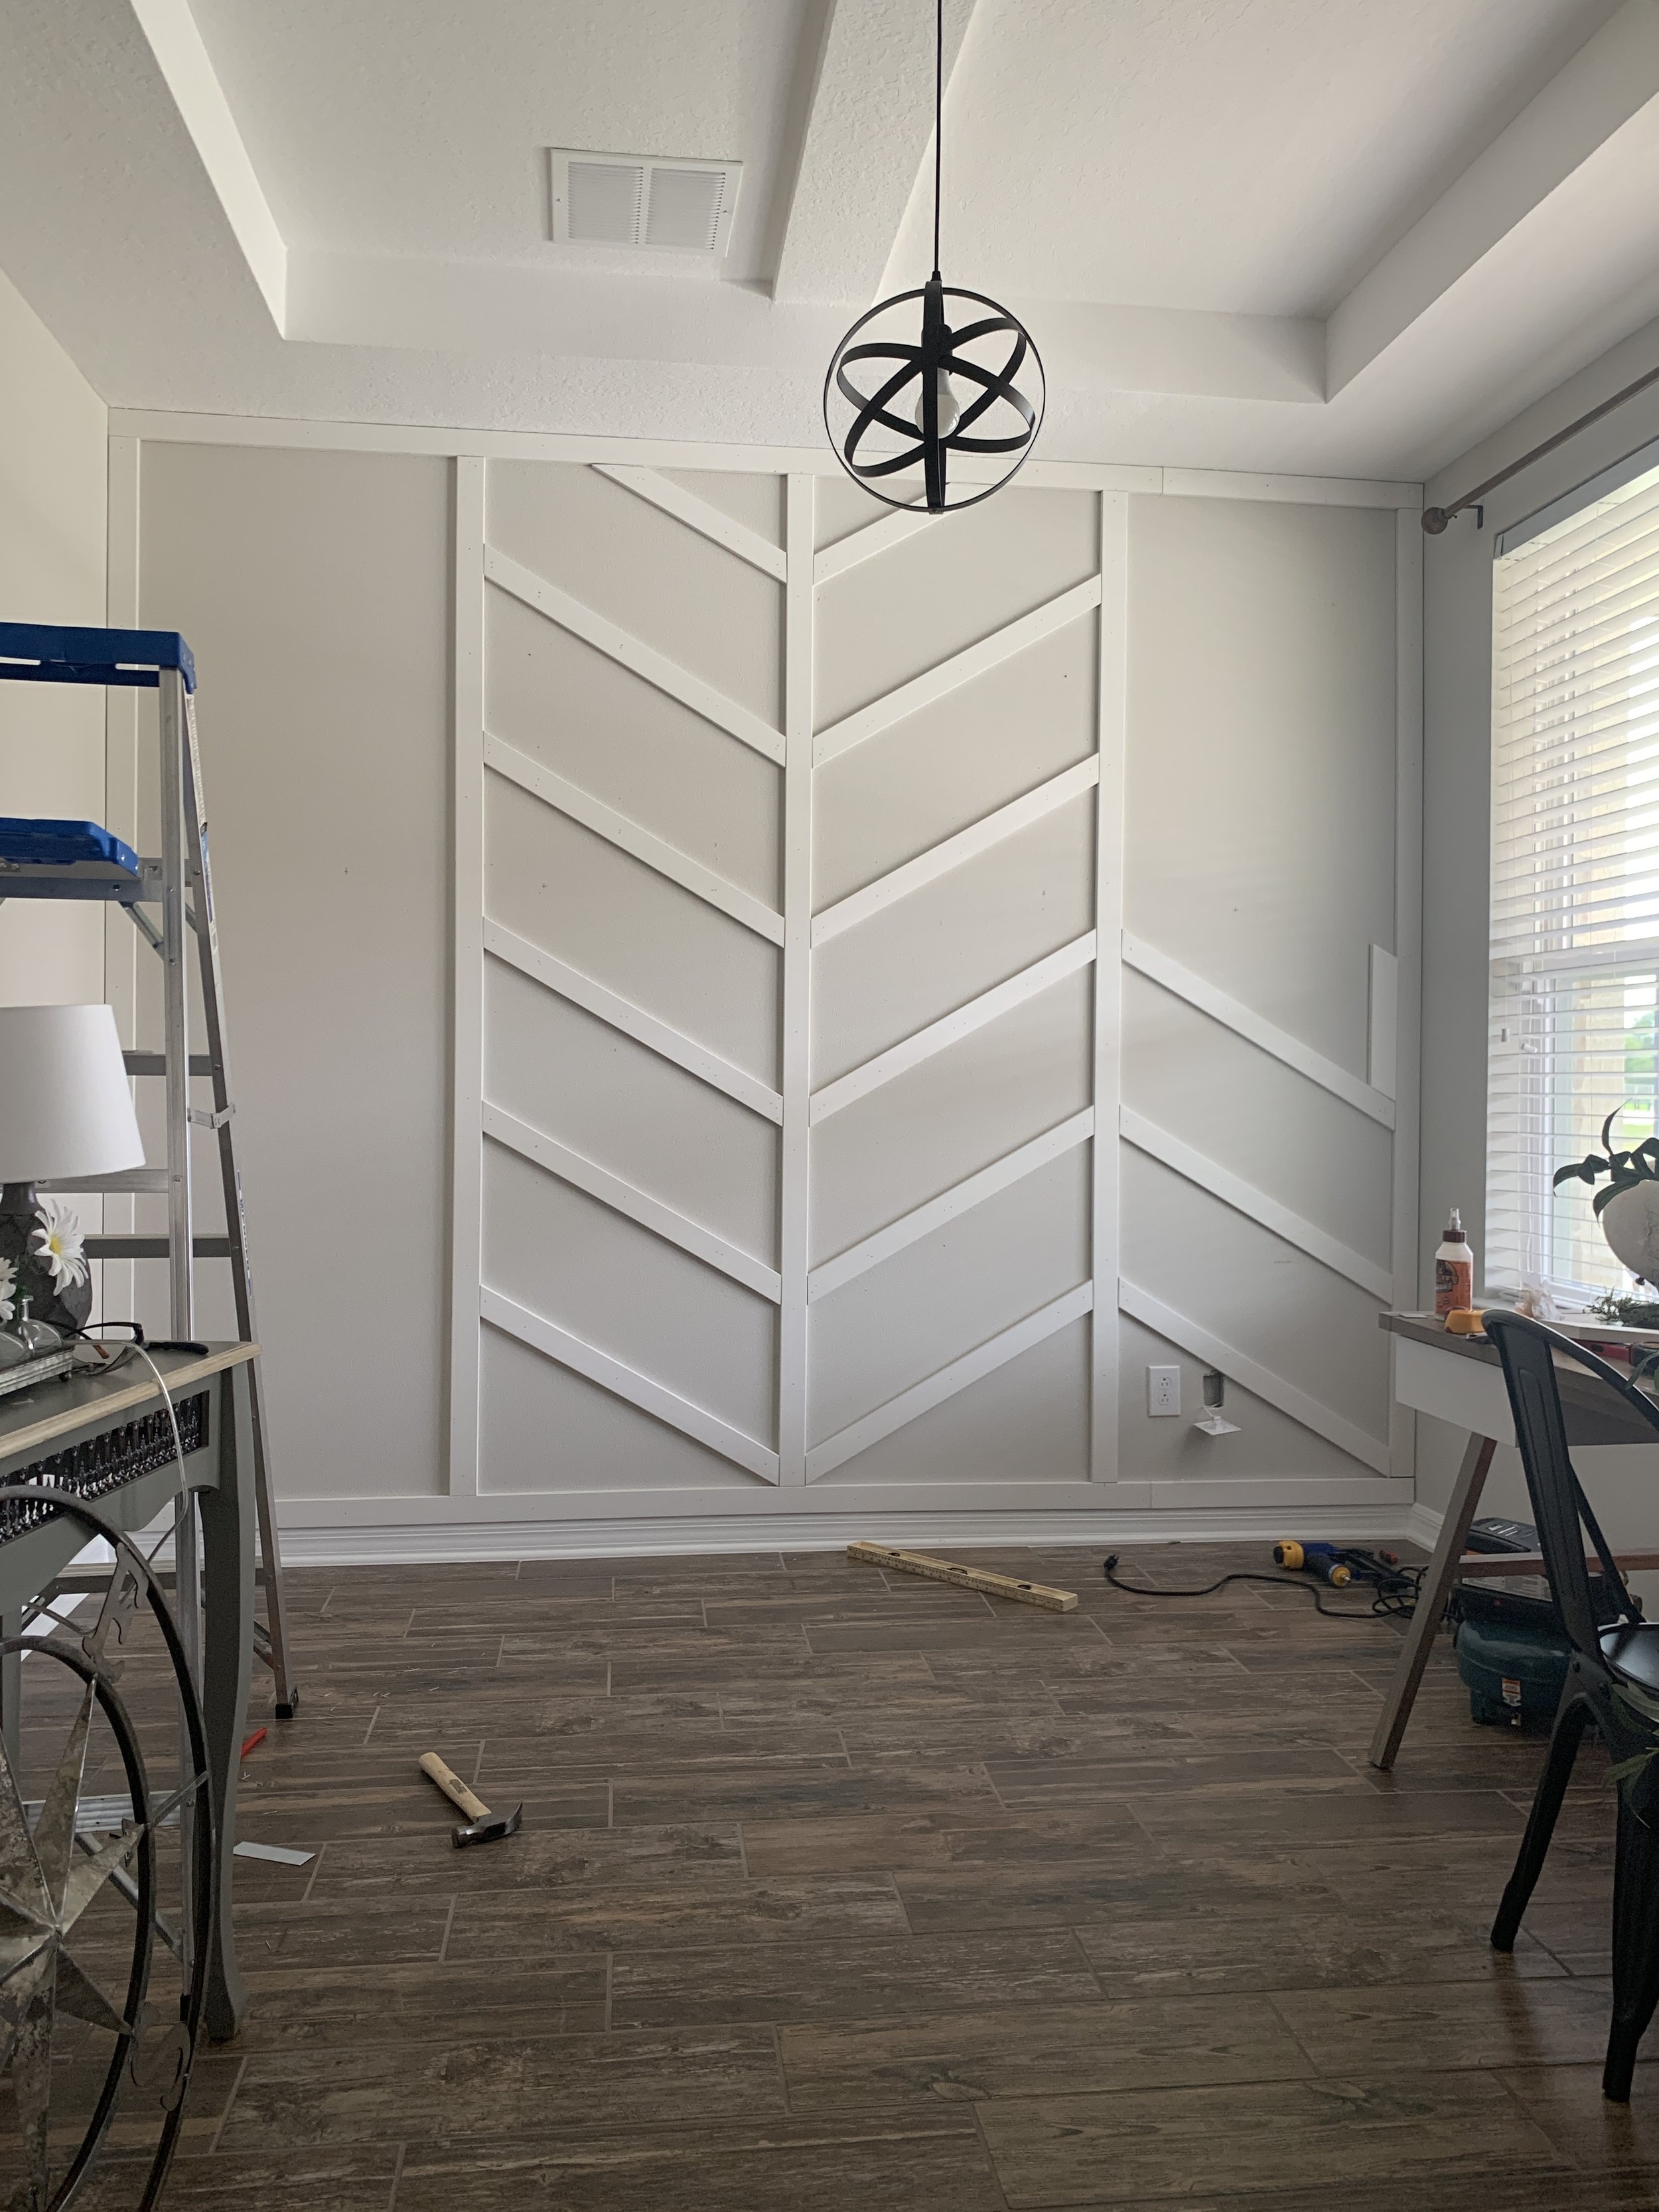
After all vertical boards are placed, you should have a wall that looks like this.
Step 5: Once you have all your vertical boards in place, you’re done! JK, now comes the fun part.
Its time to cut all your angled boards and get that herringbone pattern started! Our spaces between all the vertical boards were about 33 7/8 inches, so we cut each board down to this size and made a 30 degree angle on each end to get them to fit snug against the vertical boards. This may vary depending on how large your wall is, and how far apart your boards are.
Step 6: The next part is really important, and somewhere we messed up originally. You need to figure out how far apart you want the spacing between each angled board to be and you’ll make a template spacer out of one of your MDF boards. You’ll use this spacer as a guideline all the way up the wall. We wanted our angled boards to be 12 inches apart, its what we thought would look best on our wall (this will also vary on how large of a wall you’re doing). Do NOT make the template board 12 inches long, the spaces will only be 9 1/2 inches apart. For 12 inch spacing, you’ll need the template board to be 15 1/2 inches with 30 degree cuts on each end. See below picture for how we used the template board for spacing.
Place the spacer board vertically on top of each angled panel. You will then rest the next panel on top of the spacer and nail in there. This ensures all panels are lined up properly and you have even spacing across the whole wall.
We started with the two middle panels, and worked our way to the outsides. Still using the spacer as a template.
Step 7: You will continue using the spacer and nailing in all of your angled boards all the way up the wall on both sides, when you come to the very top panels on both sides (see picture below), you will notice the board needs to be much smaller and it isn’t a 30 degree angle, and thats fine (There will be 4 of these boards). We don’t remember what specific angle we used for the top pieces, we had to recut a few times until we got the angle perfect. And remember, you can always fill in with caulk if its not perfect 😉
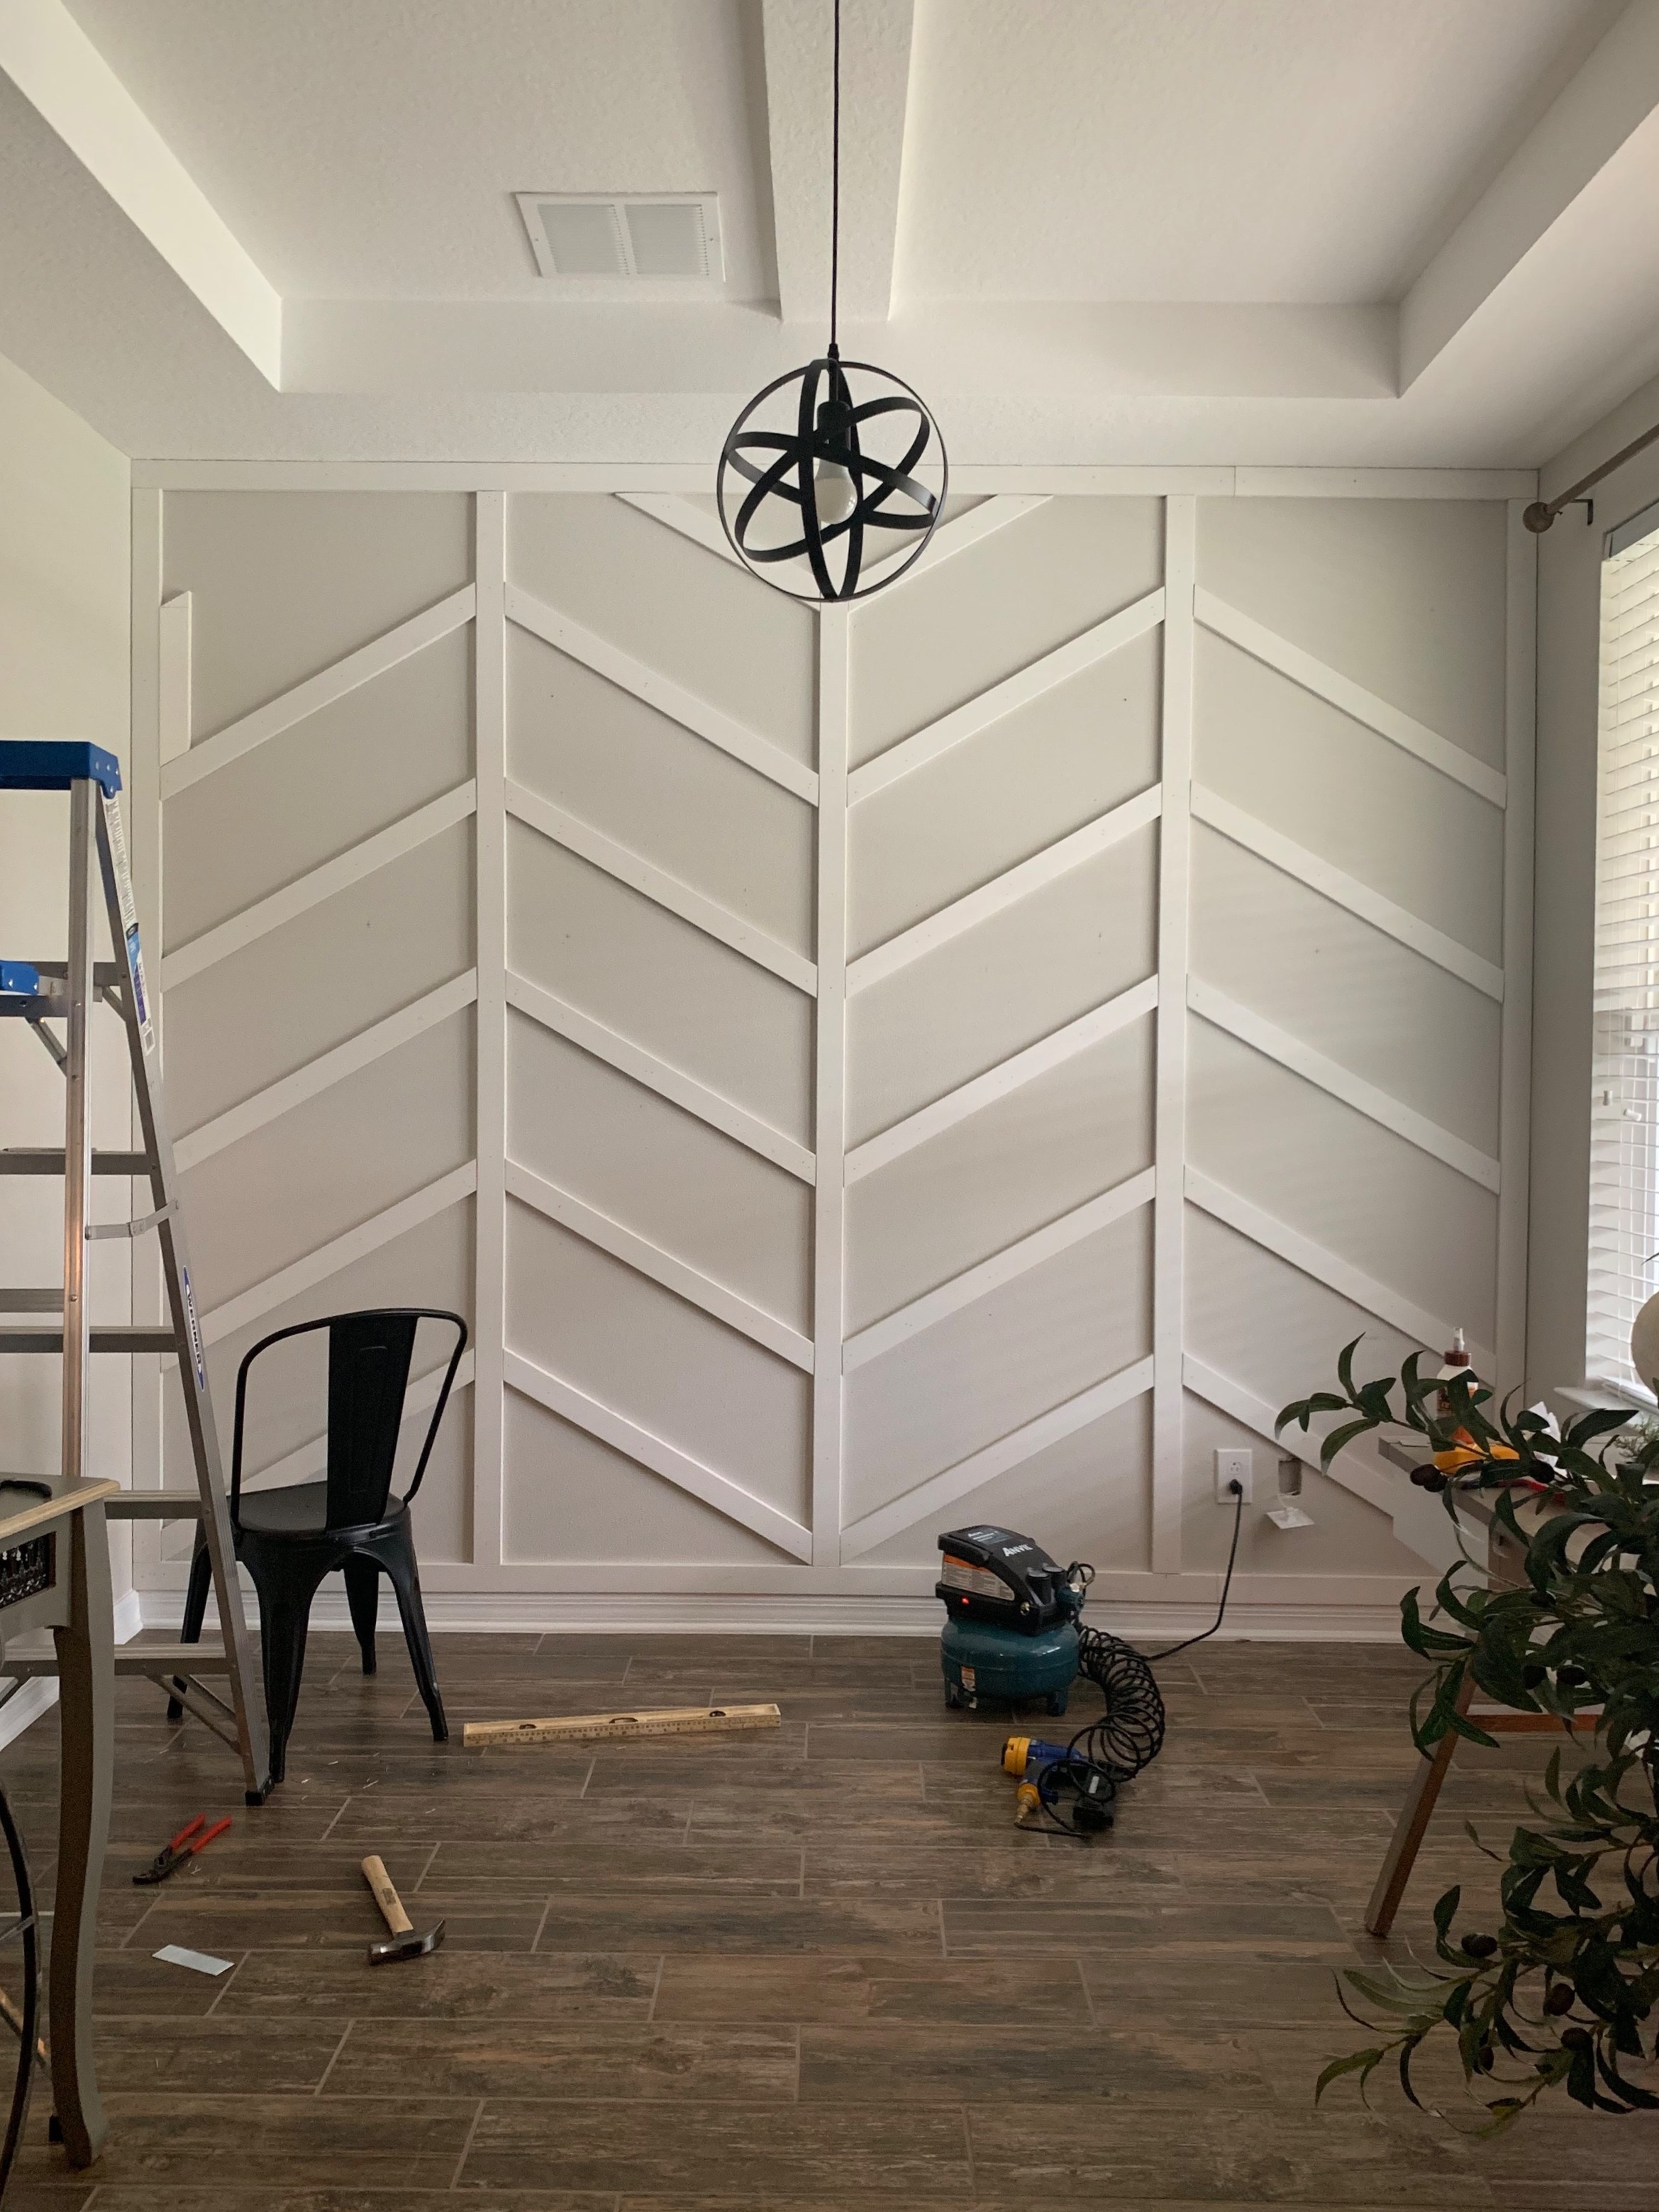
The 4 top pieces will not be the same length boards, and will not have 30 degree angled cuts, this part was a trial and error with having to cut a few times and find the perfect angle. It wasn’t as hard as it sounds.
Step 8: The hard part is done, nailing and cutting is over! Whew. Now you need to fill all the nail holes with spackle by using a putty knife/scraper to apply (or be like us and just use our fingers lol). We also filled larger seams, and all outside edges against the walls and ceiling, with caulk. Caulk can’t be sanded unlike spackle (fun fact), so you have to make sure you wipe up any access caulk before it dries. Theres some great videos on Youtube about how to apply caulk.
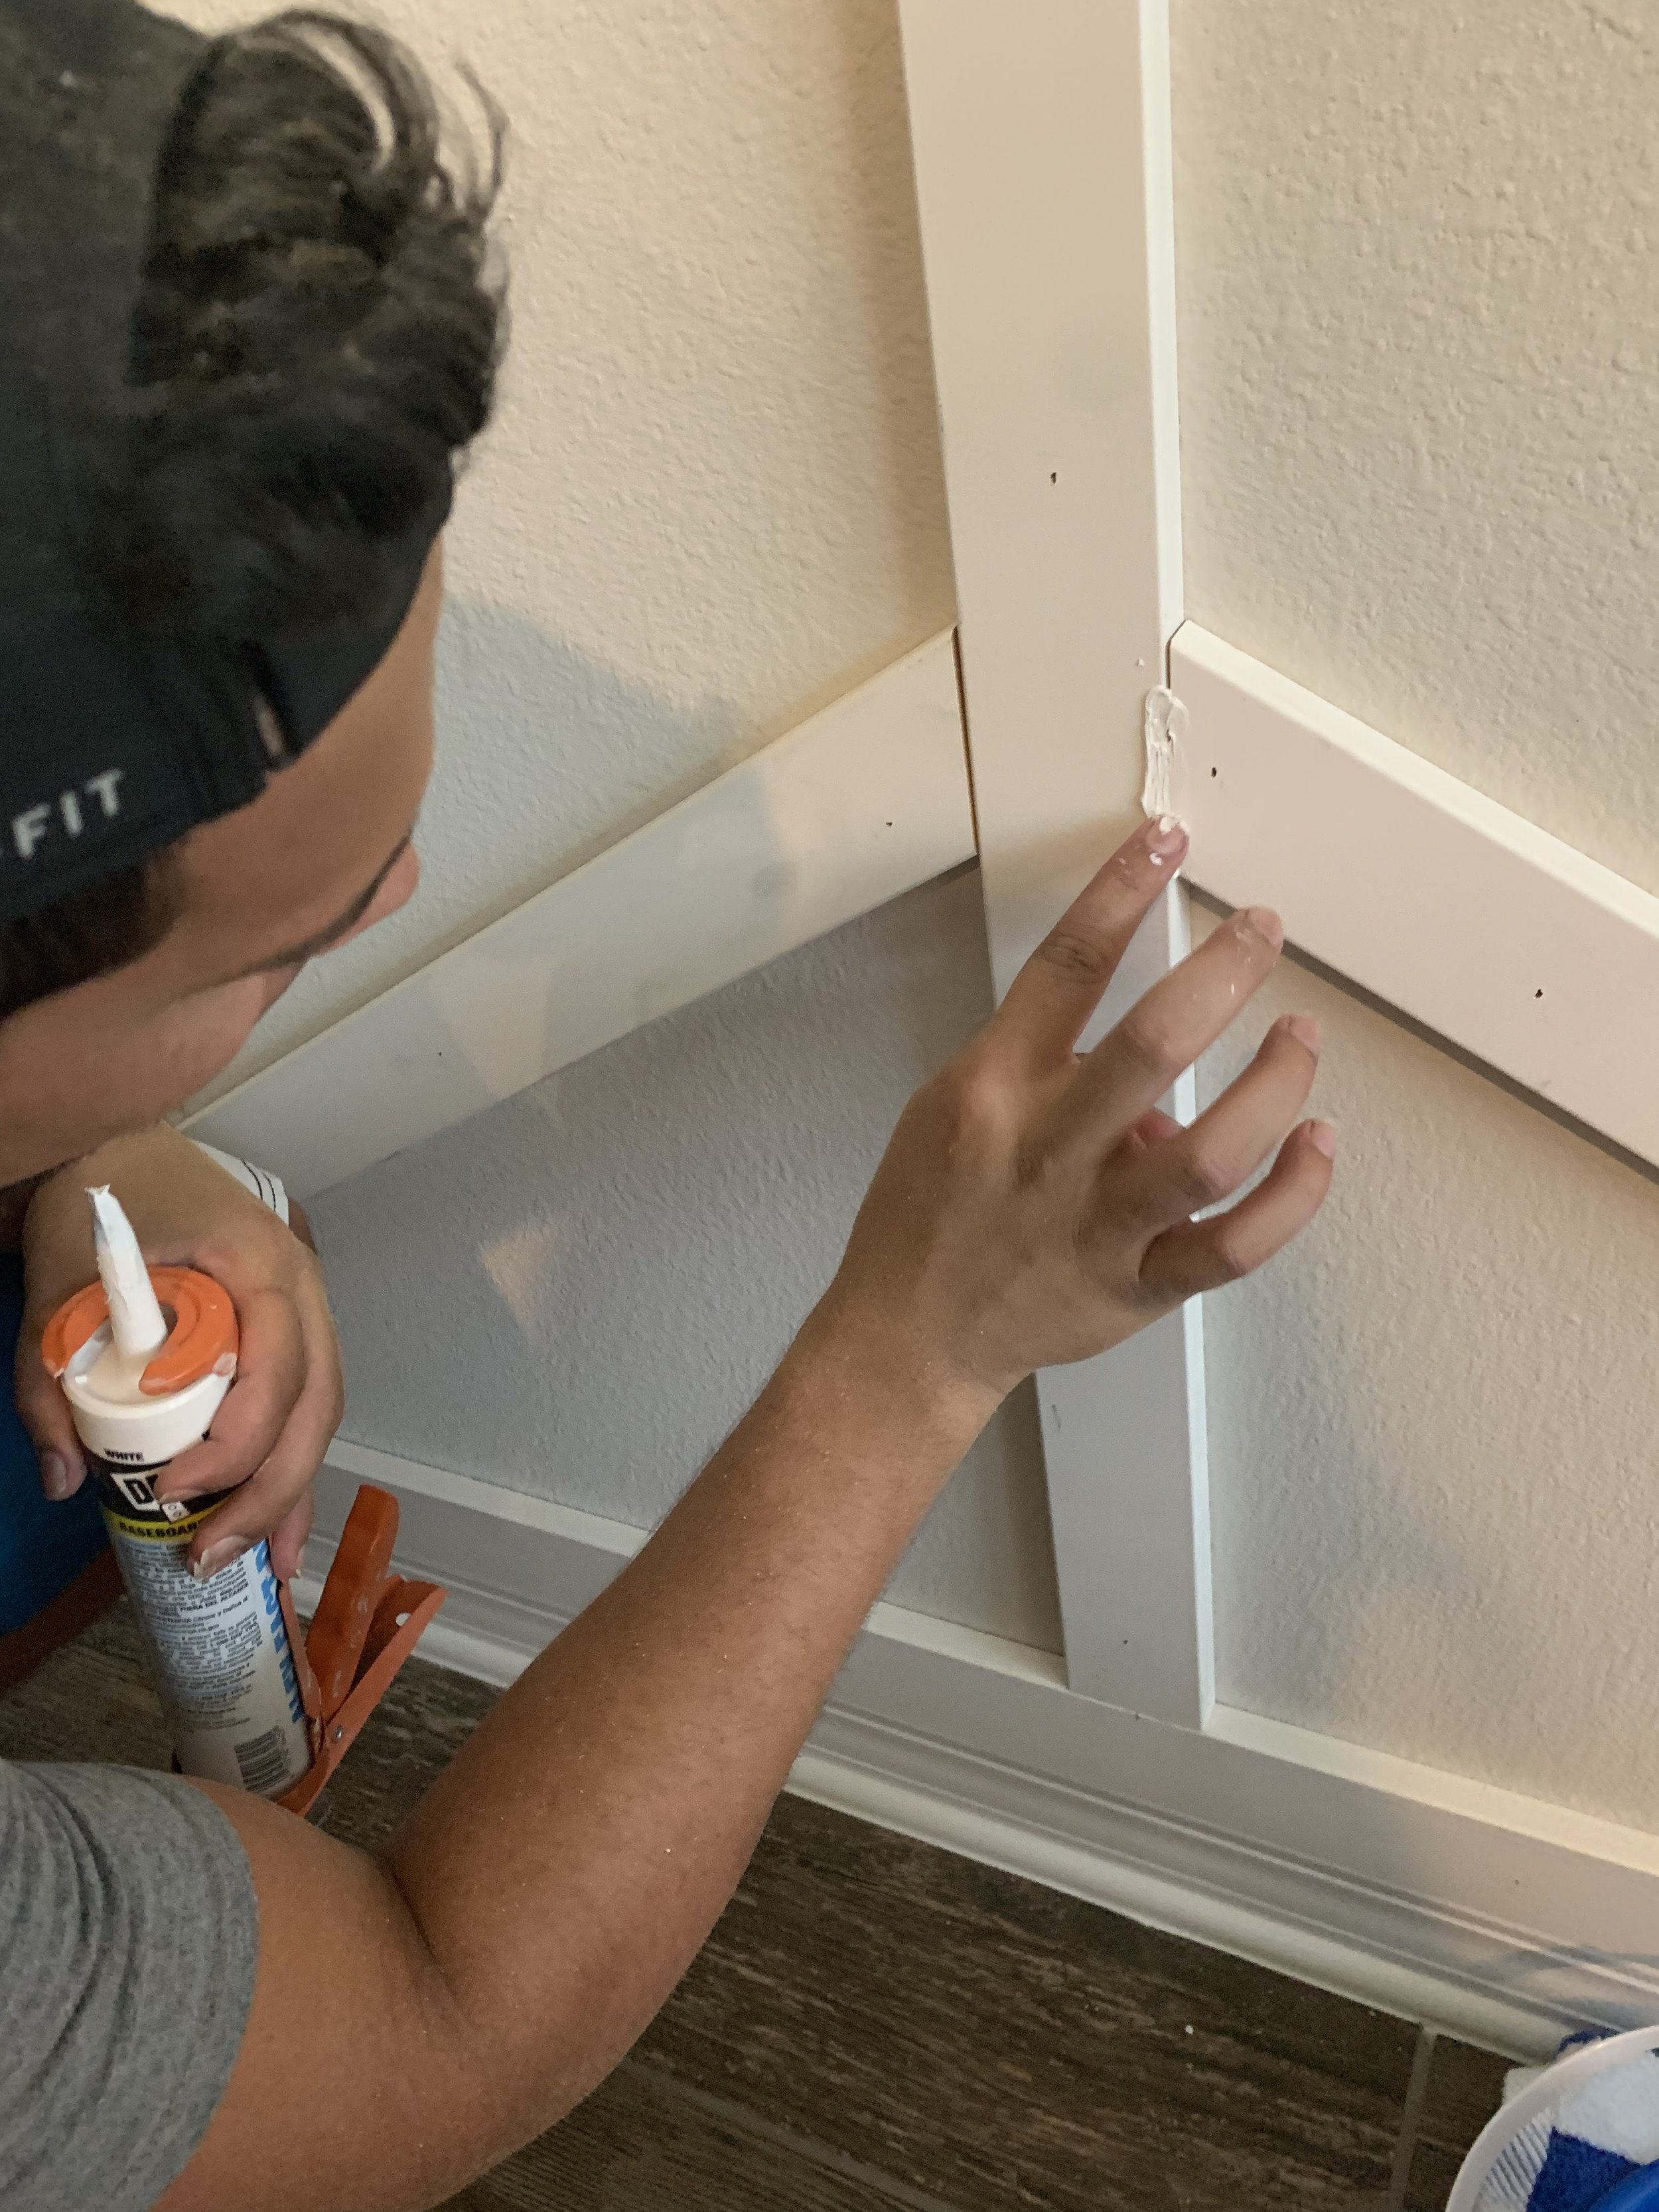
Very professional using our fingers to caulk and spackle. But hey, it works!
Step 9: Once you have all nail holes and seams filled, allow enough time for the spackle to dry before you sand. By the time we were done filling, the first nail holes we filled were already dry. This is where it gets messy. Take a low-medium sanding block and start sanding, sanding, away! You want to sand off all the spackle so the boards are nice and smooth so the paint will apply nicely. This is the messy part, so after you’re done sanding take a vacuum and a tack cloth (or in our case a semi damp rag) and clean up and wipe away as much dust as you can. We wipe down every board and every little nook and cranny- you don’t want to find any leftover dust while painting!
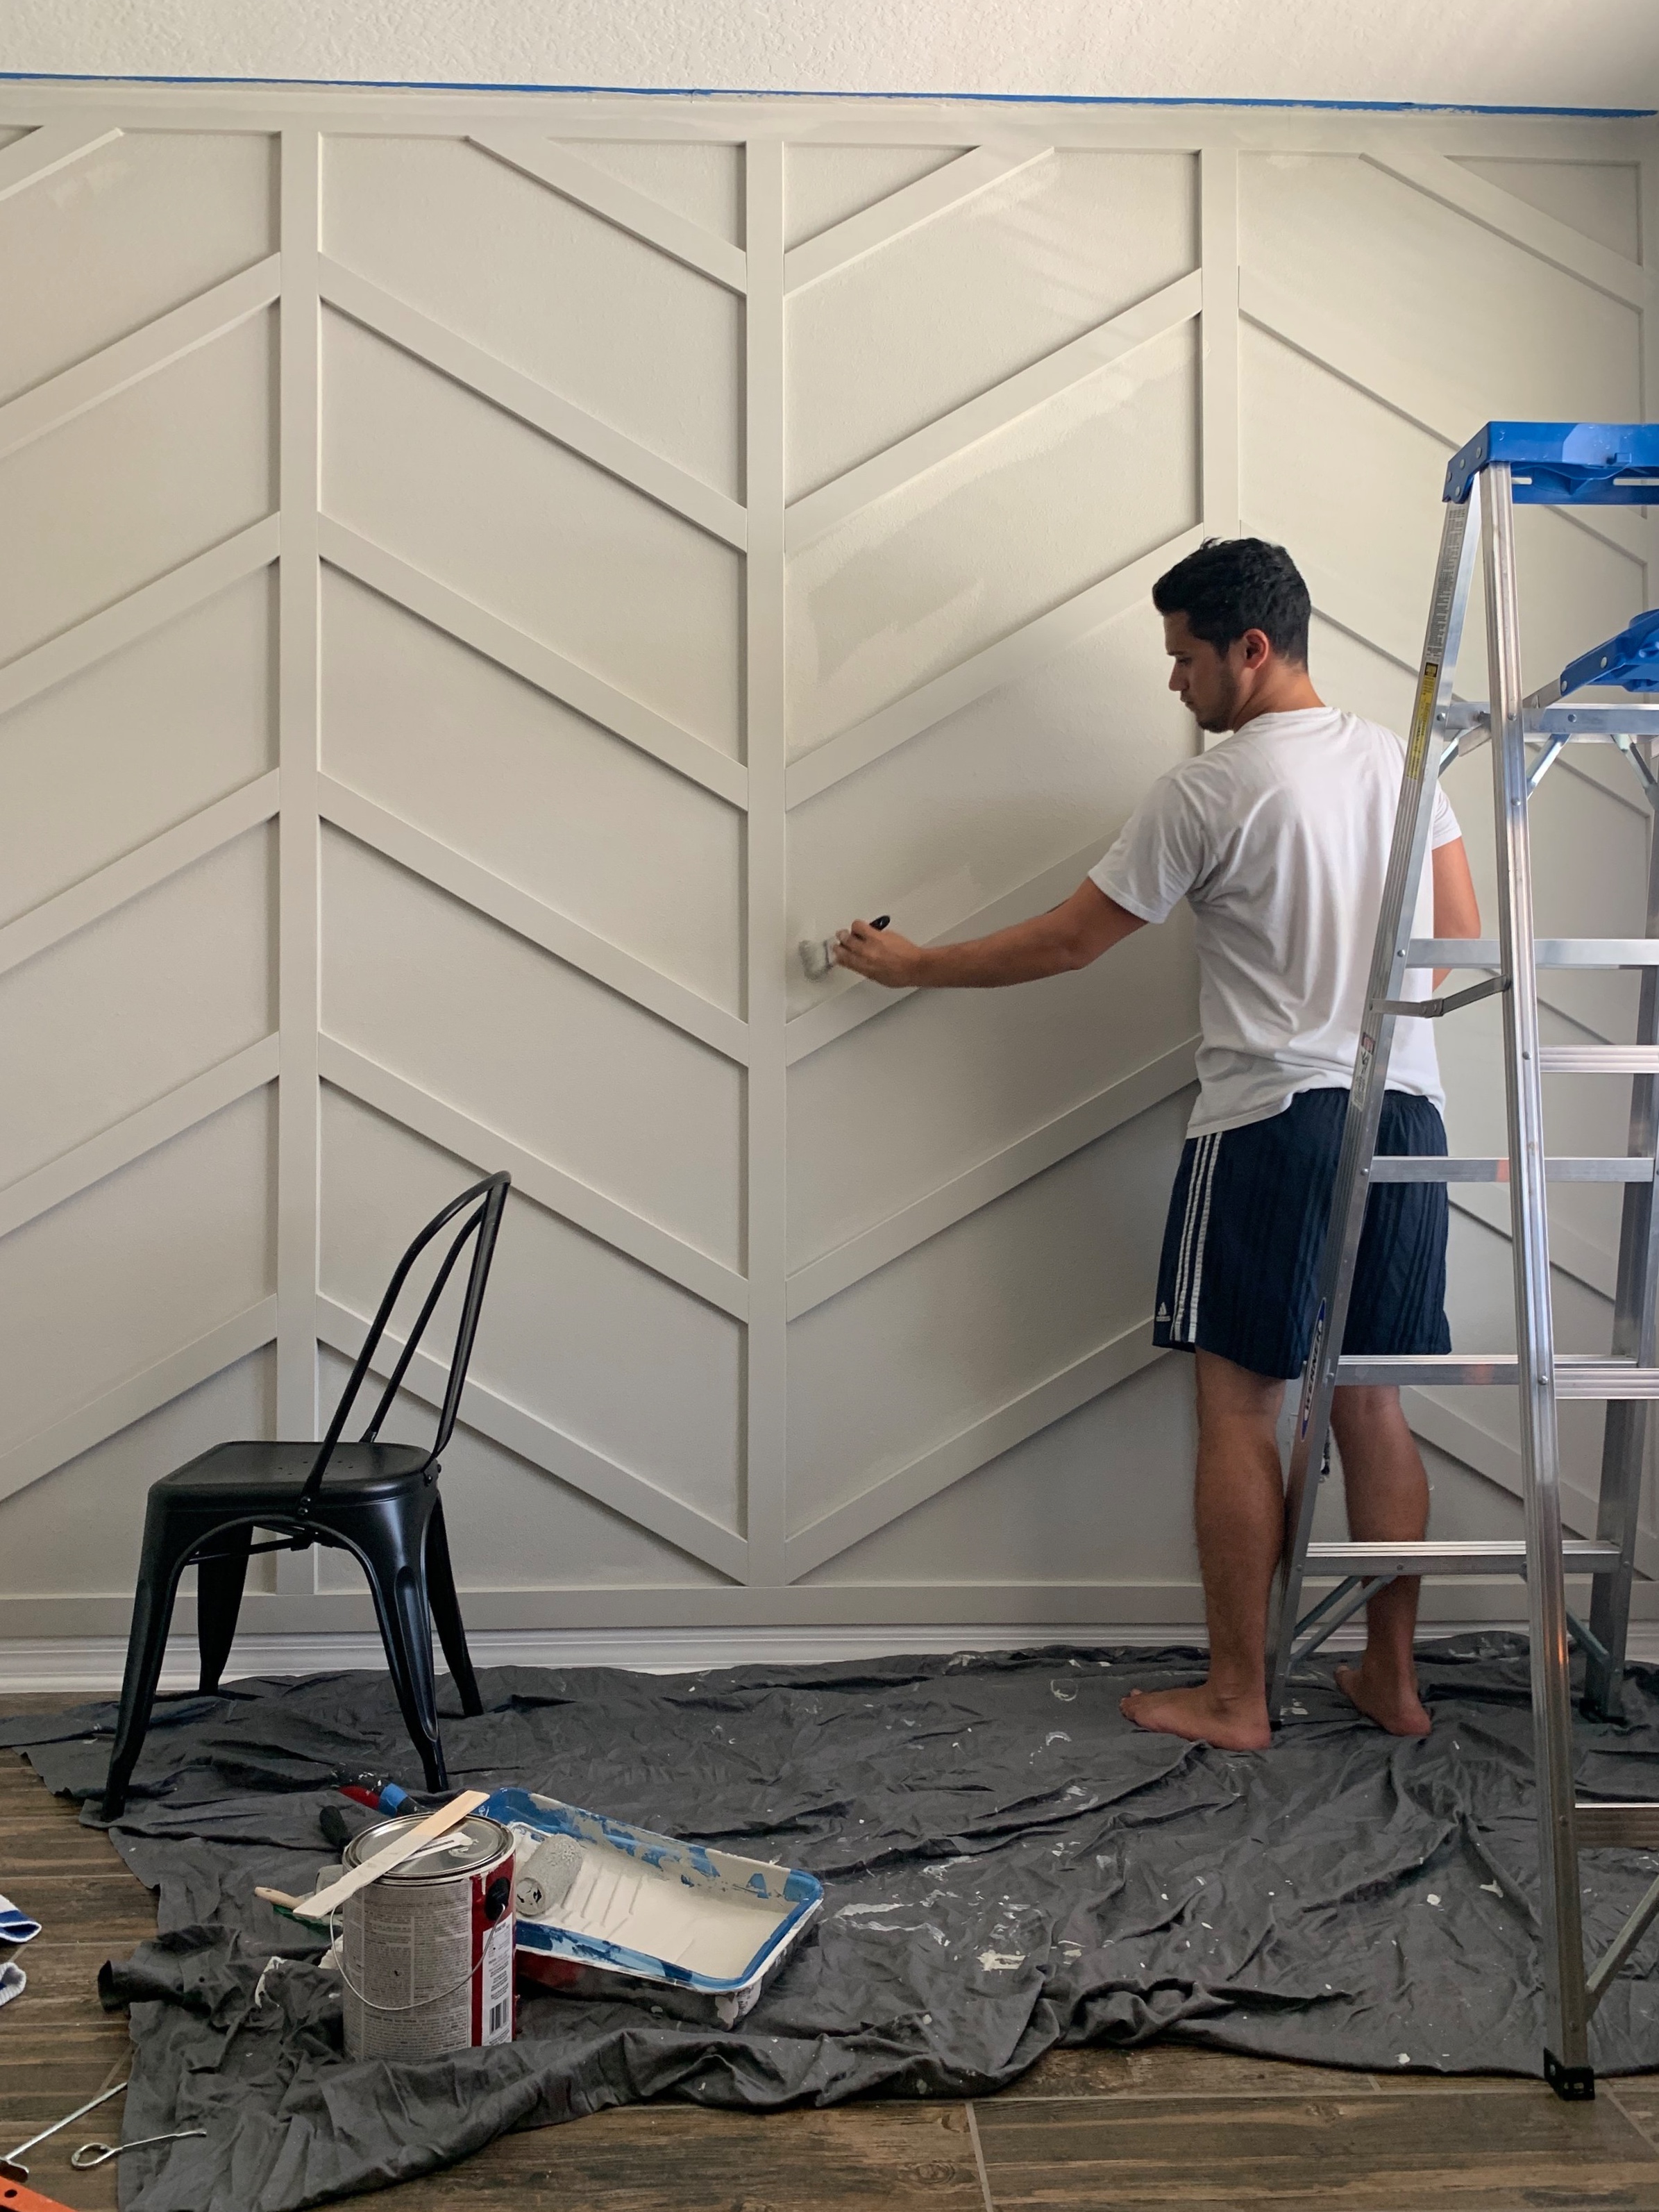
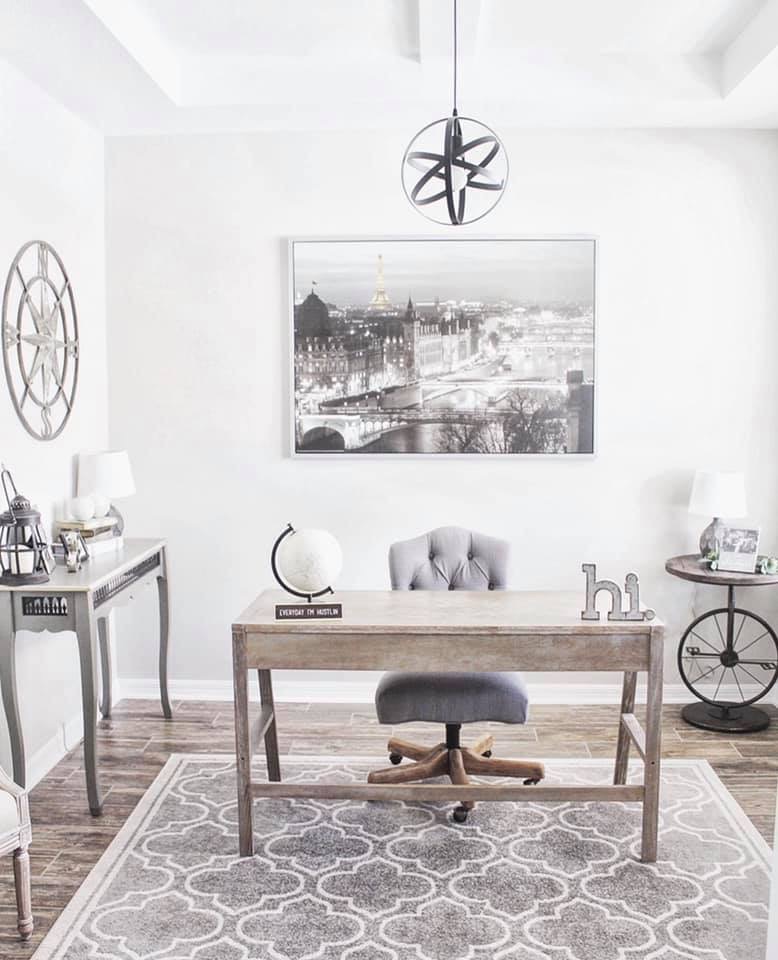
The paint we used here is the same as the rest of our home, Sherwin Williams Agreeable Gray in a flat finish.
Step 10: Now time to paint. Make sure you lay down a drop cloth on the floors so you don’t drip paint. Also, take your painters tape and tape off the ceiling and walls so you don’t mess those up. This part wasn’t super important for us, because we were using the same color as our other walls, but we still did it because they were different cans, and it turns out our new can was just a smidge darker than the walls-paint does fade over time so this could be why. We used a roller for the most part, but also a trim brush to get into all the little corners and edges of the boards. We only did one coat of paint.
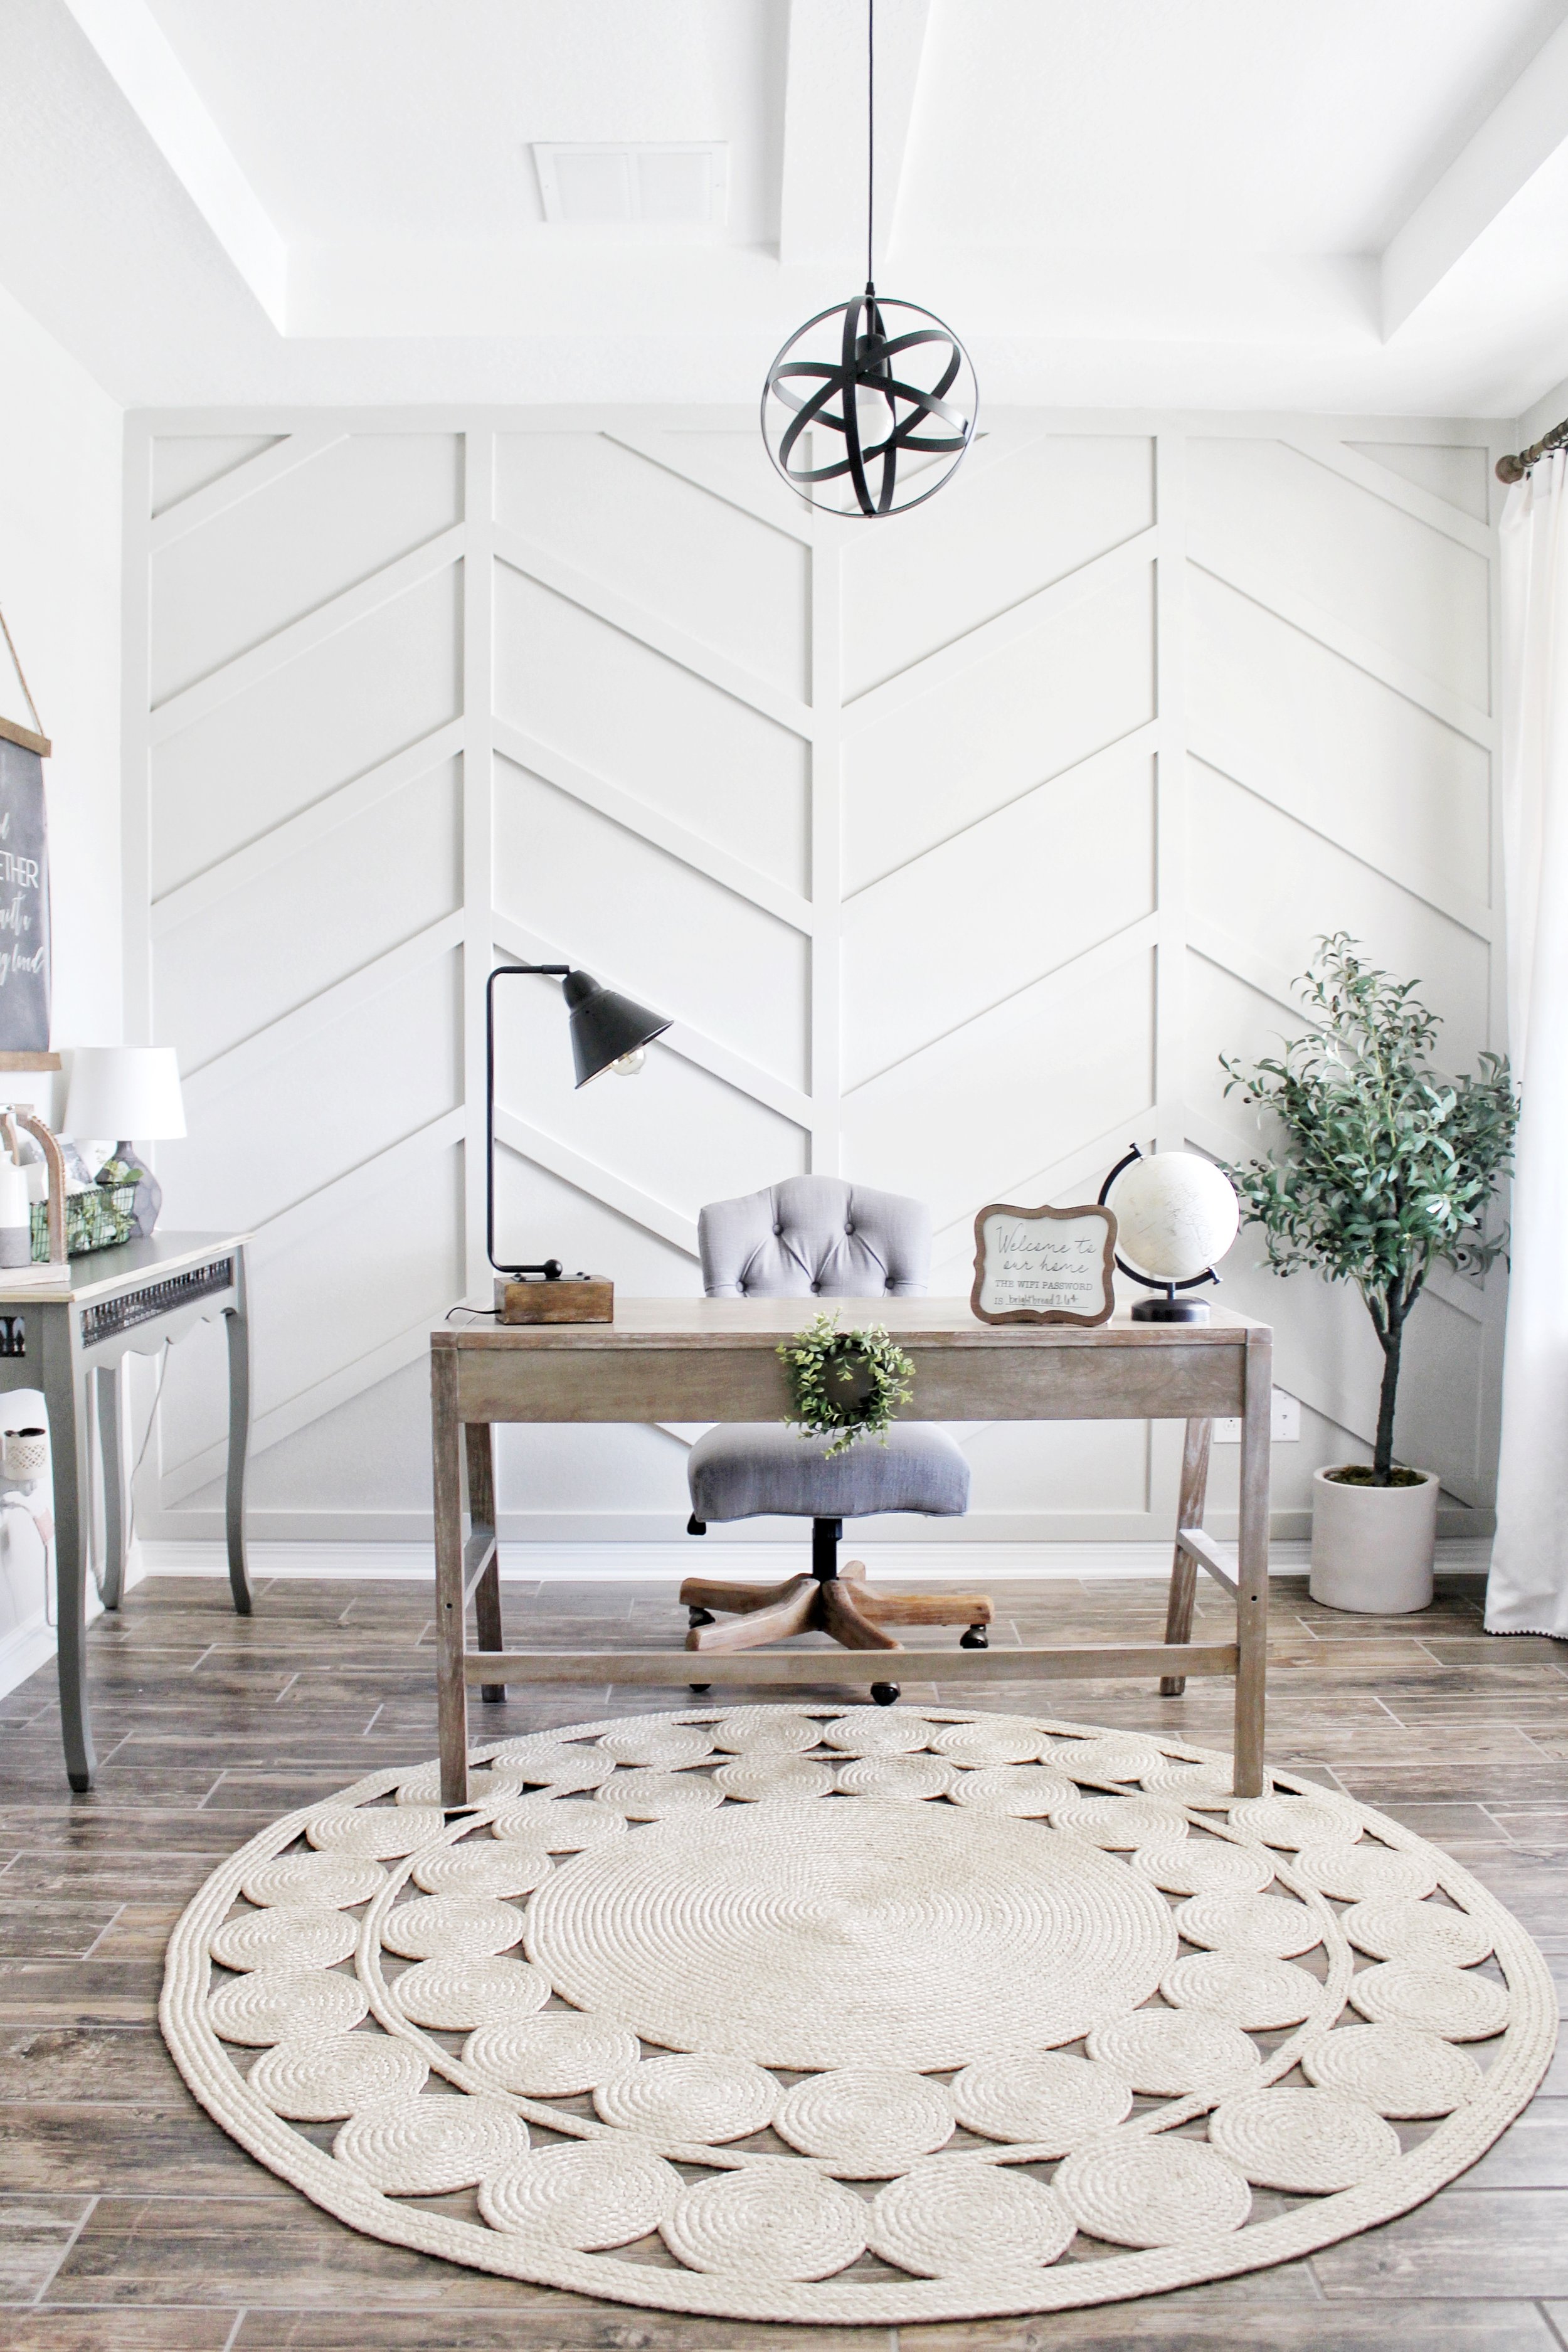

And there you have it, you’re all done! For us, it ended up being a lot easier than we thought, and a lot easier than some other projects we have done. If you want to see us do this wall step by step, go watch our saved highlight titled “Herringbone Accent Wall” on our Instagram, @newbuild_newlyweds! Hopefully this is helpful to you guys, its my first real blog post so any feedback is appreciated!

Leave a Reply
Grab our FREE download
Wanna know the 5 must have tools you need before you start?
Considering a DIY Project?


Love this- can I ask how tall the ceiling is – is it 9 ft? and how wide is this wall side to side?
Looking forward to doing the same on my wall. How long is your wall and how tall is the ceiling?
Your end product looks amazing! Great job! You said the paint on the accent wall is the same as the rest of the walls in your house. Are they all Agreeable Gray? The paint in the office (other than the accent wall) looks like white in the picture.
Sweet !! … step to step process listed. Love the color combo and the space you have created ! We plan to do this on our dining room wall. Thanks for the tips, hope we can get this accomplished,