


Jeffrey Court All Star Challenge: Its Crunch Time!
This is it, week 5!
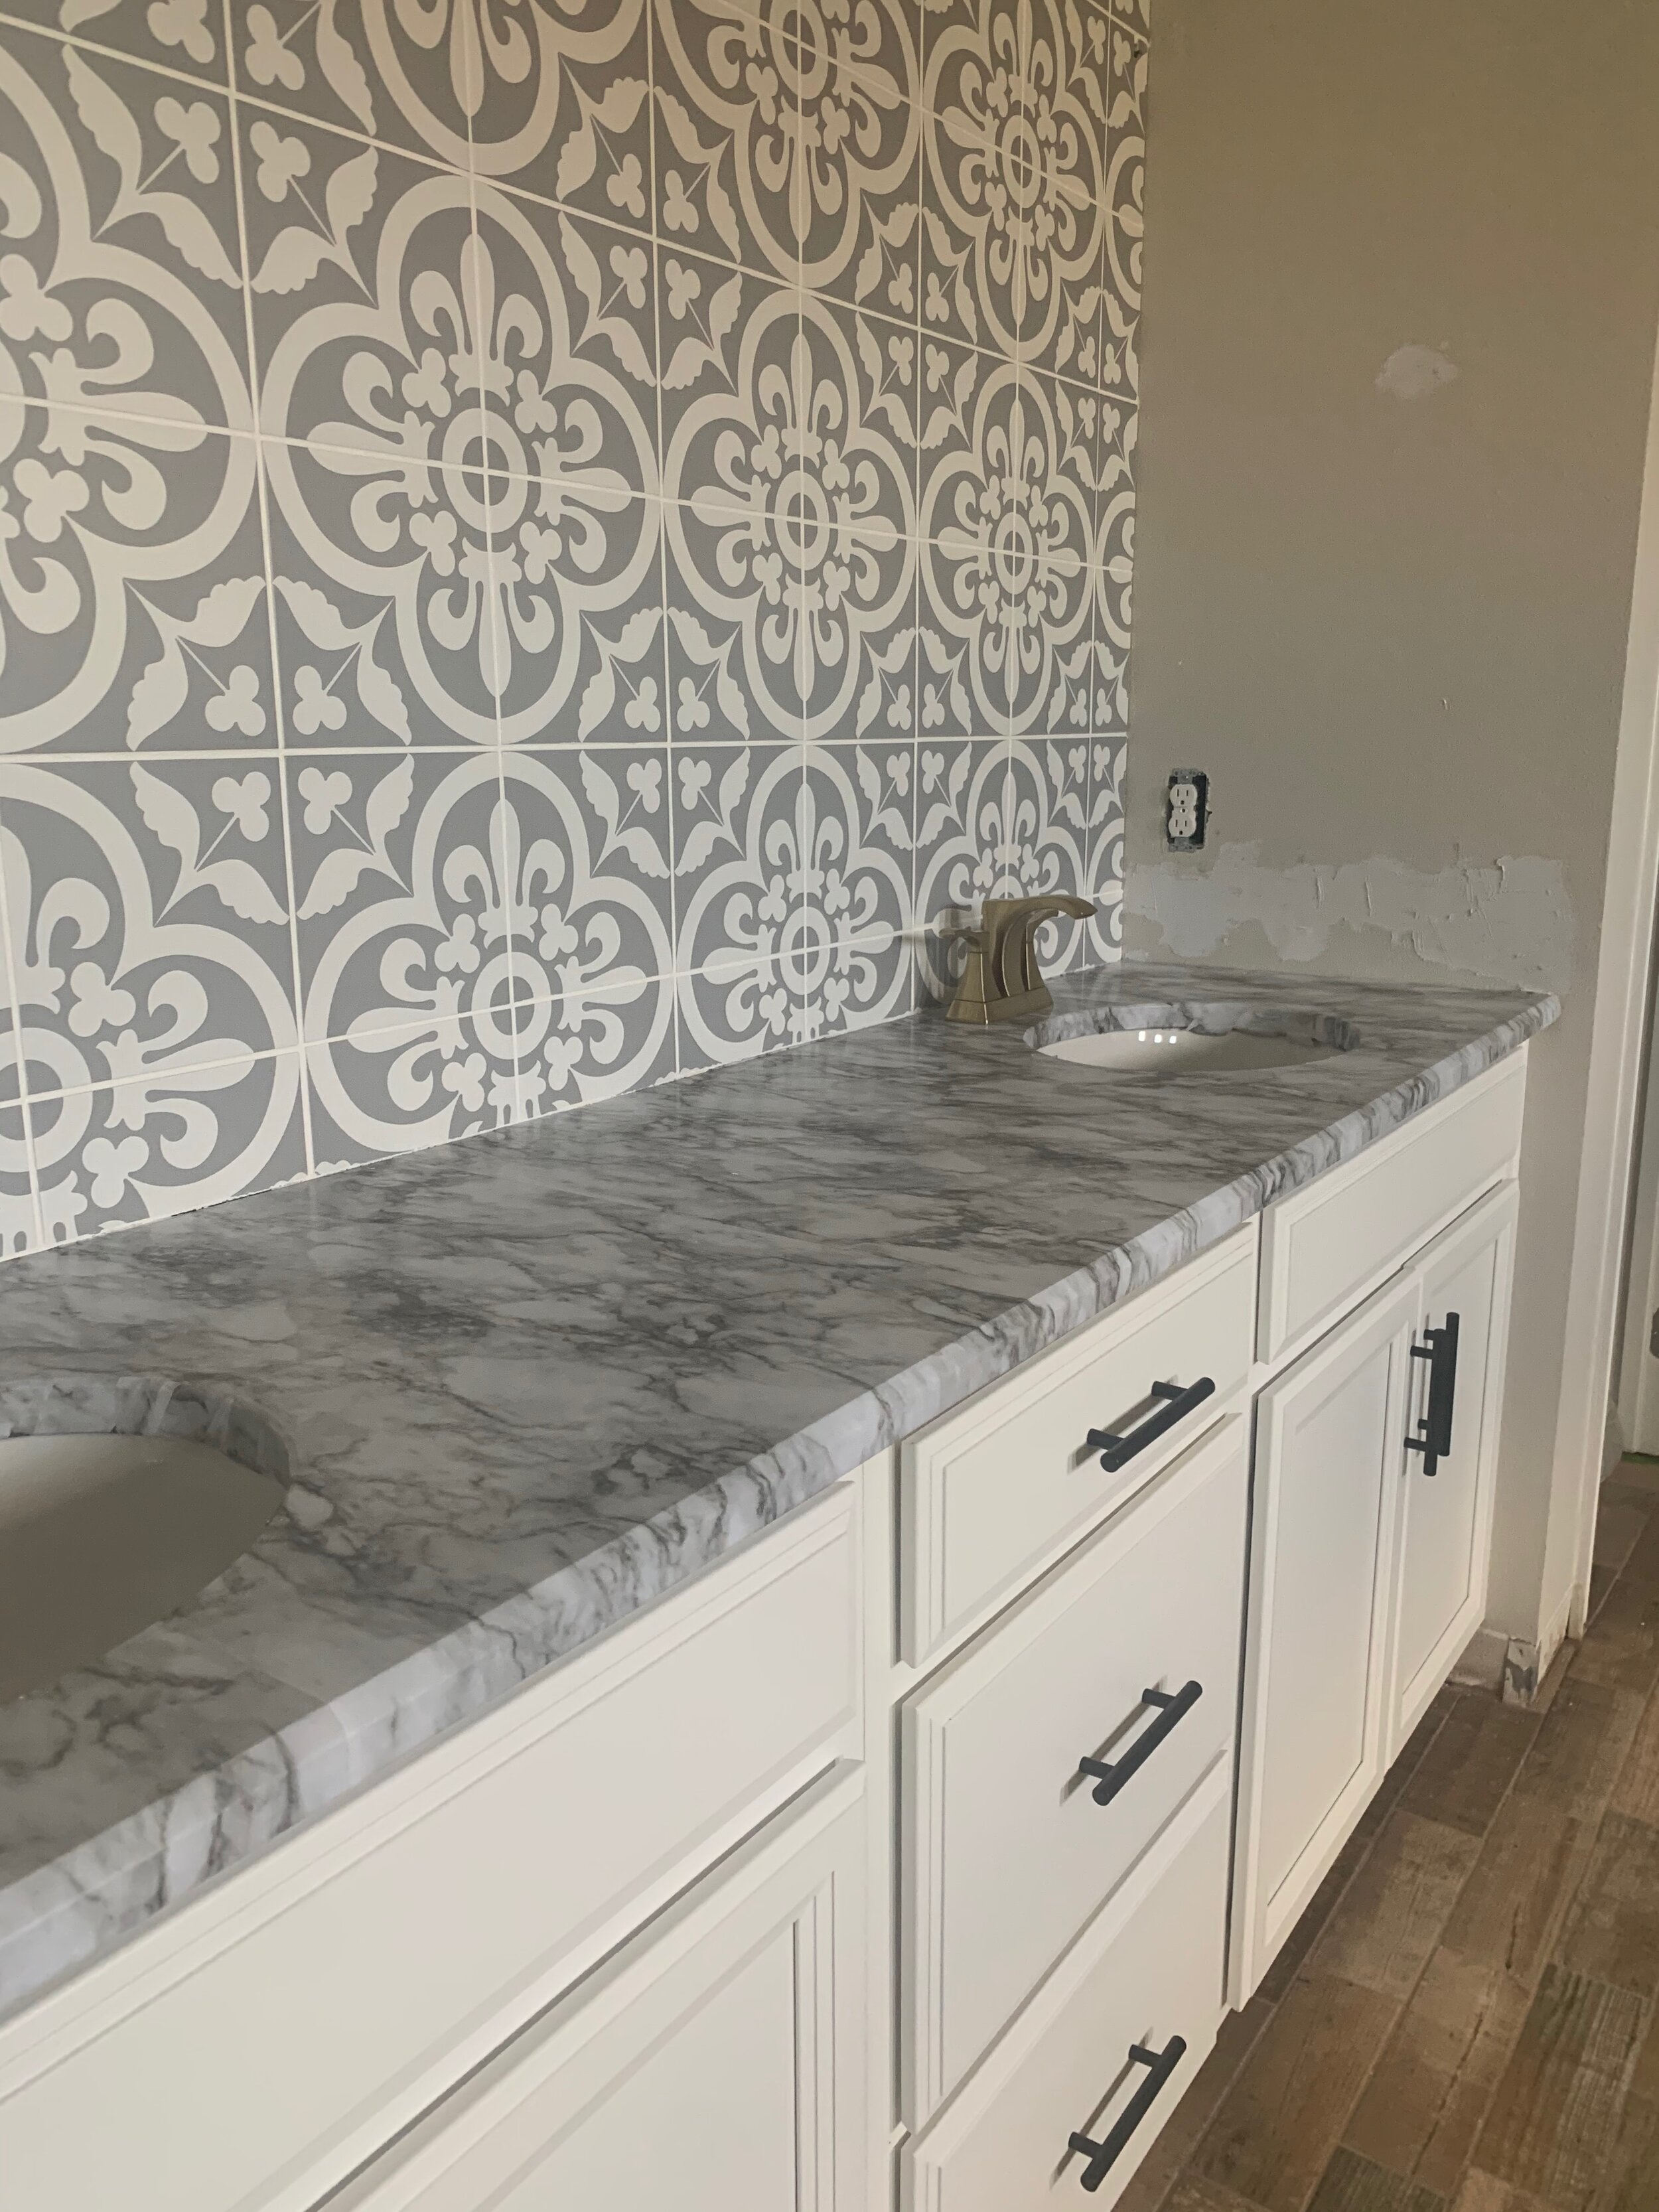
Welcome back to week 5 of the Jeffrey Court All Star Renovation challenged sponsored by BEHR and FrogTape! This week was full of some ups and downs, so let me just get right into it. Remember how I used that countertop adhesive last week? Well I decided I didn’t like, it was too busy-so I ordered one that was more white and had less of the marble veining in it. We just need to install it once it comes, which will be beginning of next week. See the picture below for what I mean, I just felt it was too gray and too much of a pattern up against the wall tile, so off it came!
For the Jeffrey Court All Star Challenge we have partnered with Frog Tape and BEHR paint, two amazing companies! They sent us some awesome products, and we really put them to good use this week! More on those products in a second! Since it was time to paint all of the walls, I needed to patch all the holes and damage, and retexture the walls. For our last renovation I found a couple really awesome products to help with that, so I used the same ones again! I found this awesome patch + primer putty by 3M and this orange peel texture spray- both on Amazon! Both were so easy to use and you honestly cannot tell there was any damage on the walls before. I put the putty on last week so I just sanded and textured this week. Look at the picture below to see how great both products made the walls look!

FrogTape
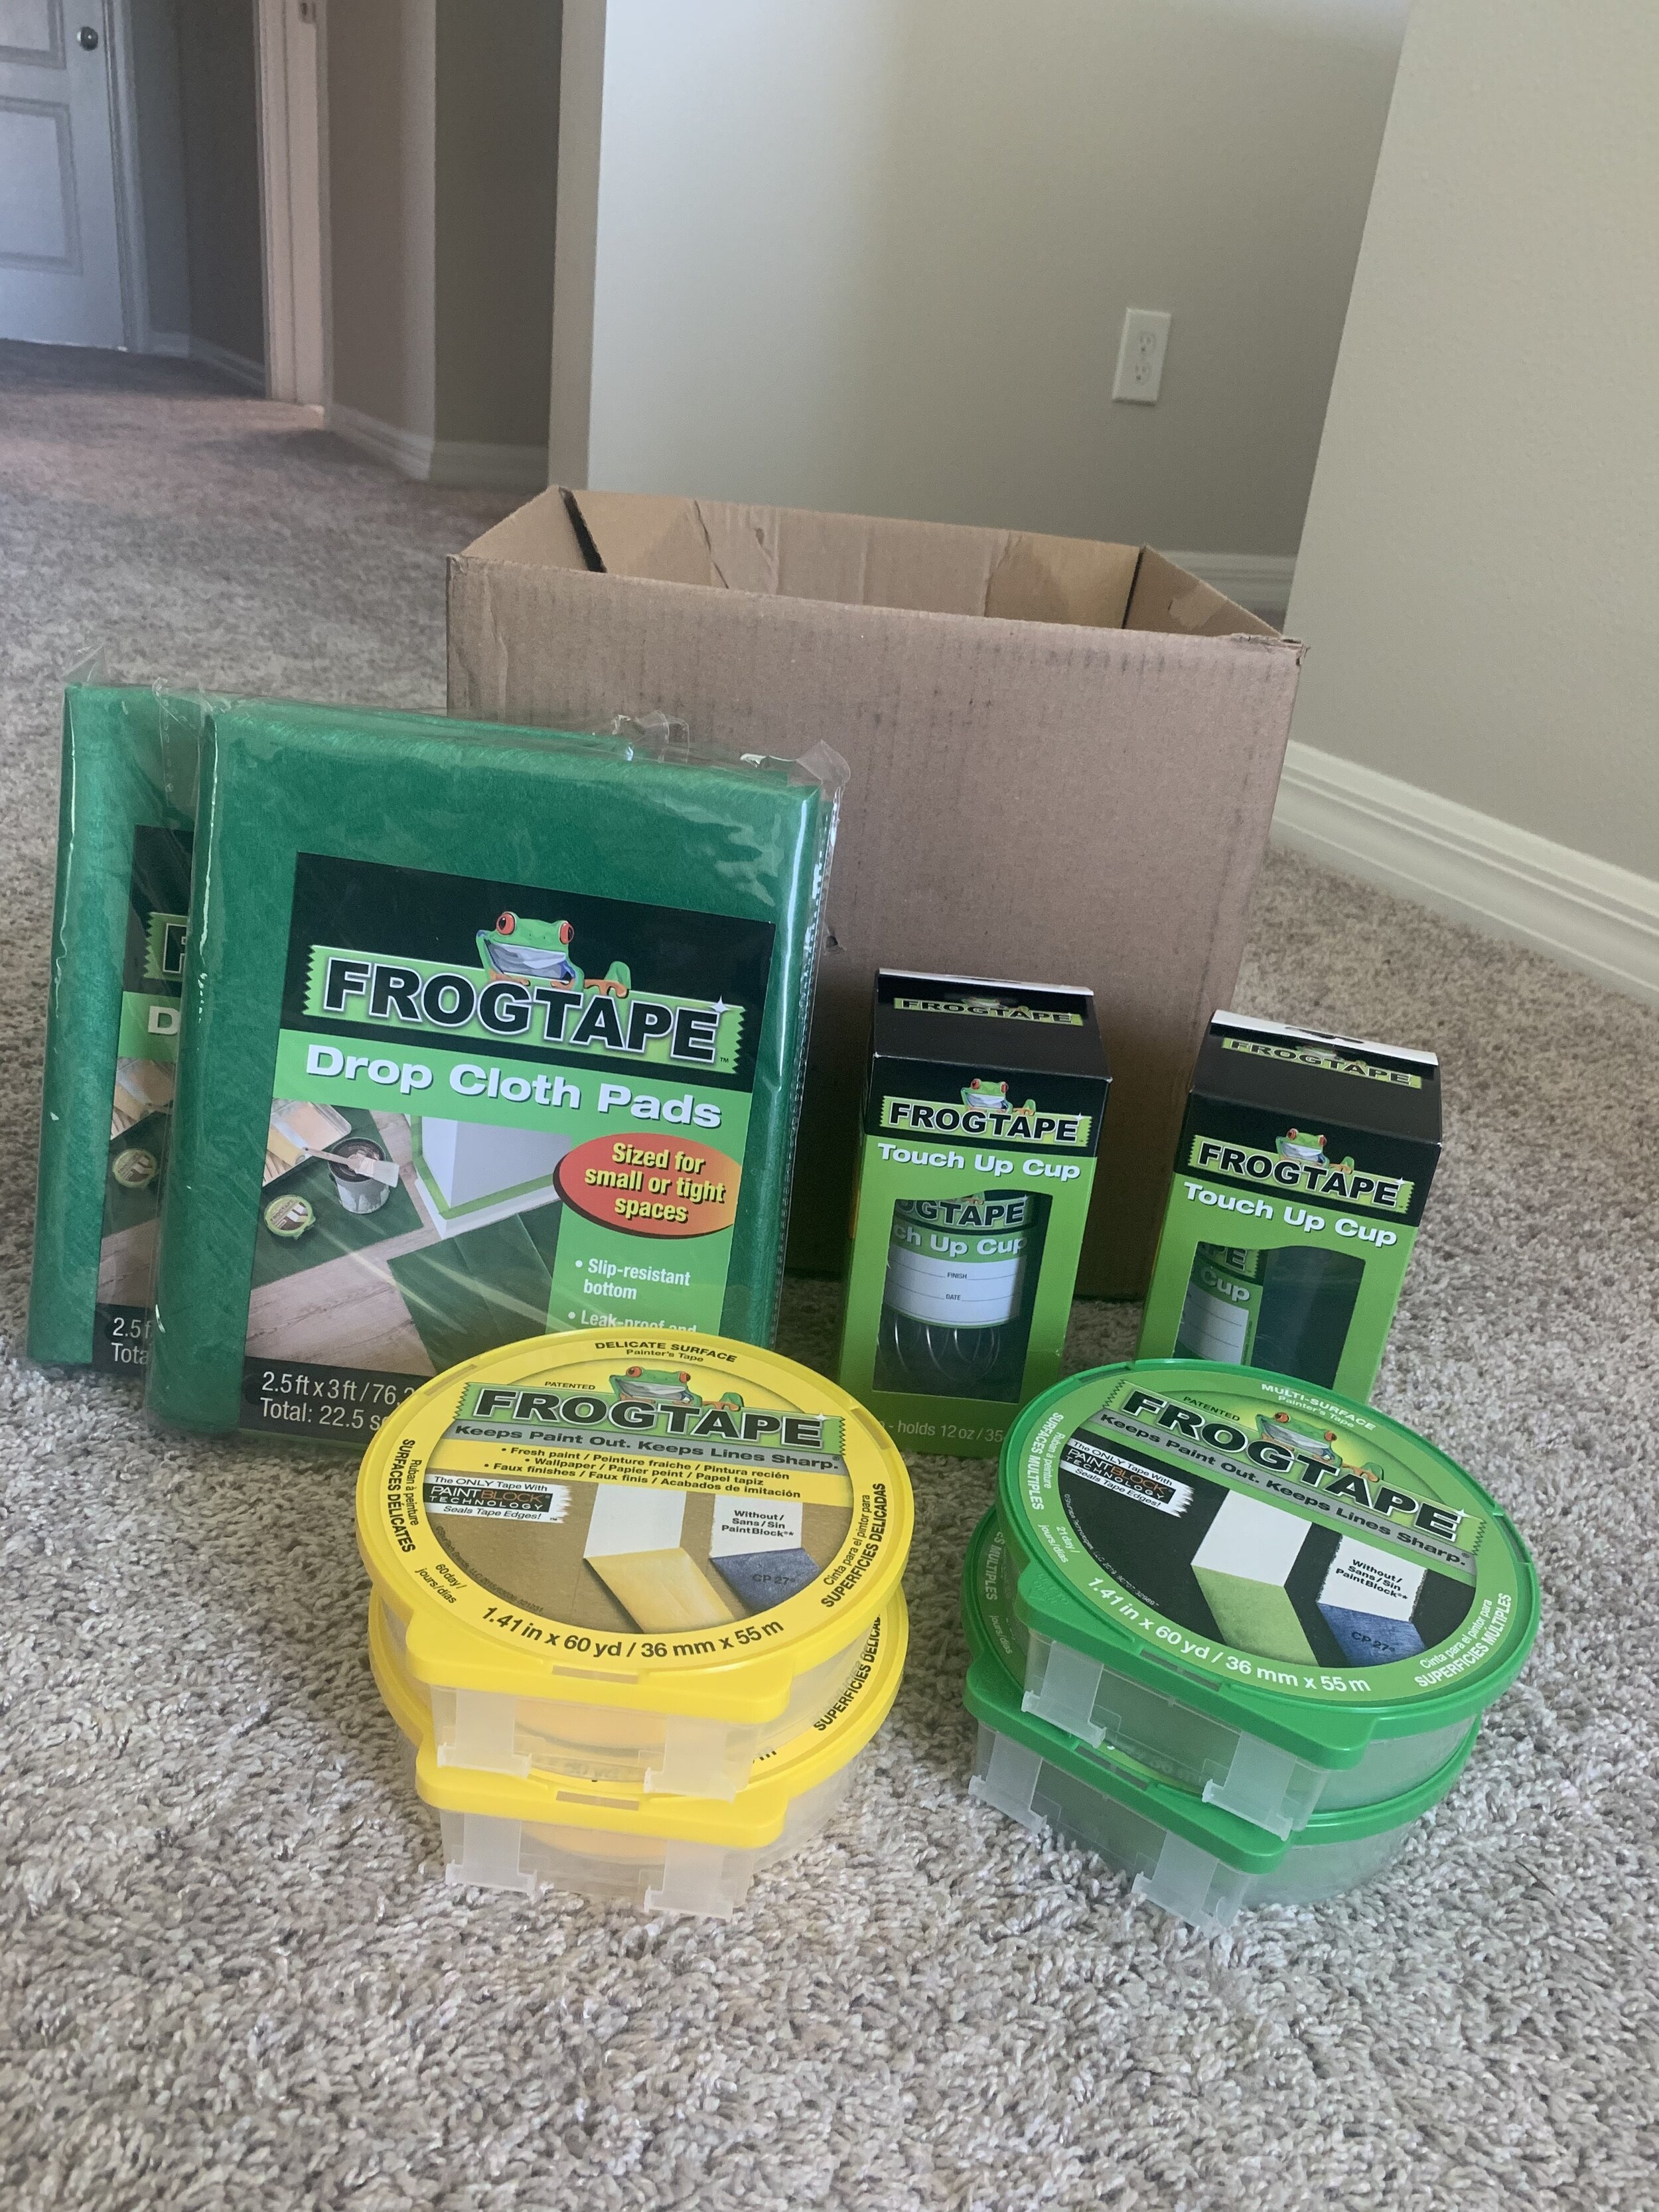
Like I said before, FrogTape is sponsoring the All Star Challenge, so we got a box of some goodies to use! This included two touch of paint cups, two rolls of their green tape, two rolls of their yellow delicate surface tape and six of their drop cloth pads-which are AWESOME! In the last year we have switched over to using FrogTape for all of our paint projects, just because it gives you much crisper lines and a clean finish compared to the standard blue tape, so we were so excited to partner with them for this project! Before we painted I put their green tape to good use and taped off all the ceilings, door trims, and tile. I also put down their drop cloth pads which are LIFE. CHANGING. The leak-proof material protects the floors below, while the slip-resistant bottom holds the pad in place, helping to provide a safer surface for standing and working. The drop cloth pads are also a great spot to place your paint or other supplies and can be easily moved around any room, and are specifically great for small spaces- like our toilet room!
BEHR
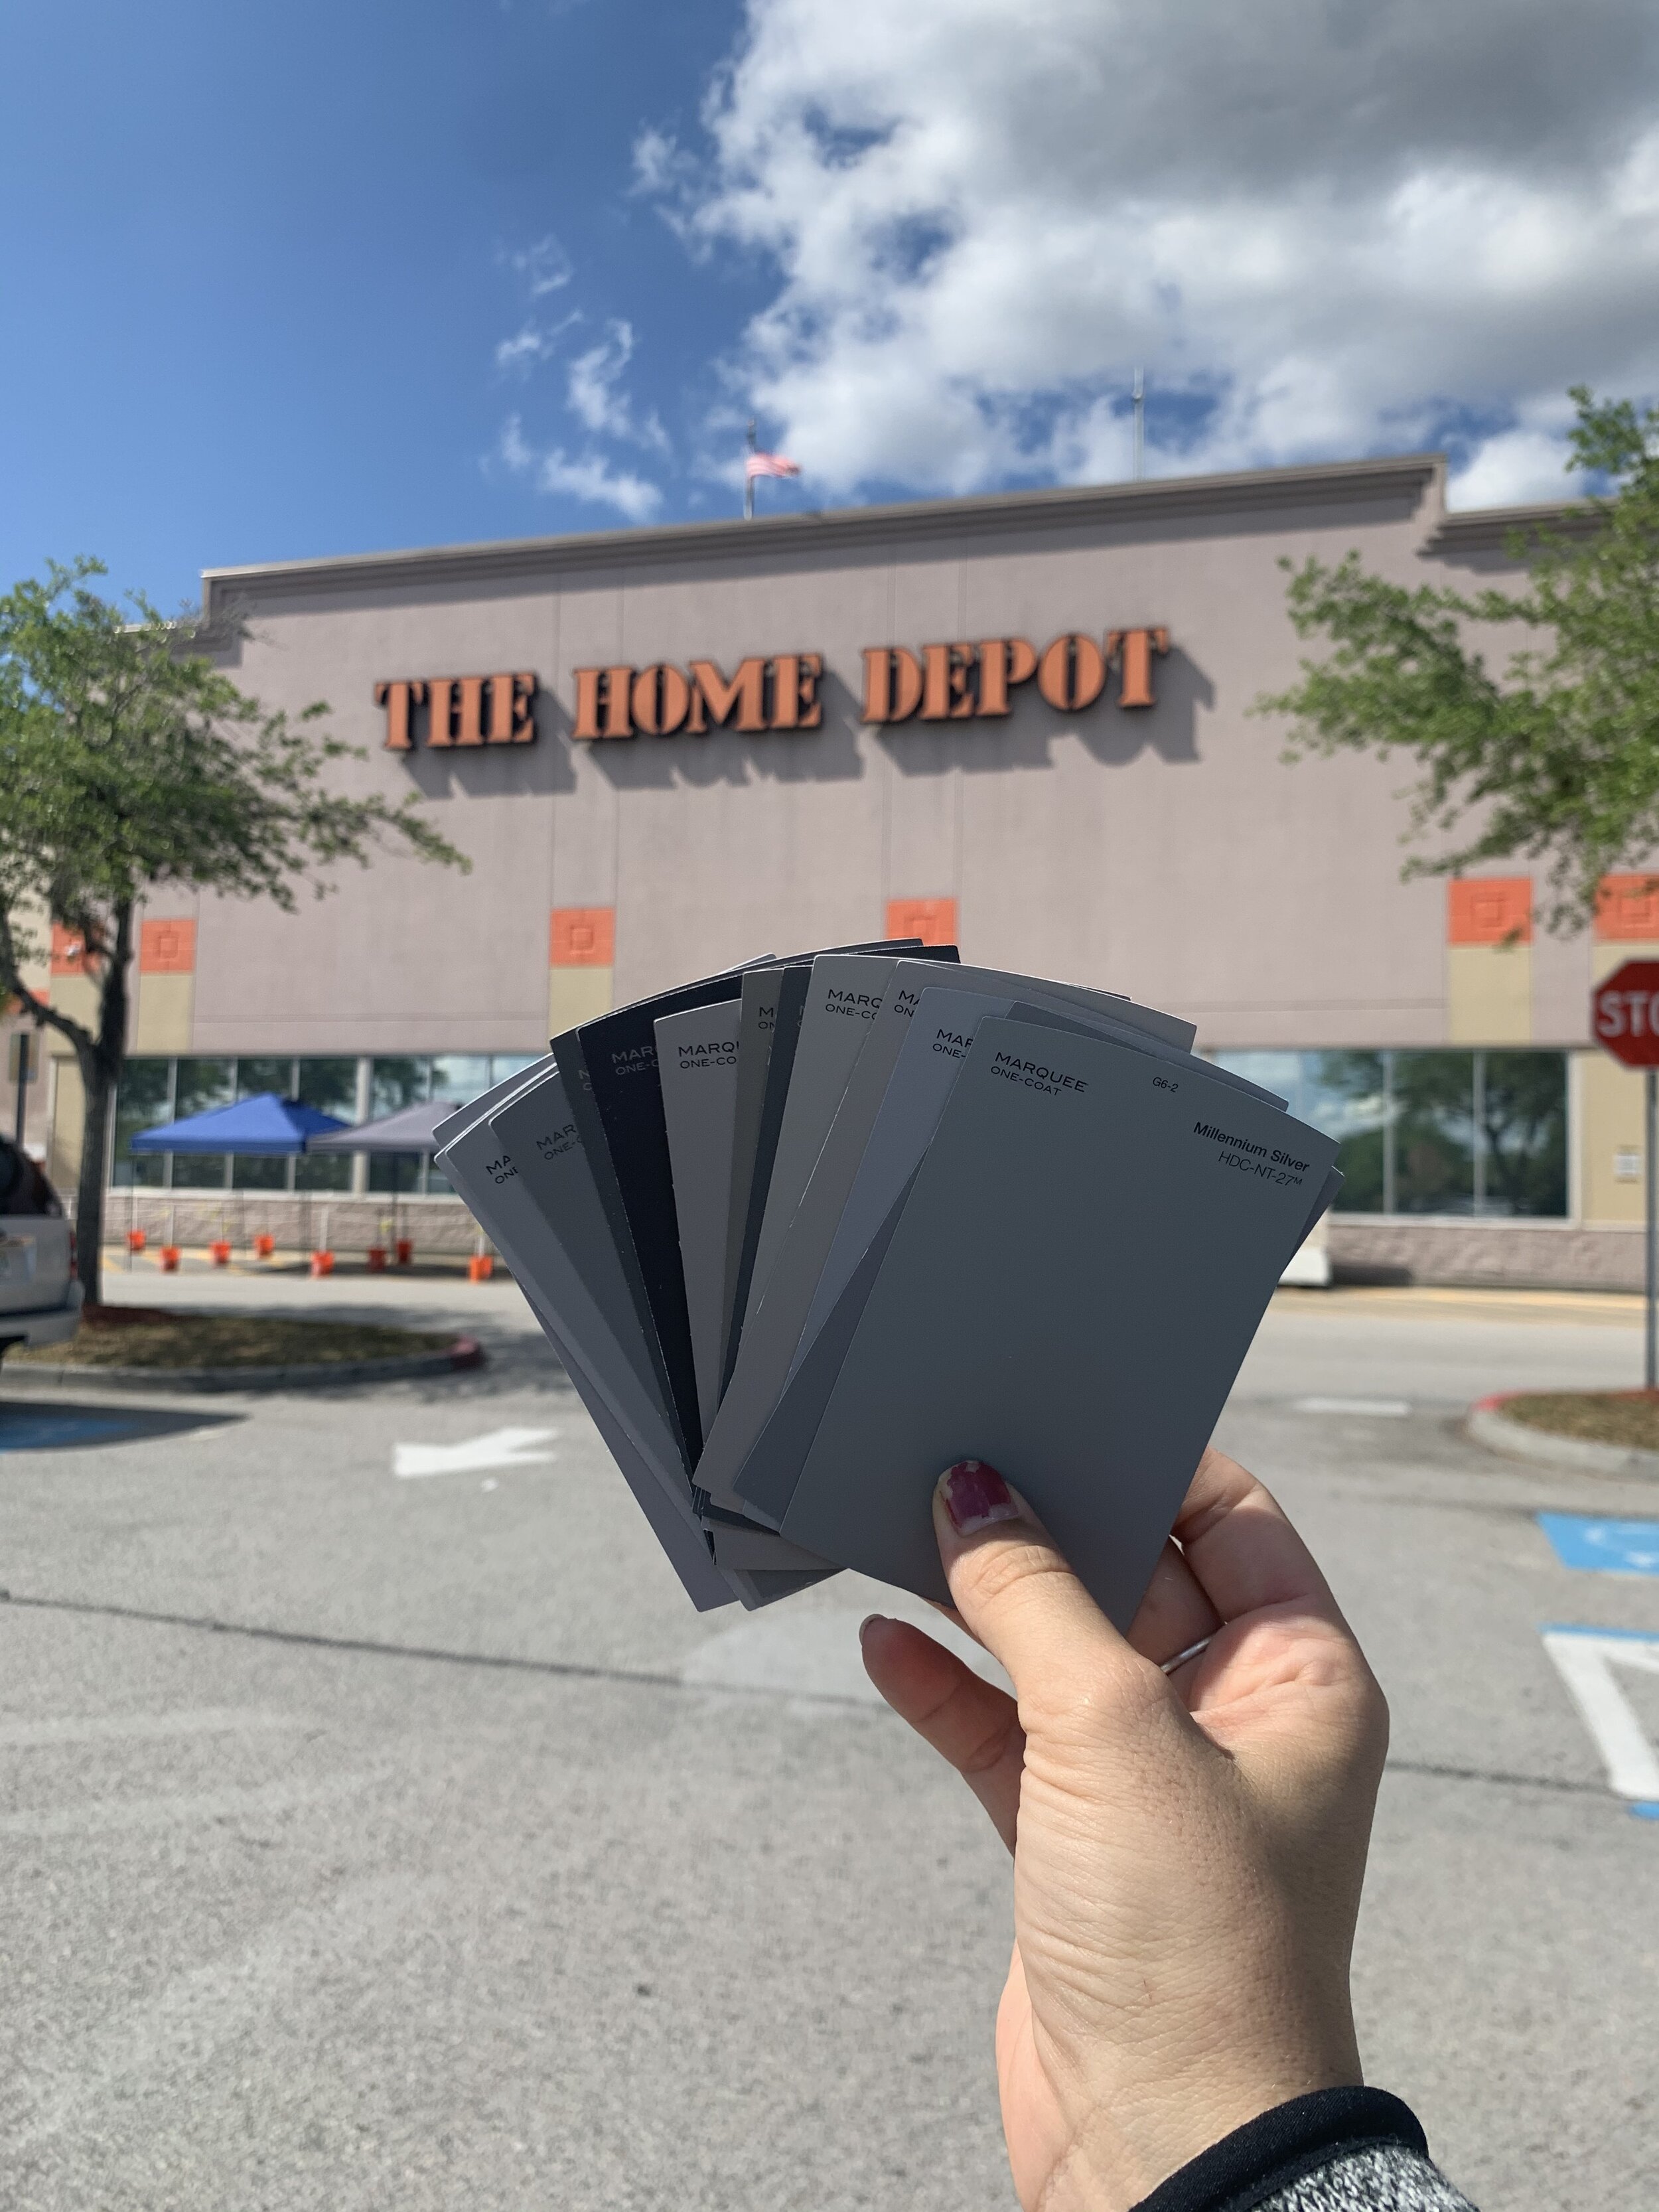
The All Star Challenge is also sponsored by BEHR, which is perfect for us because we LOVE their paint! But, did you know Kilz primer and BEHR paint go hand in hand? Me either until now! We decided to paint the entire bathroom and give it some fresh paint, and I’m so glad we did! All of their paint swatches are available on their website and they make it so easy to view the colors and compare them, its really an awesome feature! We did decide to head to our local Home Depot though to get a better look at their colors, and I swear we picked up at least 100 paint swatches, they have so many awesome colors! You know we like to keep things neutral so we were looking at their different white options for the walls, and BOY did they have a lot. We were looking for a white color for the walls, but a medium gray color for the barn door we’re building, so we wanted to compare in person with our tile selections.
We ended up choosing the color Shoelace in an eggshell finish for the walls (we actually used this same color in our guest bedroom a few months ago!) and the color Great Graphite in a Satin finish for the barn door! We went with eggshell for the walls because our builder painted our walls in a flat finish, and we HATE it! You can see every little mark on the walls, if someone breaths on it-BOOM, theres a scuff mark. An eggshell enamel sheen has a soft, velvety appearance that resists dirt and grime as well as mildew- perfect for our bathroom! For the barn door we wanted to go with a sheen that wasn’t semi-gloss, but also not matte, so we chose a satin sheen which creates a pearl-like finish that’s durable and dirt-resistant. It will also resist moisture, fading and stains, it gives us a little more durability than eggshell paint which will be perfect for the door.
BERH offers different lines of paints and we chose their MARQUEE line for both colors because it has the most coverage, with only one coat, and is extremely durable and long lasting! The paint cans also have a new simple pour lid, which prevented the can from getting messy and us getting paint every where!
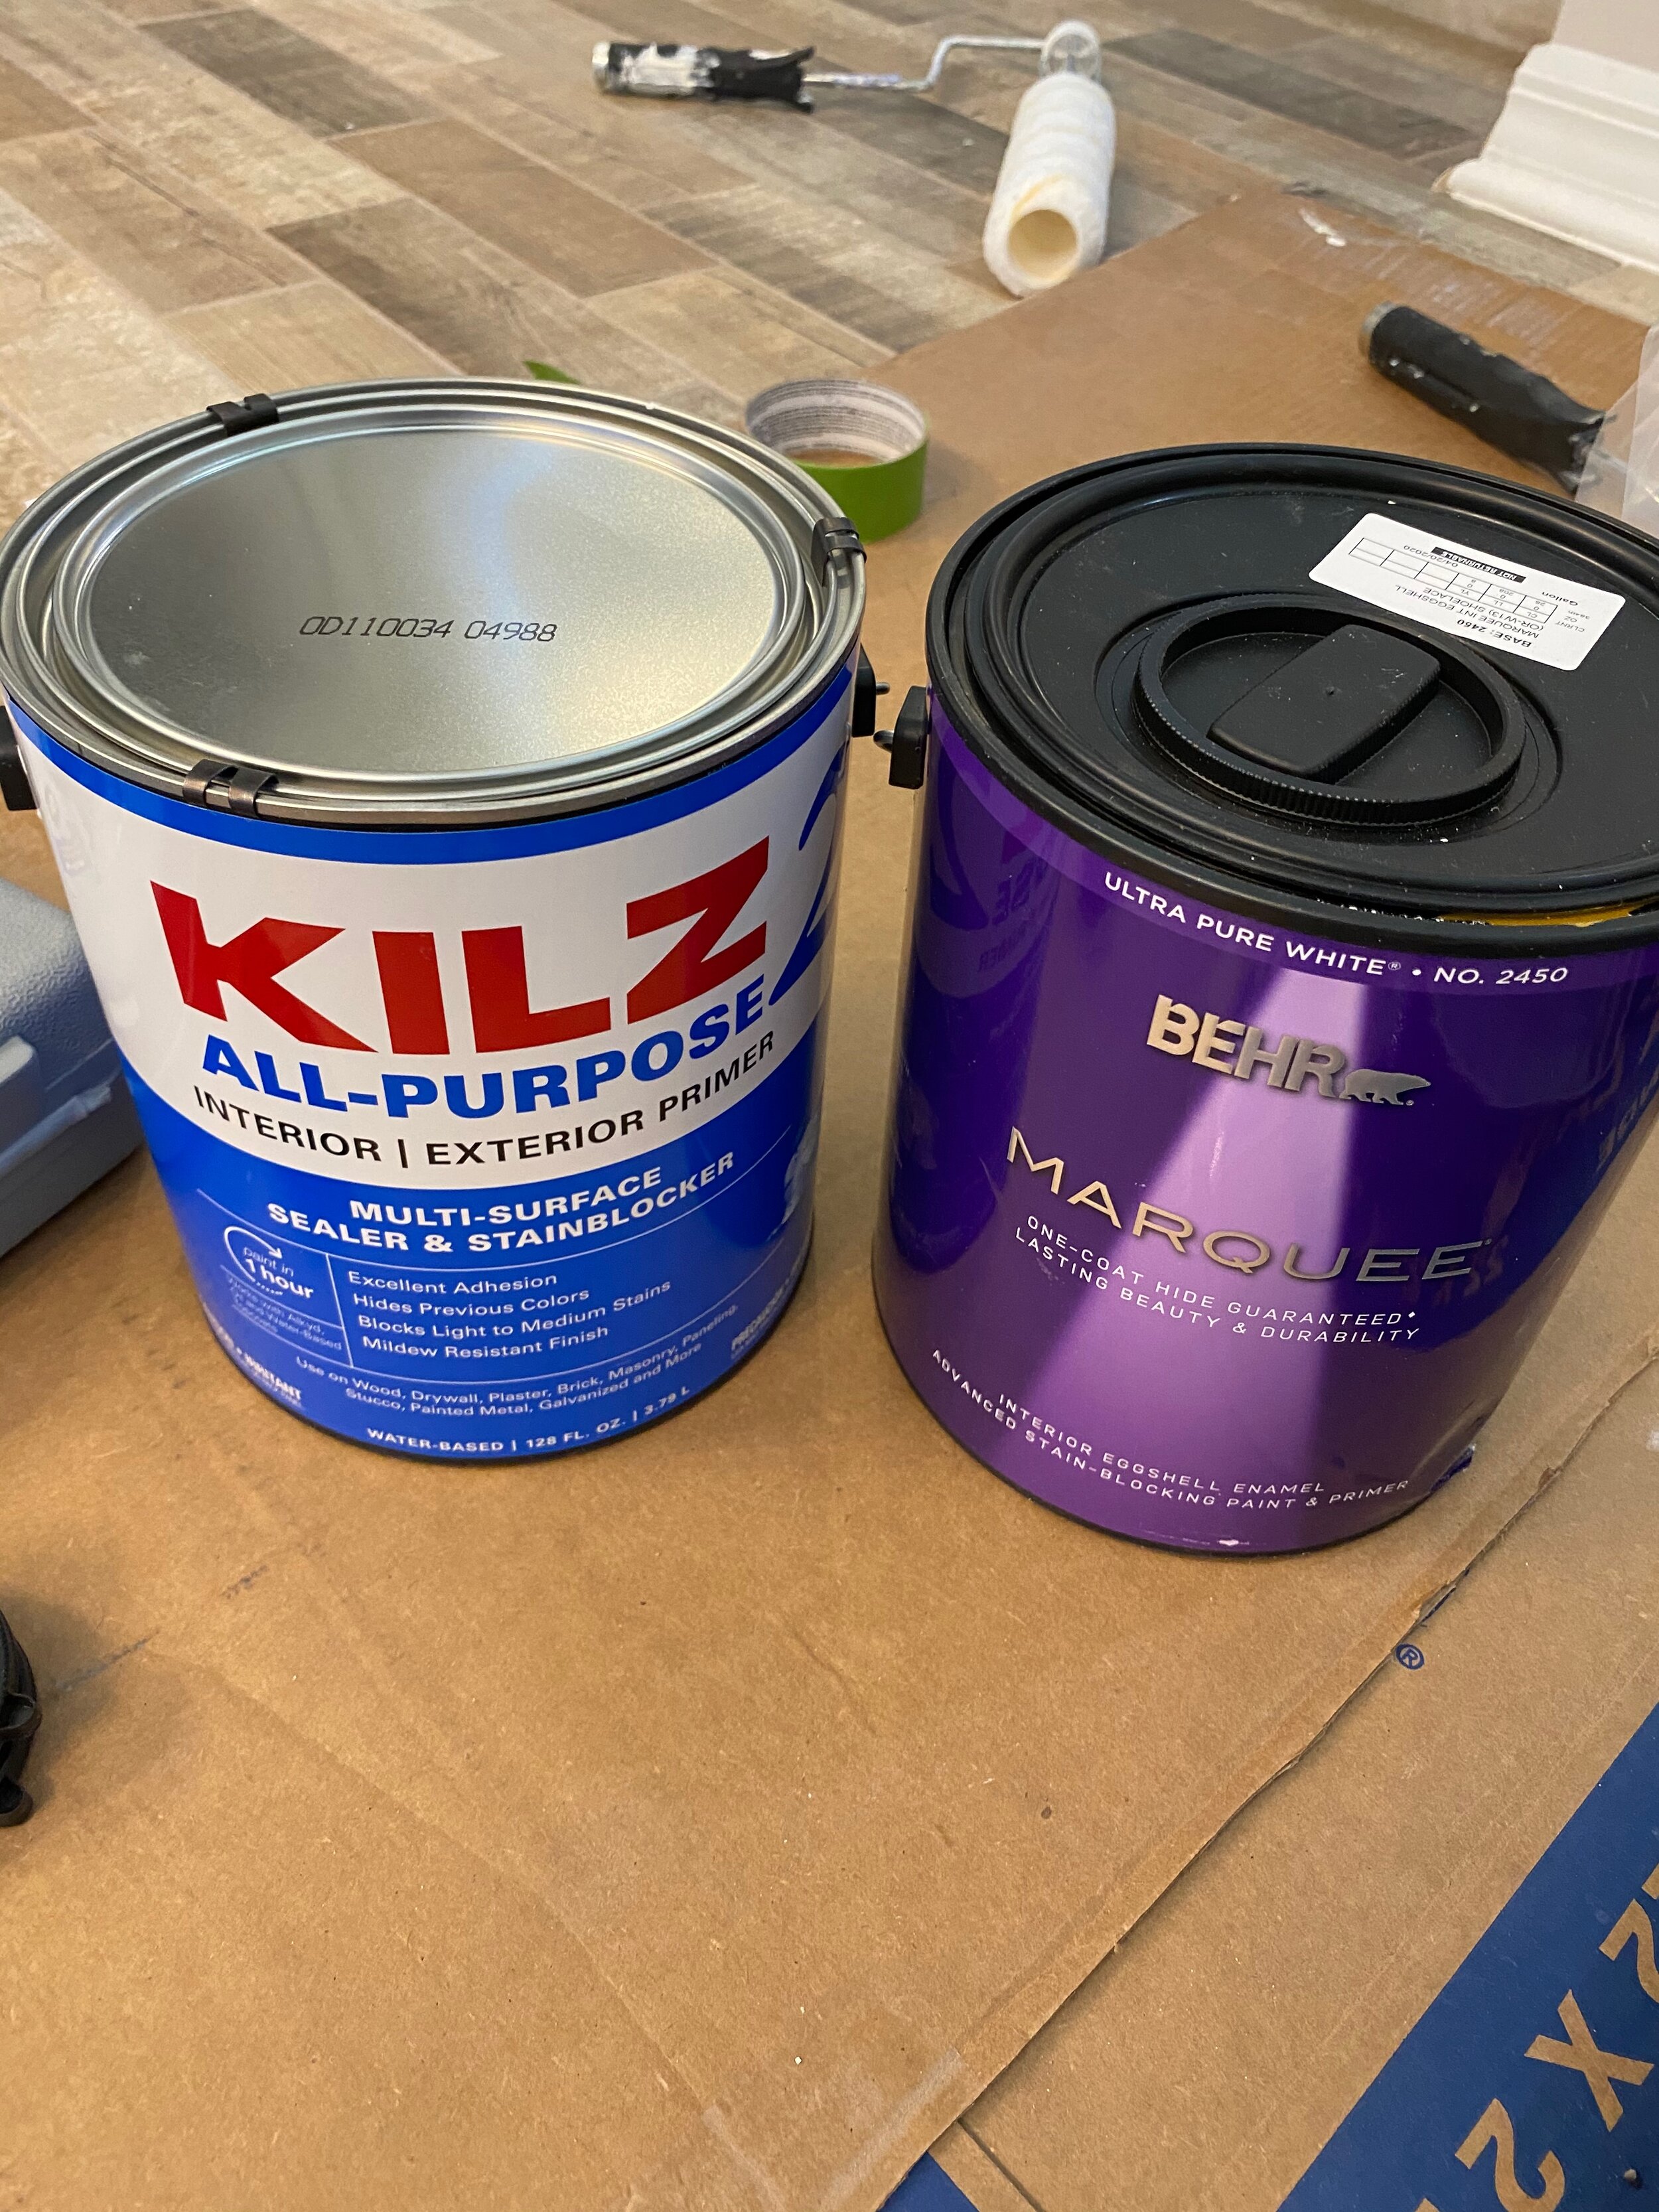
BEHR also sent us some of their KILZ 2 latex multipurpose primer. KILZ 2 is a fast drying, water-based, multi-surface primer-sealer-stainblocker with excellent adhesion, mildew resistance, sealing properties and very mild odor. KILZ 2 ALL-PURPOSE Primer blocks medium stains including minor water stains, rust, grease, ink, pencil and felt marker. Enhanced hiding makes it ideal for changing colors and helps lessen the number of coats of paint required.
Once we had everything taped off with our FrogTape, we started trimming out the walls and rolling on the KILZ primer. Although our previous wall color wasn’t that dark, I’m still happy we used primer first, it made the paint go on so smooth and evenly. When they say this stuff is fast-drying, they really mean it! You can paint within one hour, and by the time we were done with the whole bathroom, the first wall we did was already more than dry! We actually ended up waiting till the next day to paint, I’m so happy we chose an eggshell finish-we want to repaint all of our walls now!
Wall Blush
This blog post is just full of sponsored content! We also partnered with Wall Blush for this project and they sent us some of their awesome peel and stick removable wallpaper! We have used removable wallpaper before, but Wall Blush is different, and so much better! You don’t just buy rolls of it, on their website you enter in the dimensions of your space, and they send you rolls cut to size for YOUR measurements, so every roll is personal for your space! We chose one of their new prints, Fiona. Its a hand-painted olive branch wallpaper that is very is a fresh and and airy. It has a 24 inch panel design and their wallpaper is available in heights from 2 – 14 feet! Our walls are lightly textured, and the wallpaper worked fine! The pattern was also so easy to line up, because they have the wallpaper packaged in separate rolls and have them labeled for you, and even include a little guide of what it will look like on your wall- they have thought of everything to make your life easier! Wall Blush also sends you a little squeegee/scraper for you to install the wallpaper with, which was so so helpful!
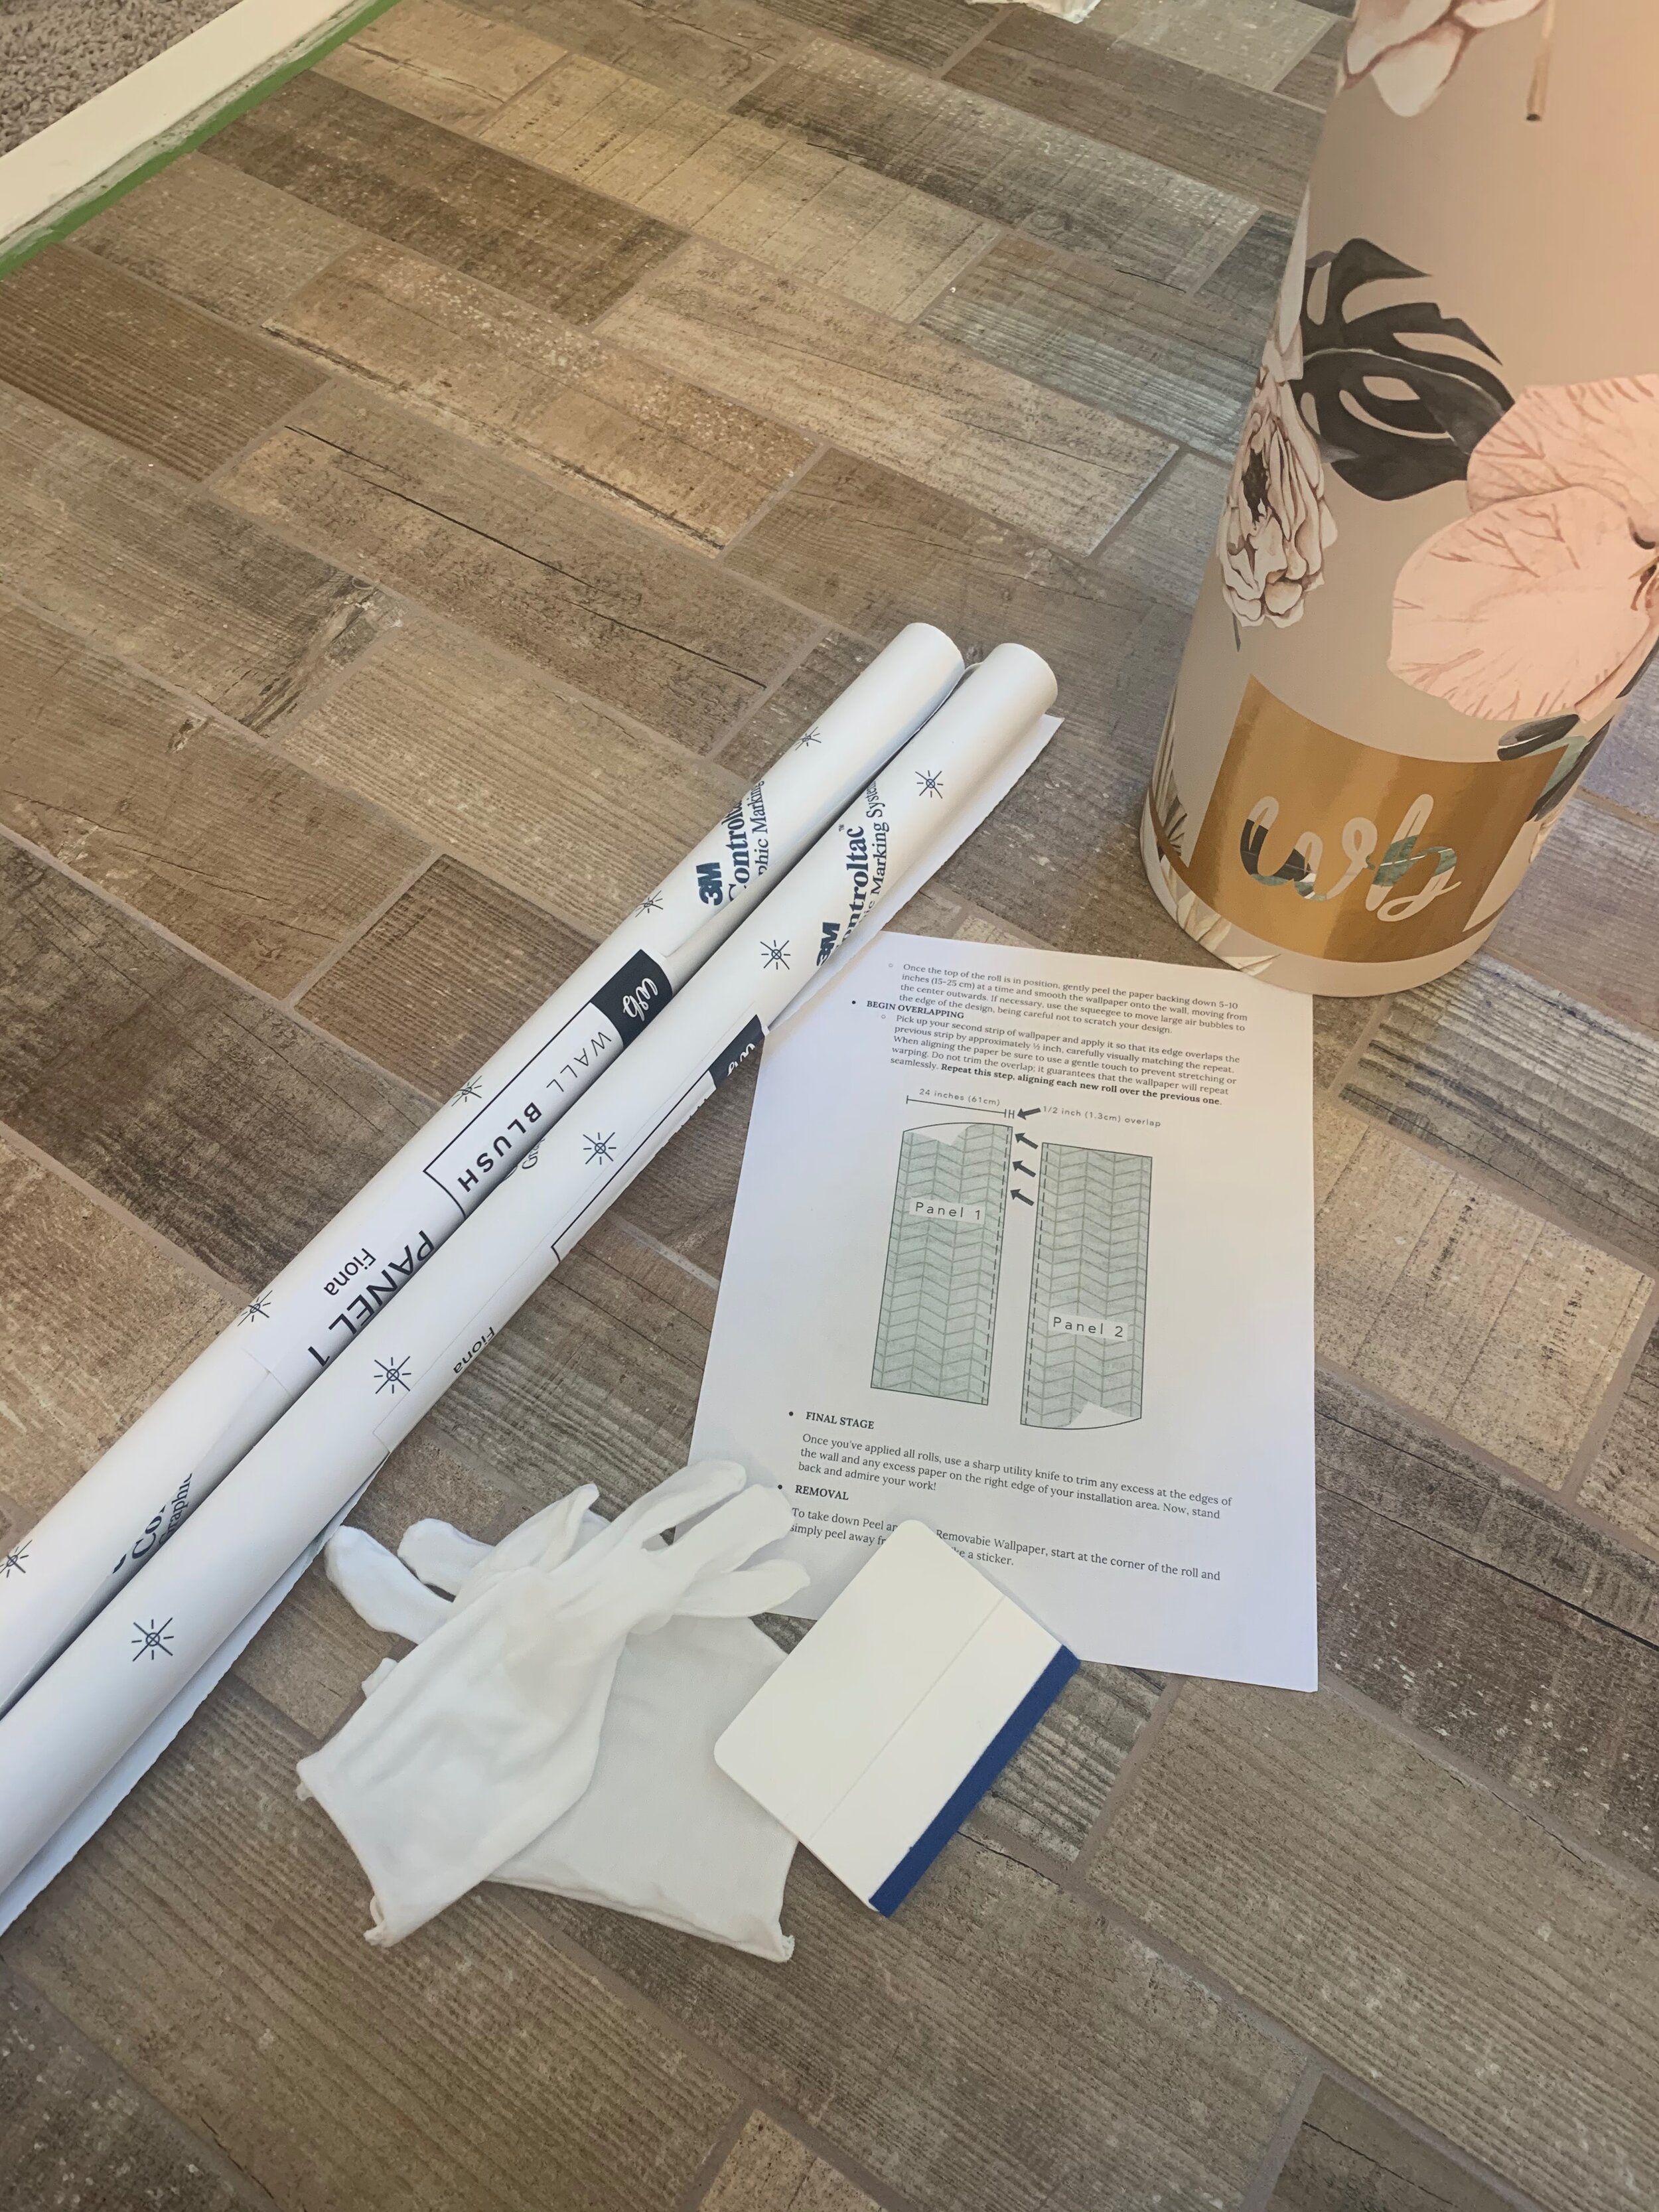
Rolls are labeled, and gave us tools to use- totally set us up for success!

LOVED the way the wallpaper looked on this wall, but wasn’t loving how it looked with the tile design across from it.
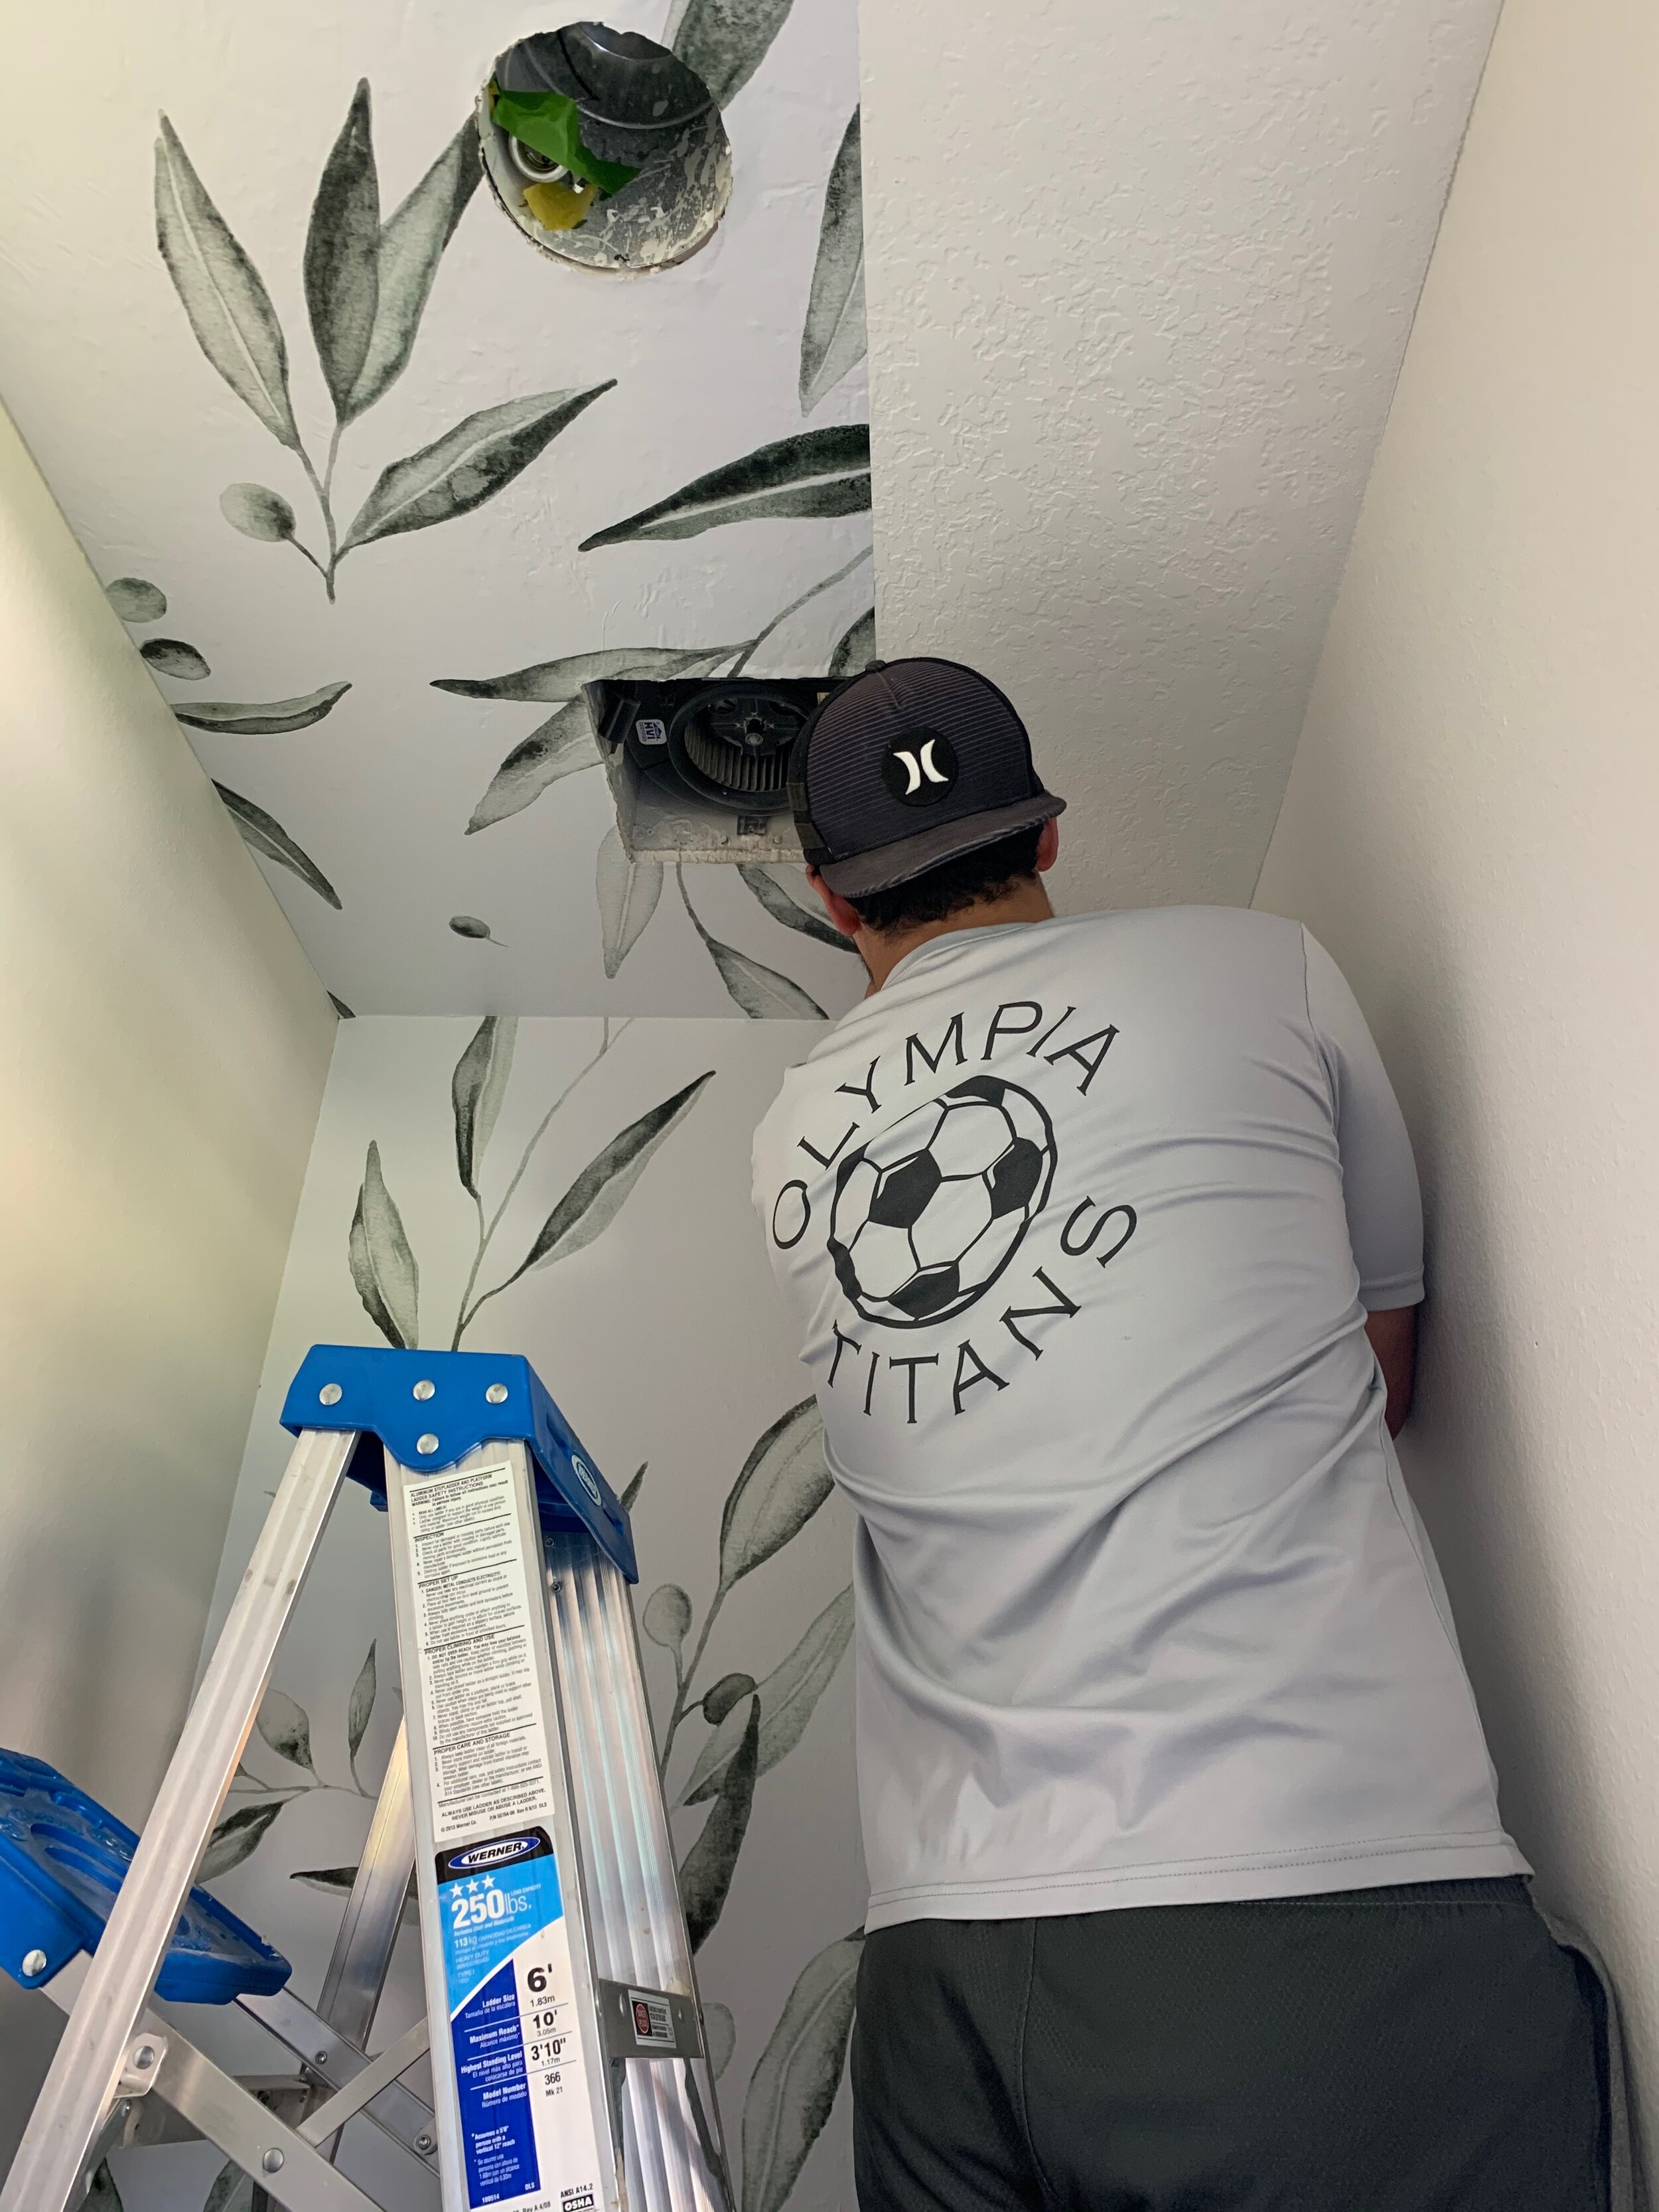
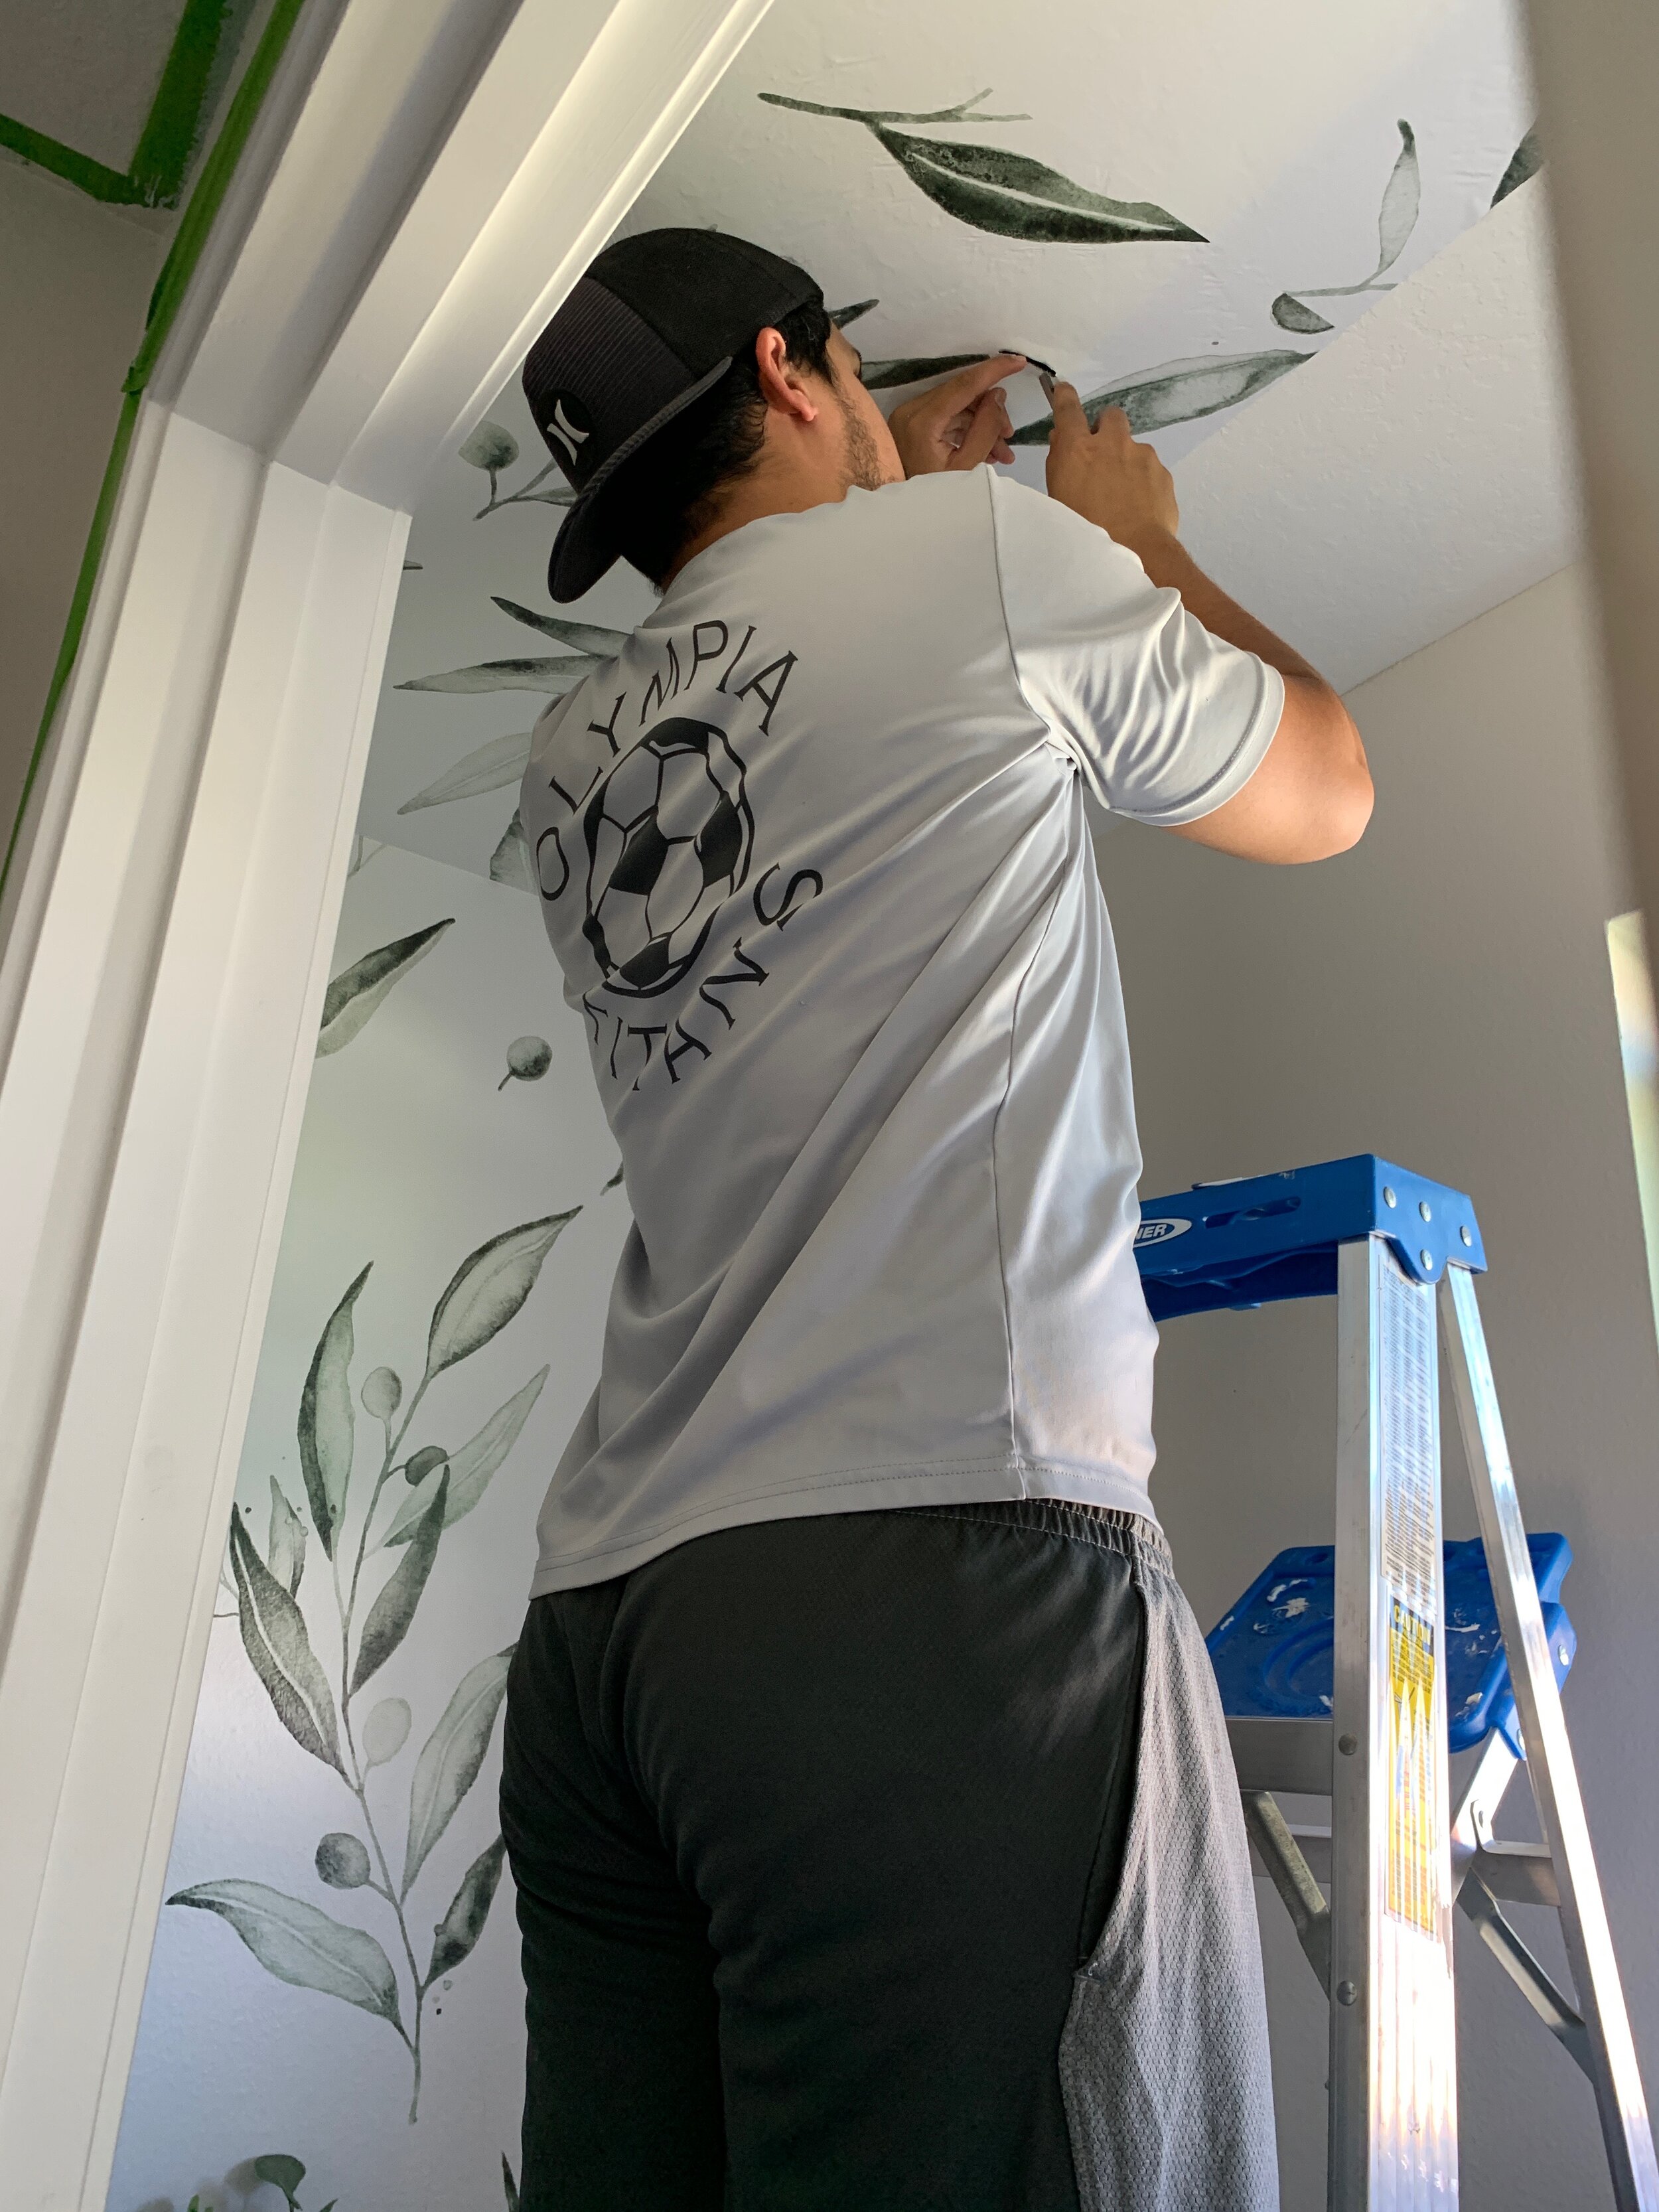
We originally got enough wallpaper for an accent wall behind our toilet, and for an accent wall on the small half wall in front of the shower. But, after we got the wall tile behind the sinks installed, I realized the accent wall in front of the shower wouldn’t look right, and the patterns would clash. So, after we installed the wallpaper behind the toilet, I had to think where else it would look good, and then it hit me! The ceiling! This is the part where Ryan really started to hate me-if he didn’t already. We decided it would be fun and unique to continue the wallpaper onto the ceiling in the toilet room, and I’m OBSESSED with the outcome! I matched up the pattern the best I could because it was made to go on our half wall, and it still turned out great! Our ceiling was heavily textured, and you can see some of the texture through the wallpaper, but I love how it turned out! So thank you Wall Blush for partnering with us and making such gorgeous, user-friendly products!
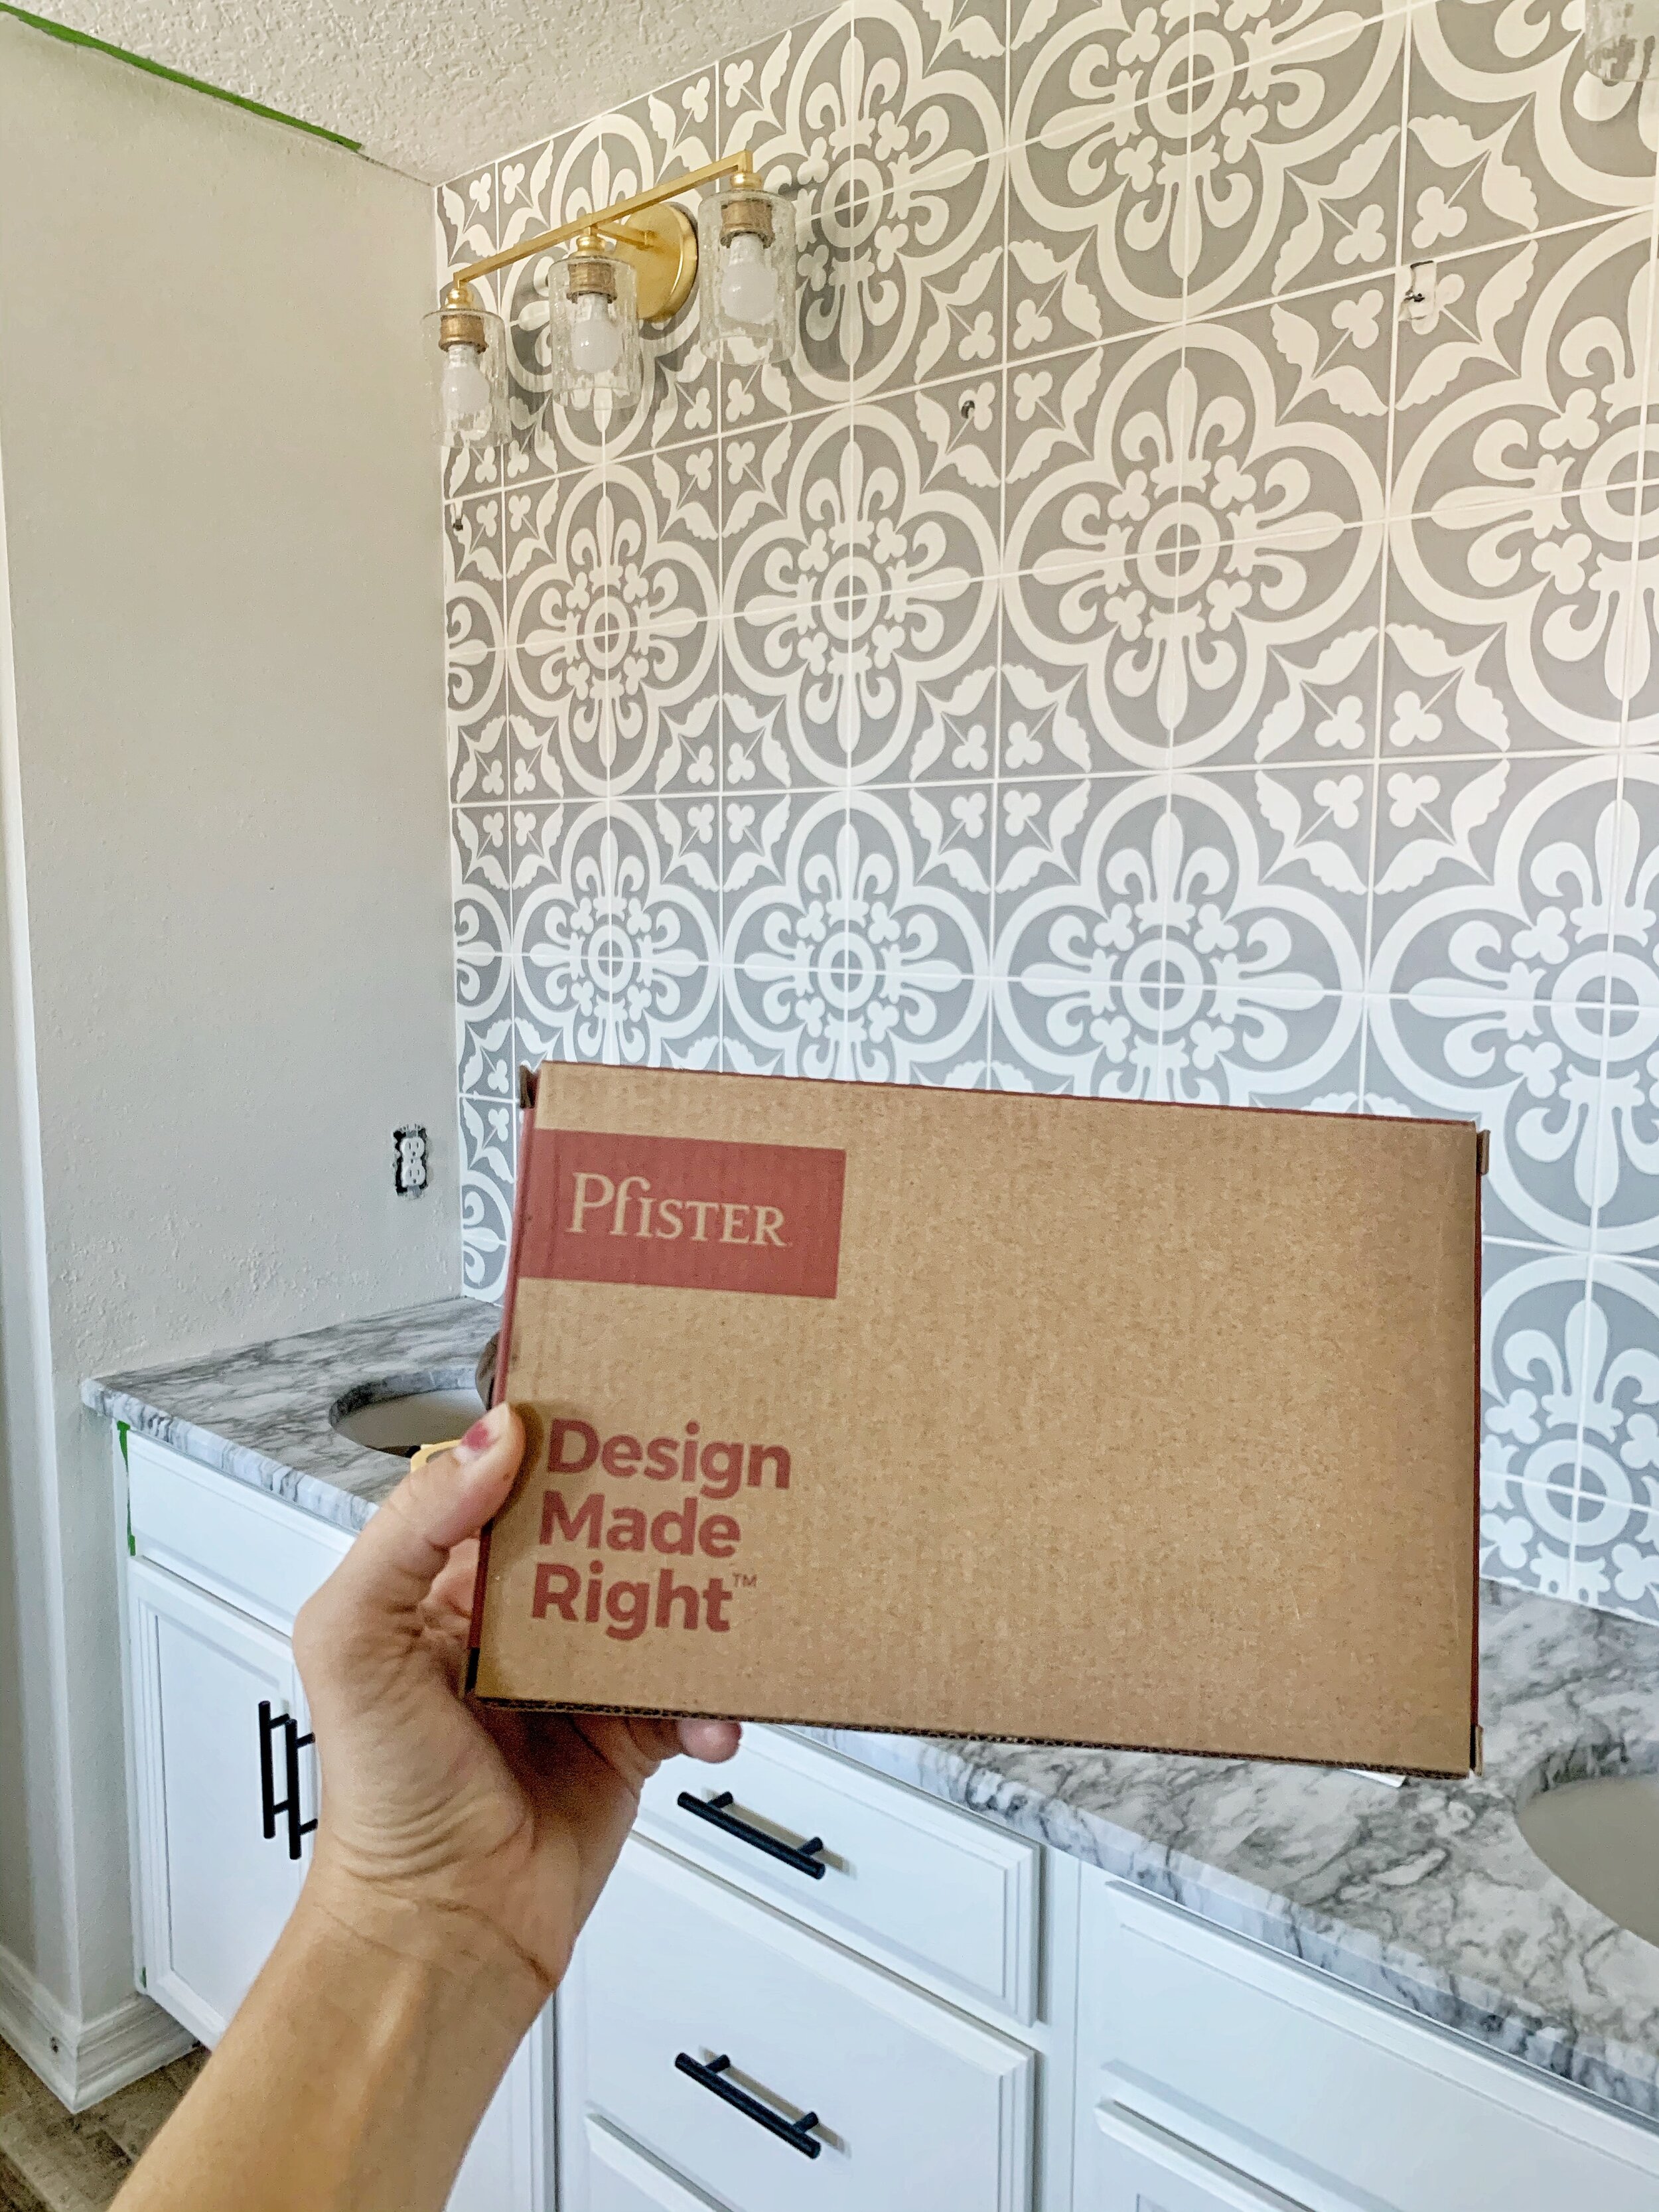
Pfister has accessories too?!
I’ll be going into more detail after the renovation on our partnership with Pfister, but for the sake of telling you our progress, here we go! If you missed our last bathroom renovation, you might not know that Pfister doesn’t just sell faucets too, they also have matching accessories such as towel rings and toilet paper holders! Our shower faucet that we’ll be installing later is in their Tenet line of fixtures, so we went with all Tenet accessories which include: two towel rings, one toilet paper holder and three robe hooks, all in brushed gold! We went ahead and installed the towel rings, toilet paper holder and two of the robe hooks, and it was so easy and they look AWESOME! Stay tuned for a blog post after the renovation for more details on all things Pfister!

What about the shower?
Good question. We FINALLY are ready for tile. We used the Schluter Kerdi membrane waterproofing system, and got the shower entirely waterproofed and ready to go. This was quite the task because of how large our shower is, and all the turns it has, but we wanted to make sure we waterproofed it correctly! My brother builds custom homes in Ohio, and this is what they use to waterproof their showers, and he says its the best in the business! With the Kerdi system, you use an uncoupling membrane to adhere it to the wall, which requires a little more of a watery consistency than normal thinset, which made things a little messy. We used two of the 108 sqft rolls and a little more than one of the rolls of Kerdi band to seal around the windows. We actually started to tile the shower at the end of the week, but more on how that turned out next week…nothing like waiting till the last minute right?!
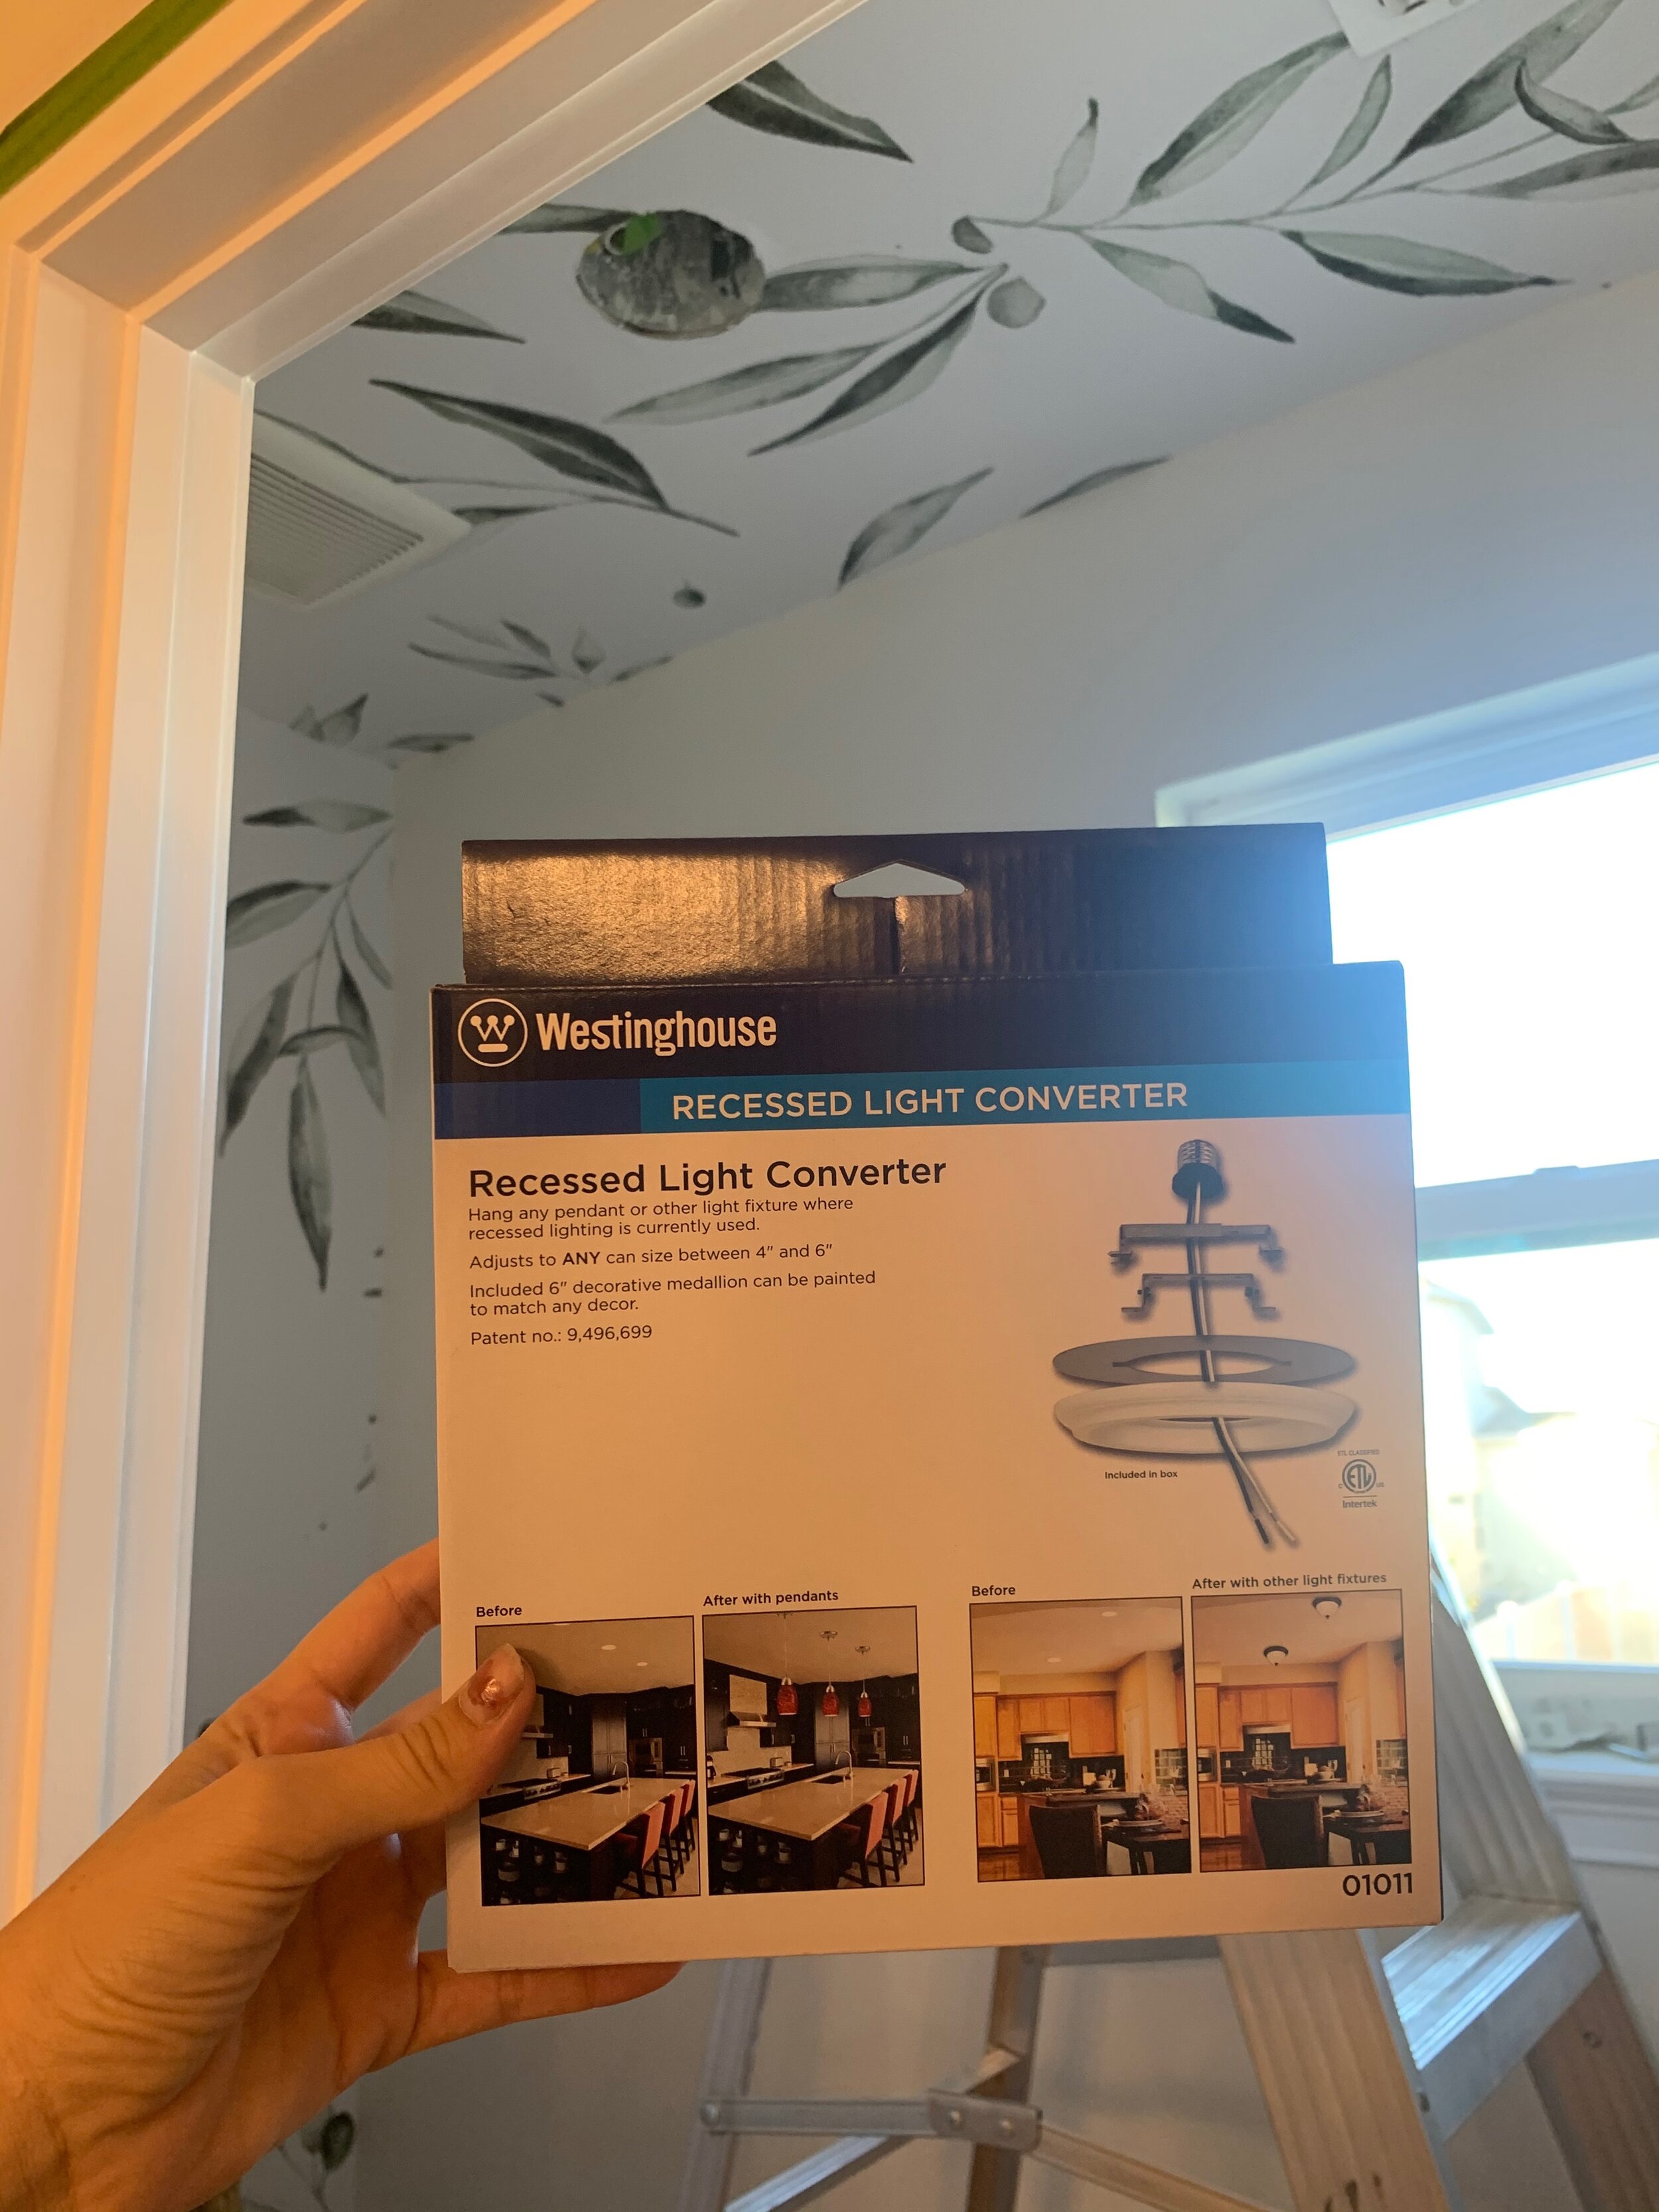
Recessed light who?
The last quick and easy thing we did was we converted the recessed light in the toilet room, to a flush mount light fixture. It was quick and easy, we have done it before, and made such an impact on the space! I actually ended up spray painting the cover of the conversion kit so it blends in with the light fixture more, and you can’t even tell! Its the person black and gold fixture and compliments our other design choices and wallpaper perfectly! Head to our Instagram to see the light we picked out and to see how easy it was to change!
Things take a turn for the worse next week, so be sure to stay tuned for that and to see THE FINAL REVEAL! It is gonna be good!
And remember to vote for us by clicking here!
-xoxo
Newbuild Newlyweds
Grab our FREE download
Wanna know the 5 must have tools you need before you start?
Considering a DIY Project?


Be the first to comment