


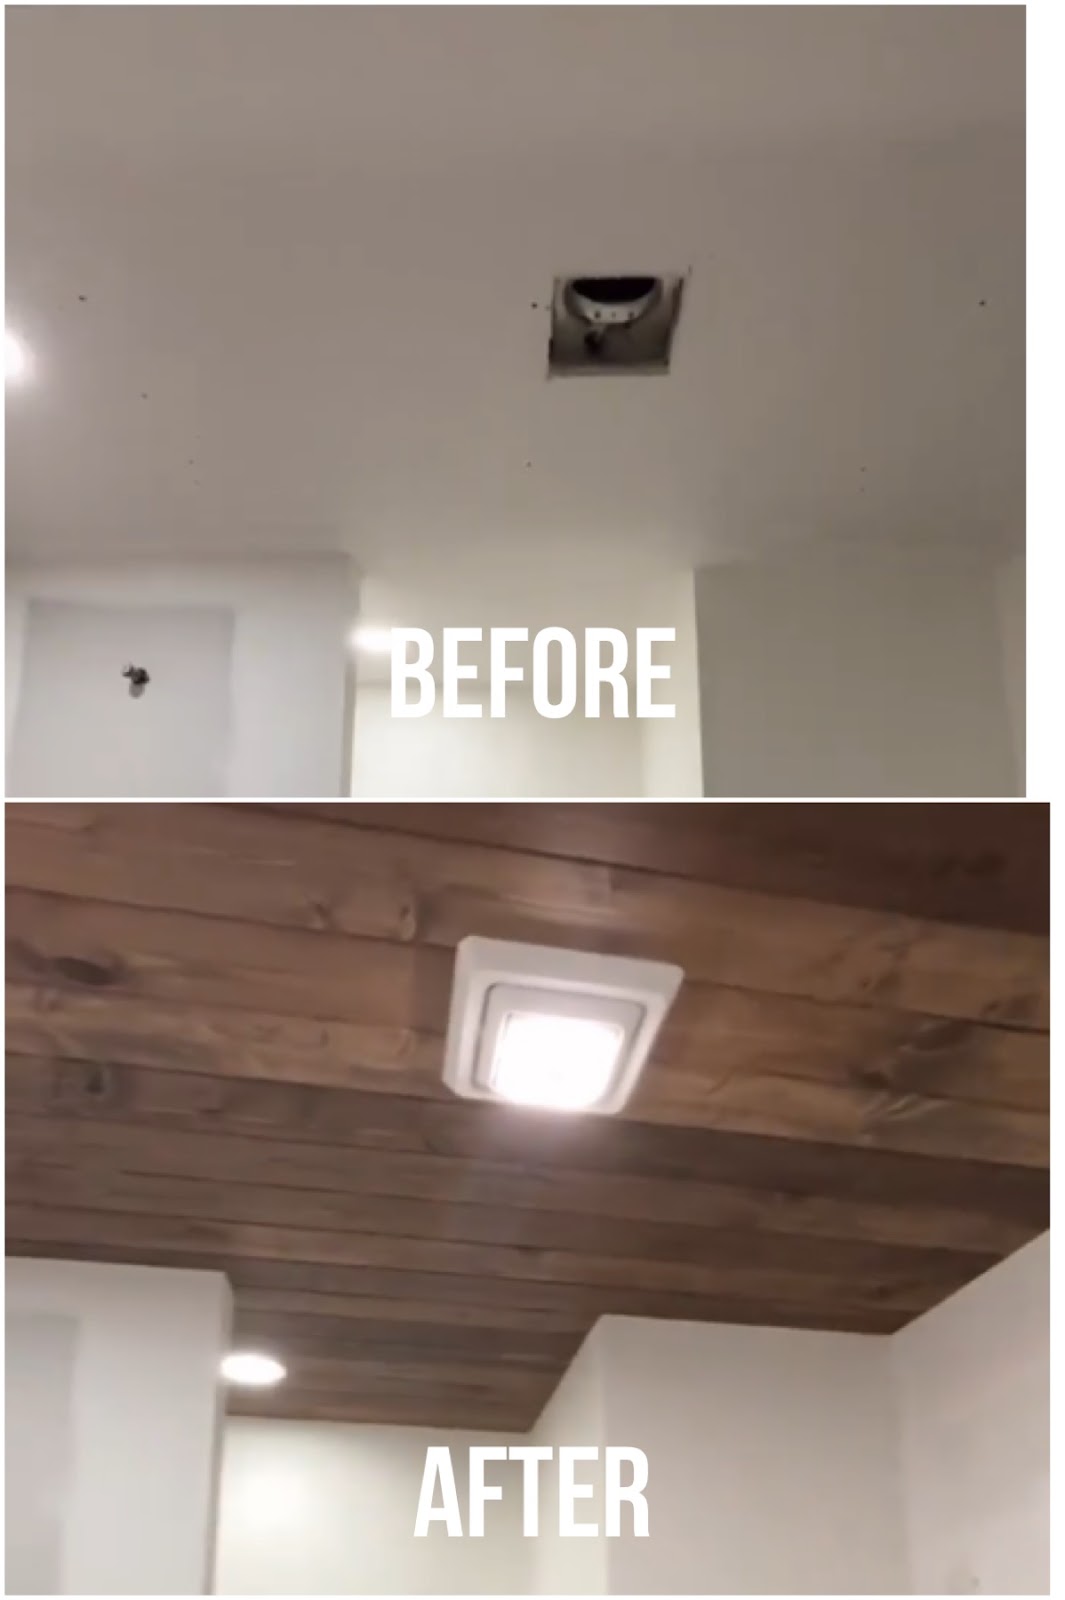
Beginner Friendly DIY Wood Ceiling
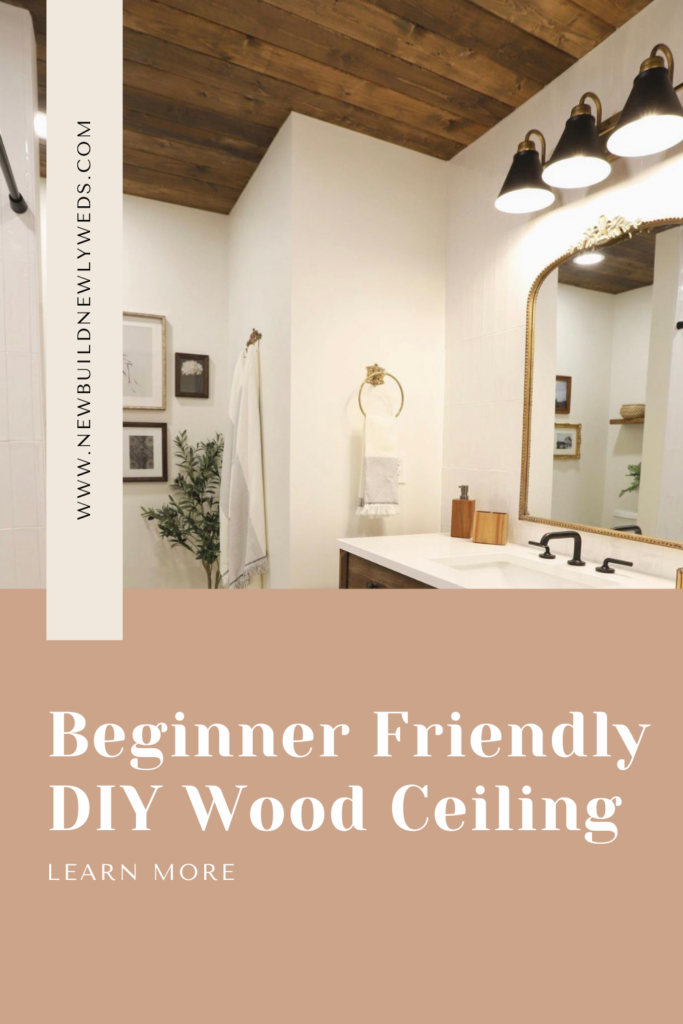
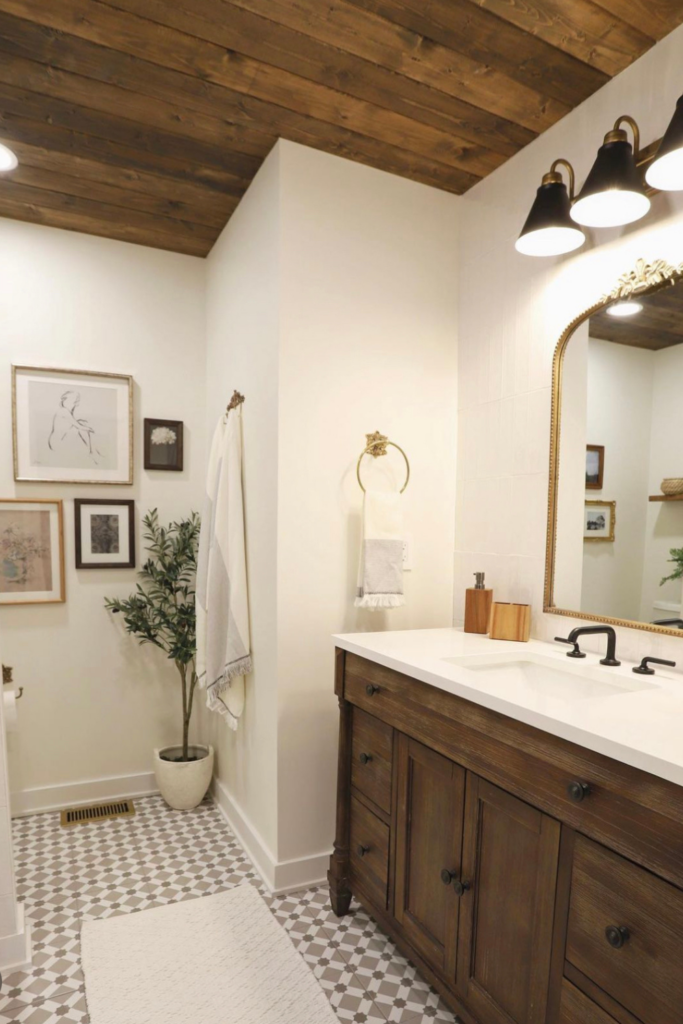
Our guest bathroom was a complete tear out and demo so we were able to start completely from scratch. It’s a small space but that doesn’t mean it can’t be beautiful.
Natural tones have been one theme that we love and have carried throughout our entire home from the kitchen island to the wood ceiling beams in the living room and in other little special touches and pieces of decor.
We kept this style going in the guest bathroom by choosing a stained wood vanity and doing a matching DIY shiplap ceiling. This is the same stain as our kitchen island and living room beams and it pulled the room together perfectly.
This project is fairly beginner friendly and we were able to complete it in just two evenings with both of us working together.
If you want to try this in your own home, here’s everything you need to know.
You will need:
- Tape Measurer
- 9/16” x 5” x 8’ Unfinished Pine Shiplap
- Wood Stain (we used a special order stain – OCS100 in Cappuccino)
- Staining Pads
- Wood Stain Sealant
- Ryobi Tools® Jigsaw
- Ryobi Tools® 18 Gauge Brad Nailer
- Ryobi Tools® Miter Saw
Choosing Your Boards
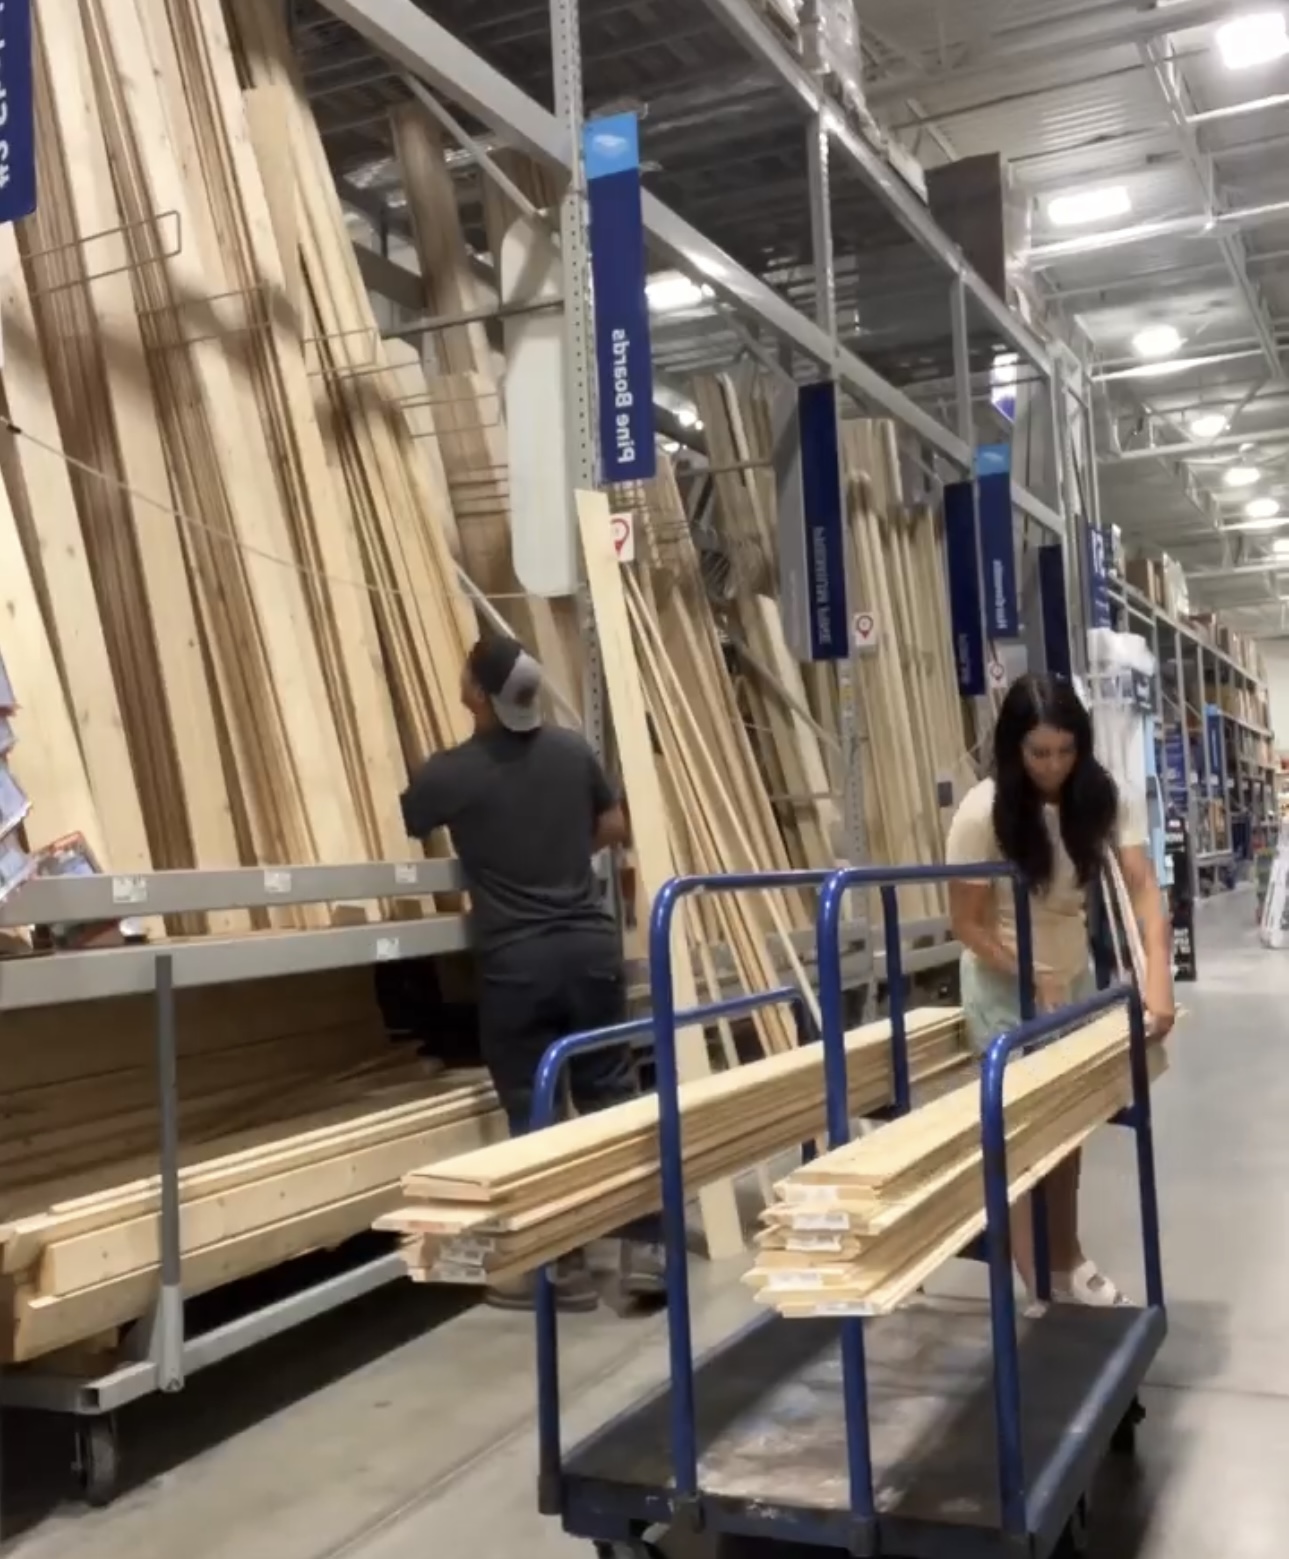
We started by measuring the ceiling before heading to Lowes and grabbing the 8’ Unfinished Pine Shiplap boards. You’ll want to be sure to look through all of the boards to make sure they are straight and not damaged.
We chose pine because it stands up great to moisture and resists shrinking, swelling and warping which is really important for a bathroom.
Our guest bathroom won’t be used that often and it has proper ventilation.
Tape Measurer // 8’ Unfinished Pine Shiplap Boards
Staining the Boards

We then used Staining Pads to stain the front of all of the boards. We chose not to sand before staining because the boards are going on the ceiling and were already pretty smooth.
The dark stain color is a nice contrast to our light COREtec floors and walls.
After letting the boards dry we sealed them for extra protection since they will be going in a bathroom and exposed to moisture.
Staining Pads // Wood Stain // Wood Stain Sealant
Installing the Boards
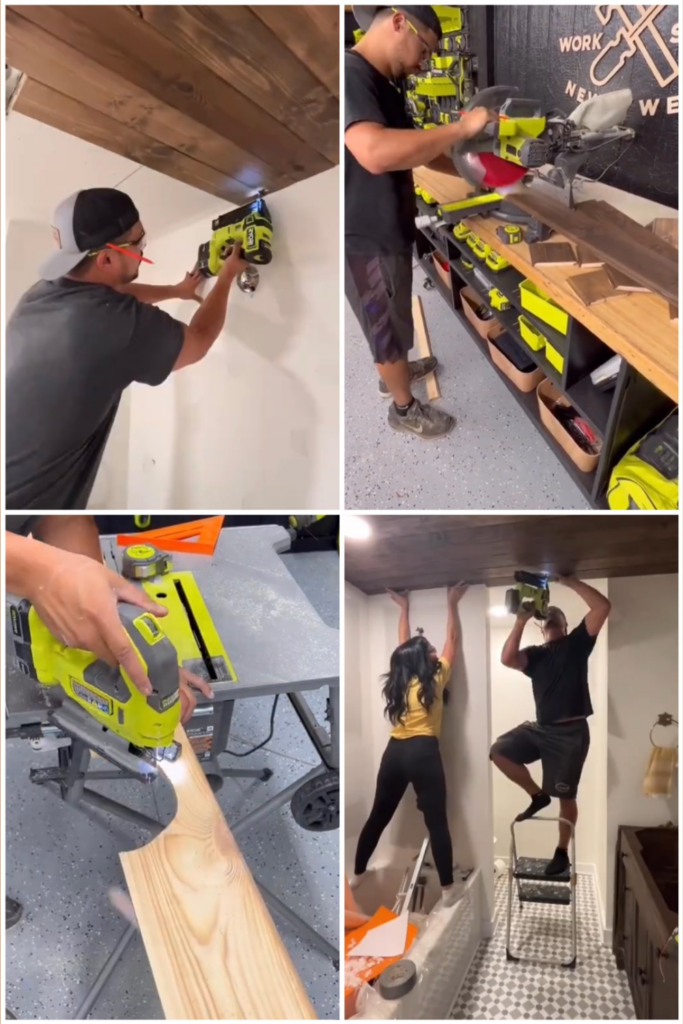
To install the boards, we used our Ryobi Tools® 18 Gauge Brad Nailer to nail the boards directly into the ceiling joists. We nailed the boards in twice at each joist, once in the lip of the board and once on the other side.
Next, we made our end cuts to fit across the ceiling with the Ryobi Tools® Miter Saw and used our Ryobi Tools® Jigsaw to make the cut outs in the boards for the ceiling vent and the lights.
Ryobi Tools® 18 Gauge Brad Nailer // Ryobi Tools® Miter Saw // Ryobi Tools® Jigsaw
The Finishing Touches
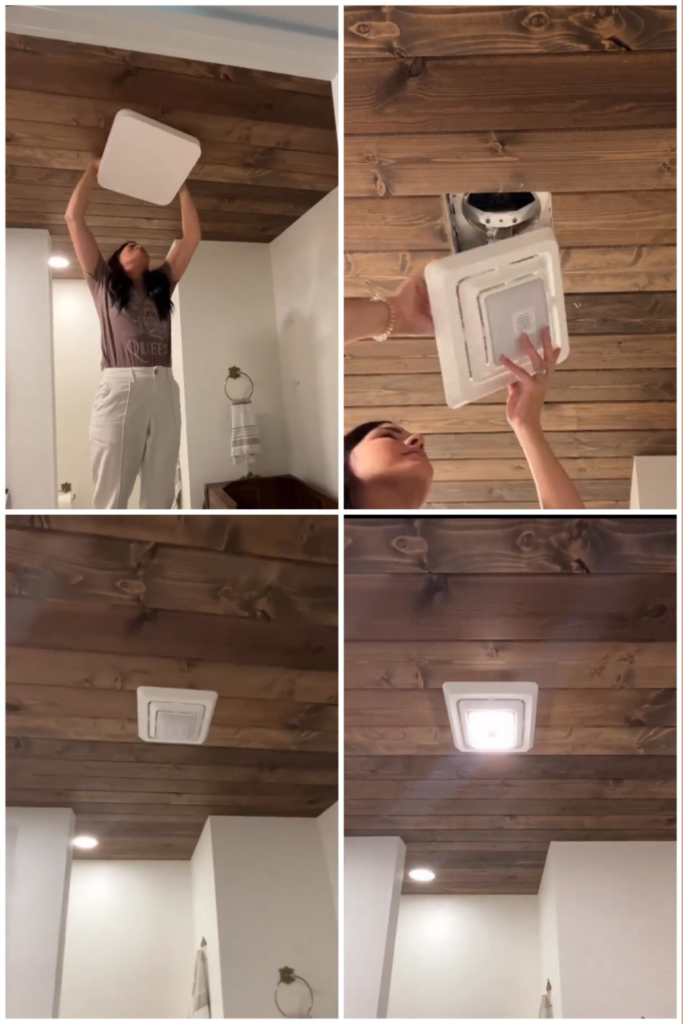
To add some finishing touches, we completed the ceiling project by putting all of the lights back up and changing out the old vent fan grille with this new super cool cover that is an LED light and Bluetooth Speaker. This will be a really cool touch for our guests to enjoy. It’s totally extra but we love the little touches that make our house feel that much more special and us.
We love the way it turned out and how this simple DIY project added so much to our guest bathroom design. You can shop the rest of our bathroom here.
Stay tuned for the full guest bathroom reveal soon!
If you decide to do a wood shiplap ceiling in your home, be sure to tag us on Instagram @newbuild_newlyweds, because we would love to see it and cheer you on!
Leave a Reply
Grab our FREE download
Wanna know the 5 must have tools you need before you start?
Considering a DIY Project?


Love this remodel!!! What is the wall color used here? Can’t wait to get on the nail guns!
I absolutely love this ceiling! I might try it myself! 🥰