


DIY Reading Nook Floating Bench

We are taking it back to our old house in Florida to share about one of our first ever projects. In our upstairs loft area we had a little corner that we added horizontal shiplap and floating shelves to but originally just had a storage ottoman for seating. We wanted to do something that not only looked better but was also more functional so we decided to do a floating bench that we could add baskets underneath to.
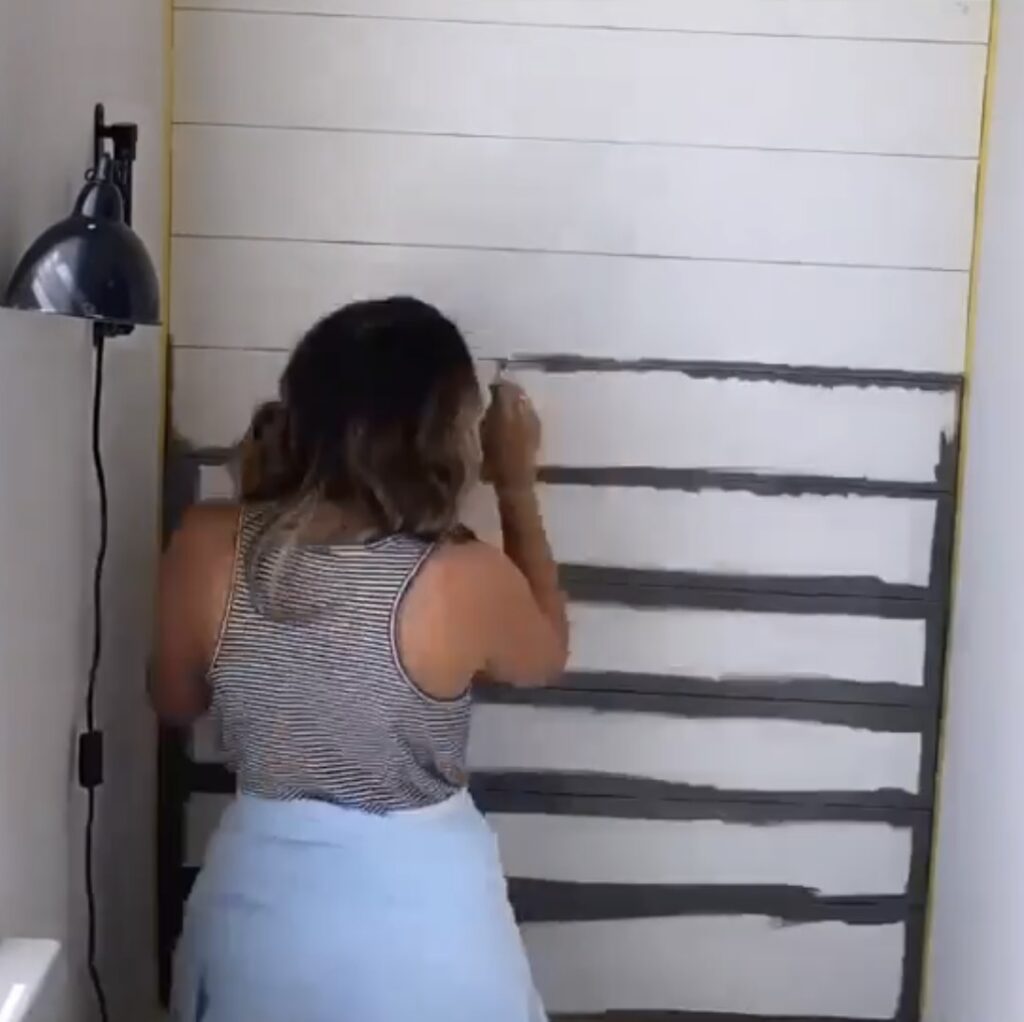
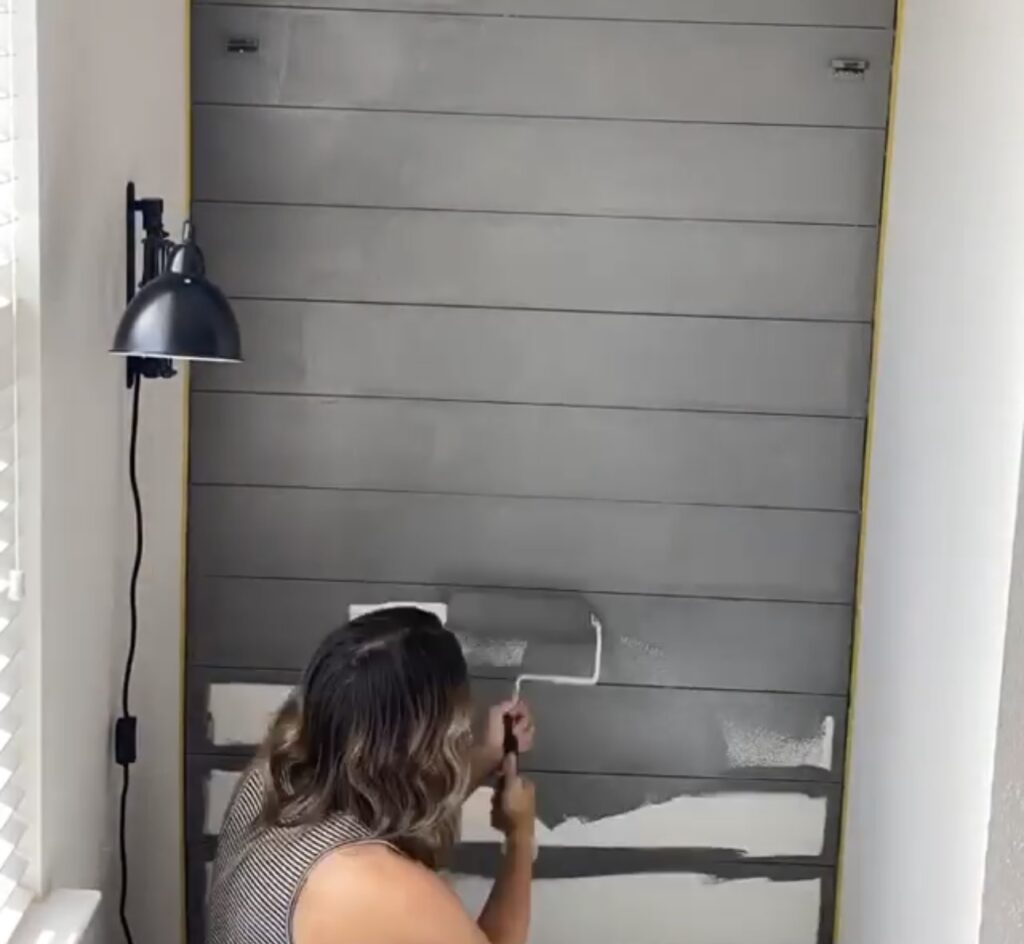
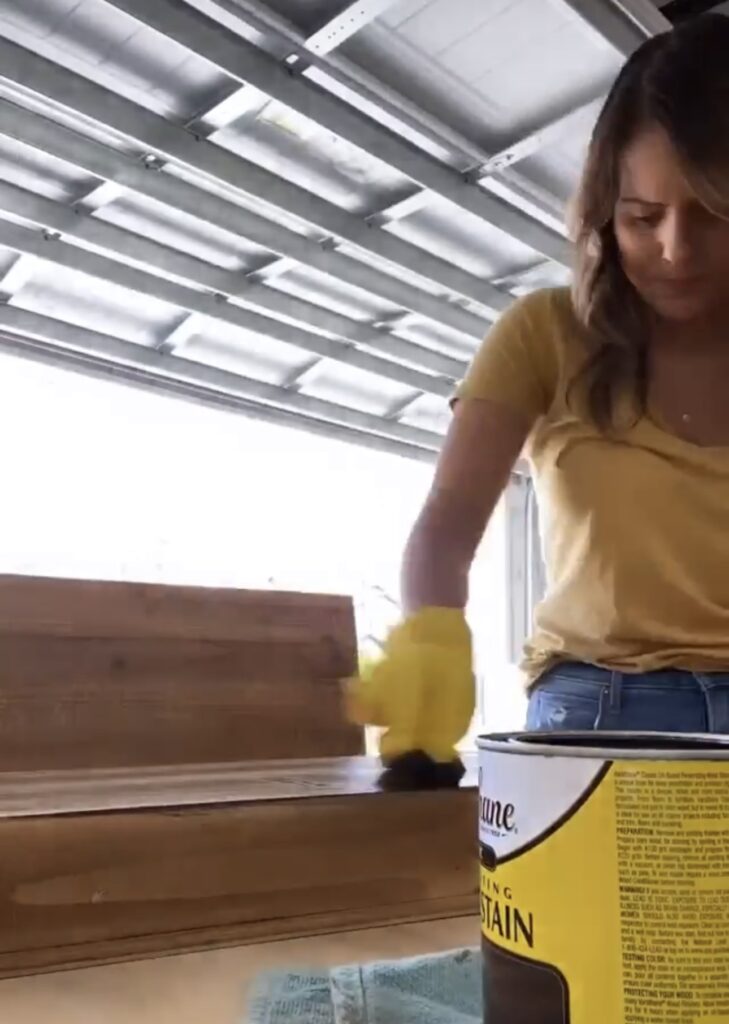
We started by removing the floating shelves that were already installed and painted the horizontal shiplap that we had previously added. I used a small brush to get between each board and then did two coats all over with a roller. While the paint dried, I stained the floating shelves a darker color to match the stain we’ll be using for the bench.
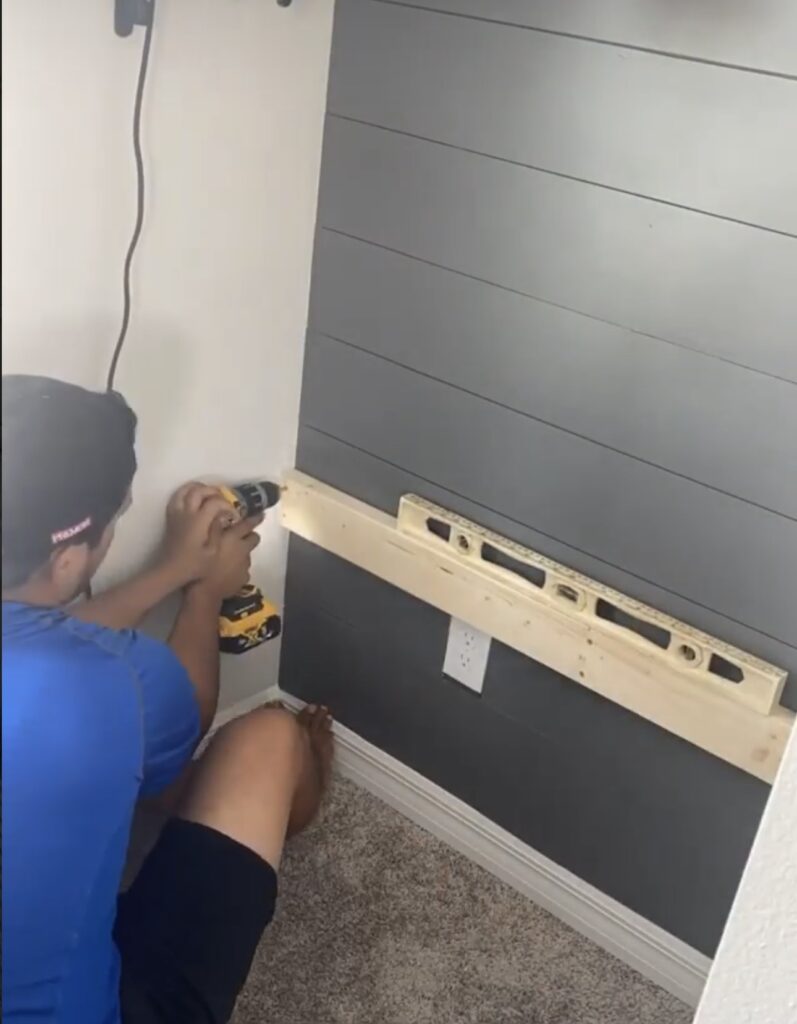
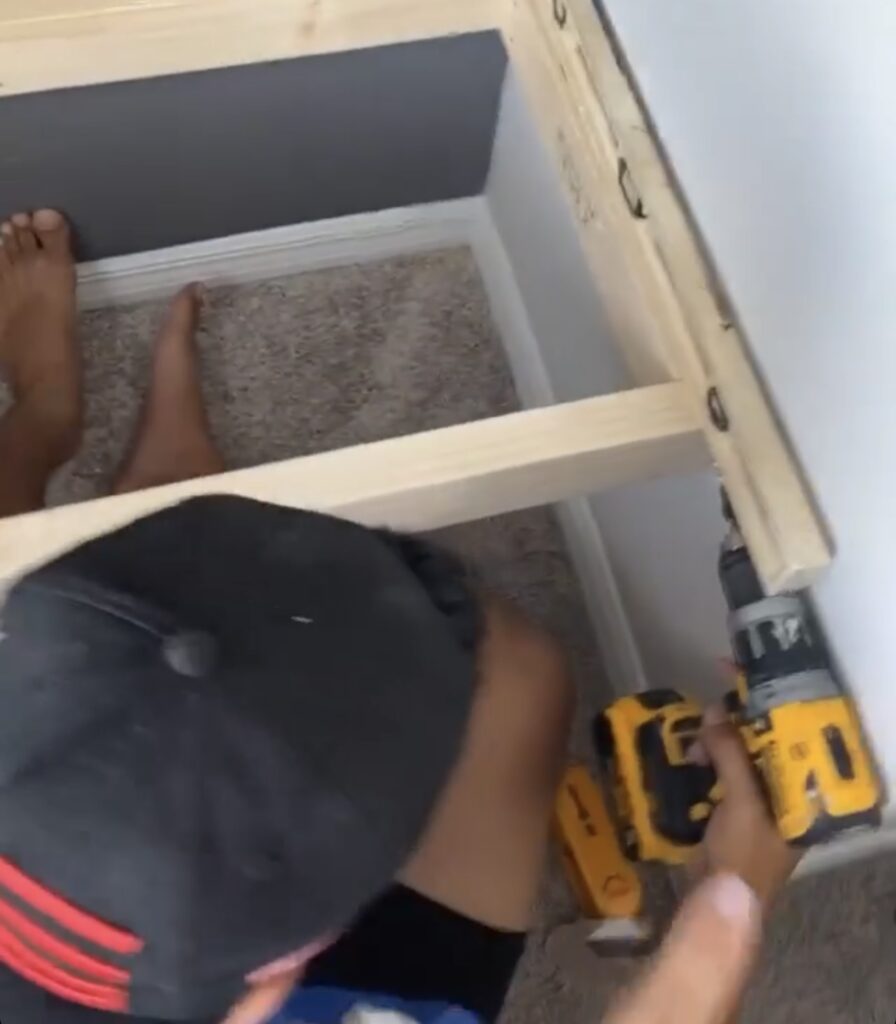
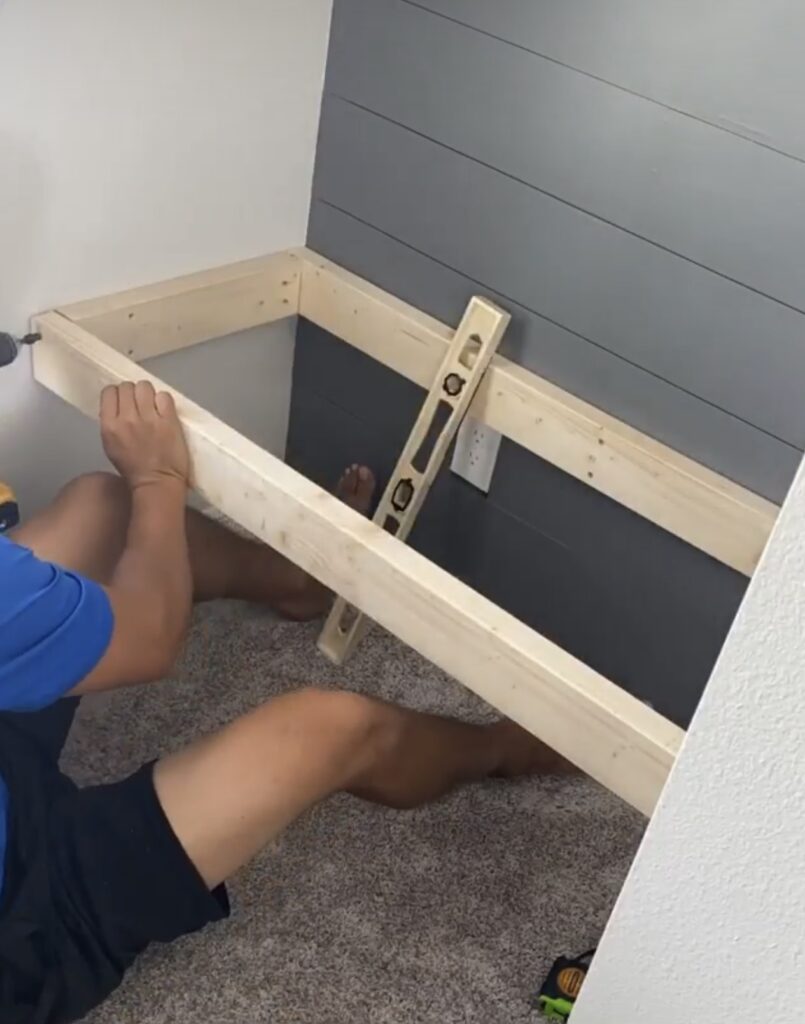
Once the paint was dry, Ryan got started building the frame for the floating bench. He started by measuring where we wanted the bench to sit and added the bracing board to the back wall. The bench will be 43″ long, 20″ deep and 21″ off the ground.
He used 2×4’s for the frame and screwed the first board into the studs on the back wall. Then he screwed the two side boards into the side walls and then added the front board going across.
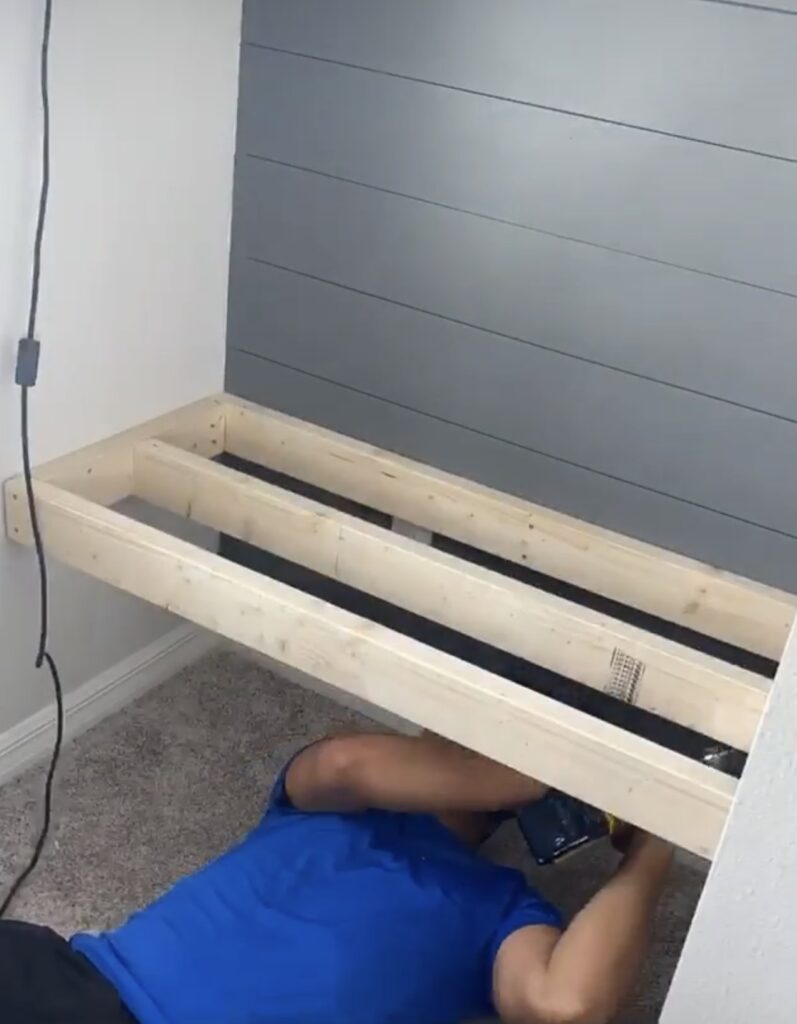
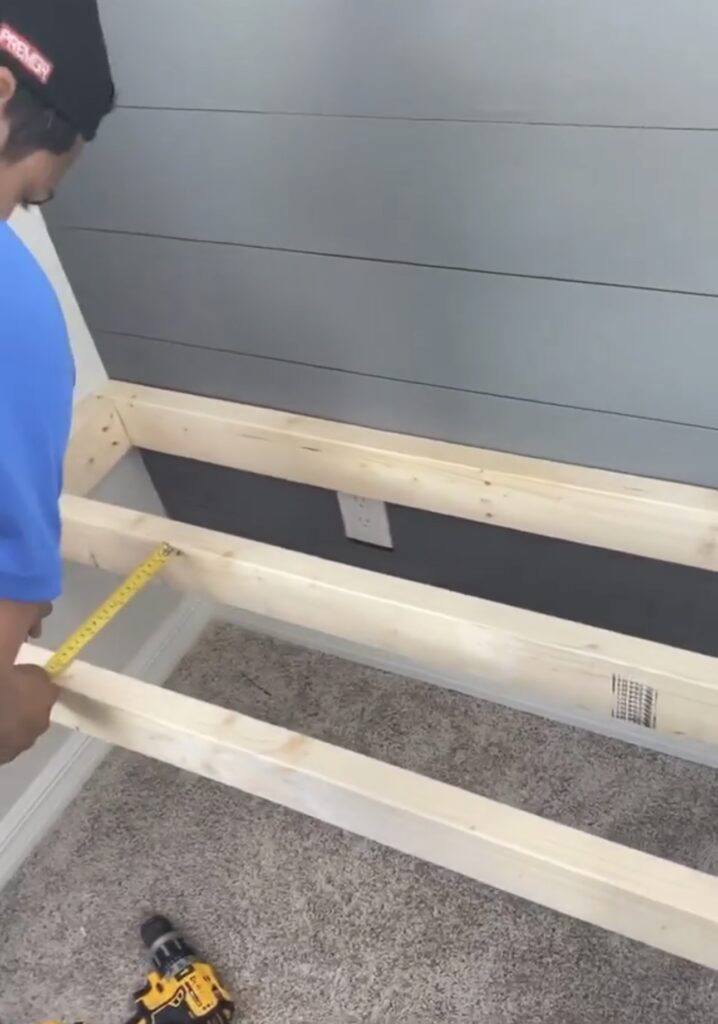
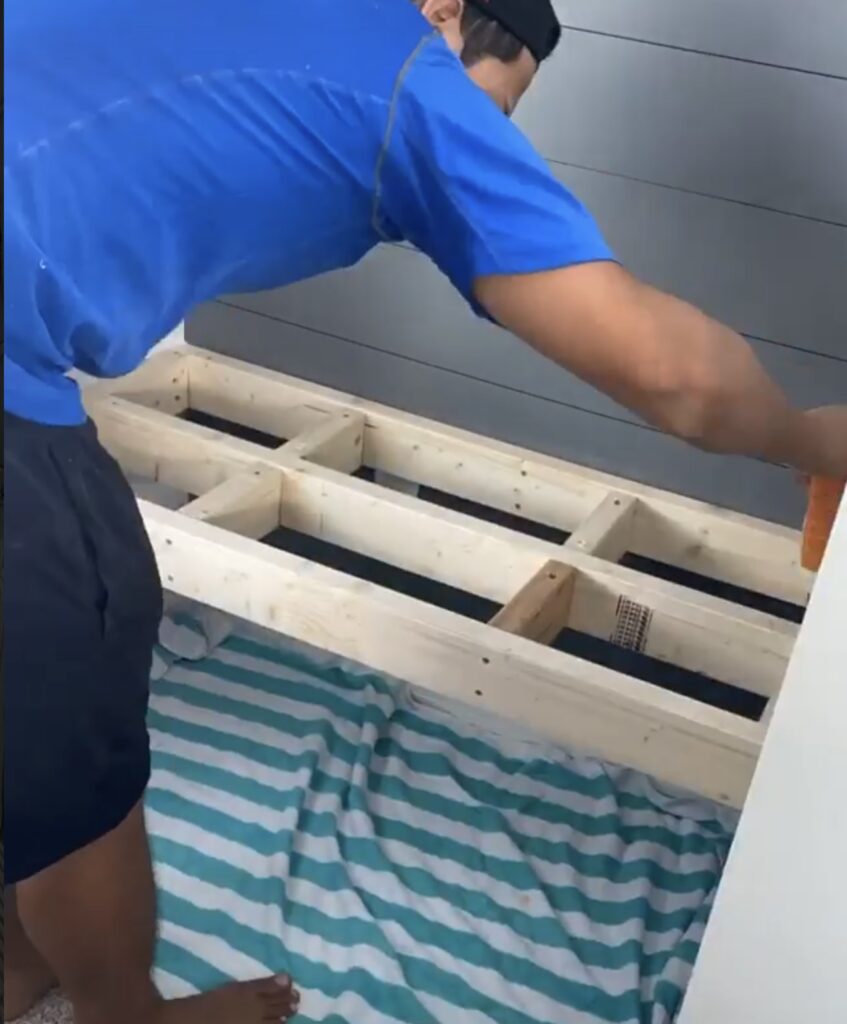
Once the main part of the bench frame was finished, he added another 2×4 going across the center. We wanted to really use this bench as a reading nook so we needed it to be extra sturdy and be able to bear weight, so we also added some bracing boards between the front, center and back boards of the frame.
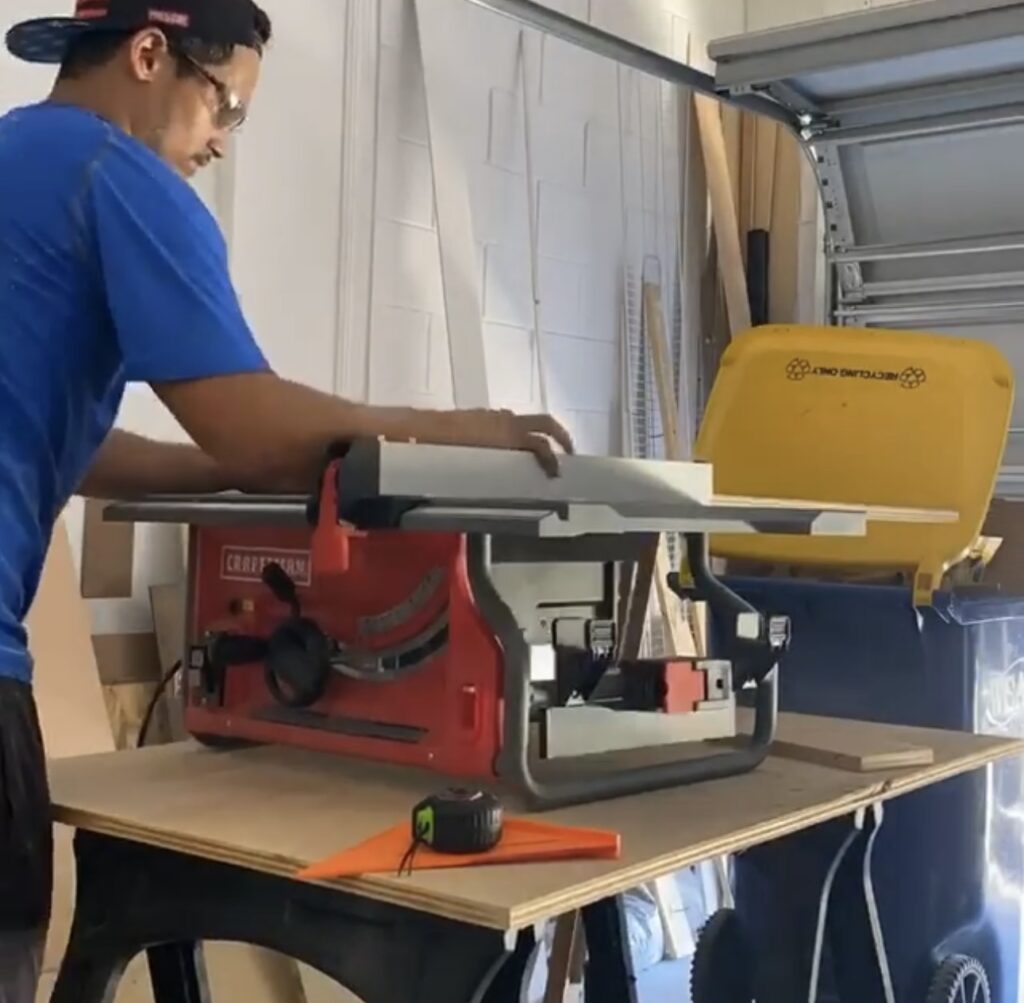
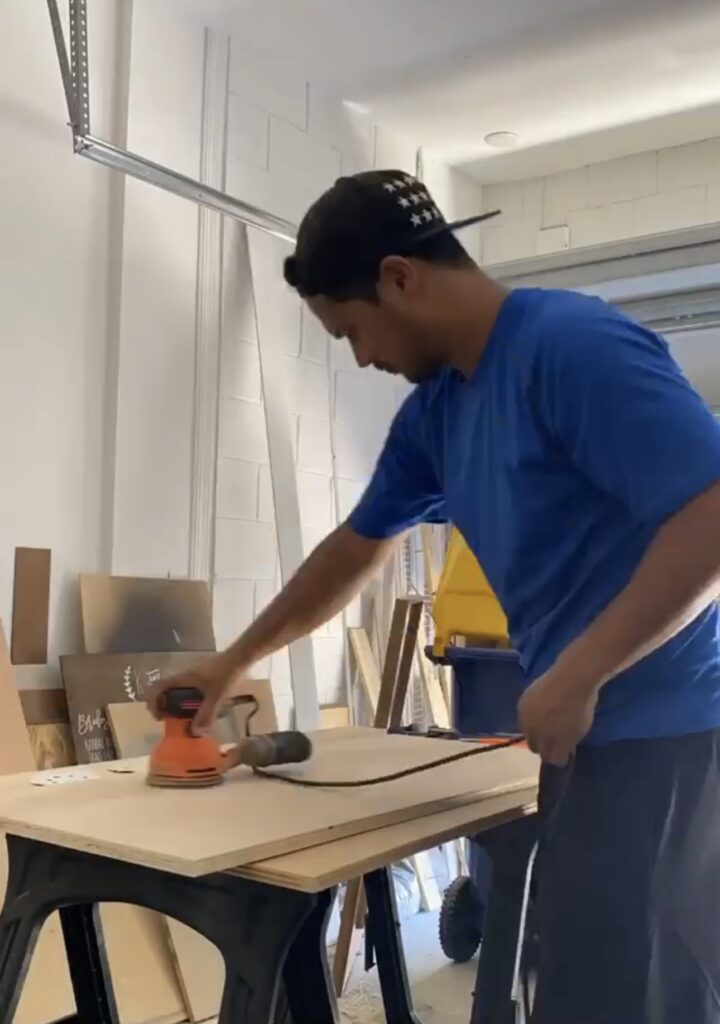
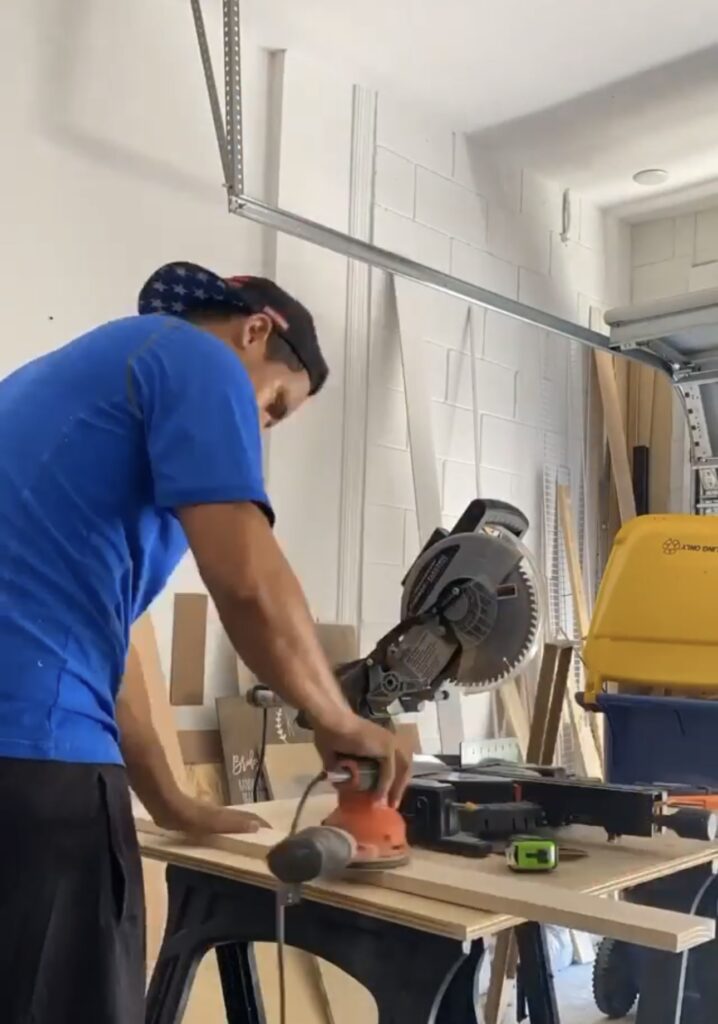
After the frame was completely built, including the additional bracing boards so that it was nice and solid, we moved on to the top of the bench for the seat. Ryan used a table saw to cut a piece of 3/4” birch plywood to size. Since this bench will be functional and we actually wanted to sit on it, we sanded it down really well so that it would be nice and smooth.
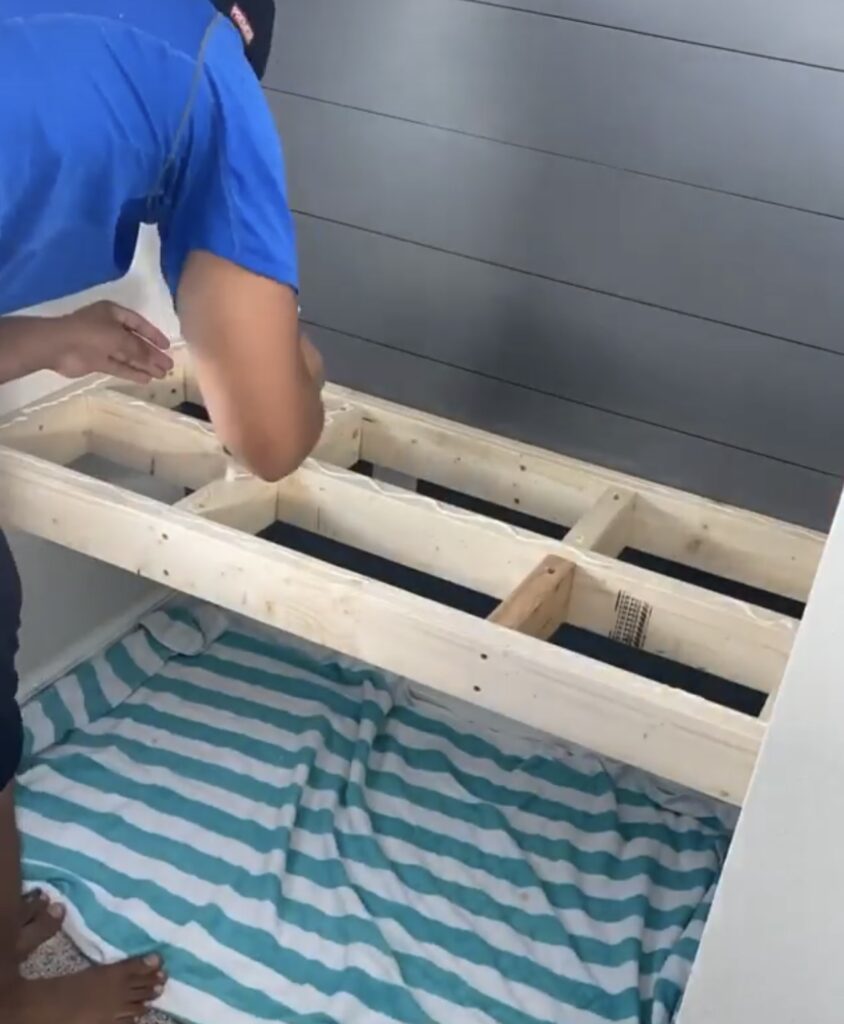
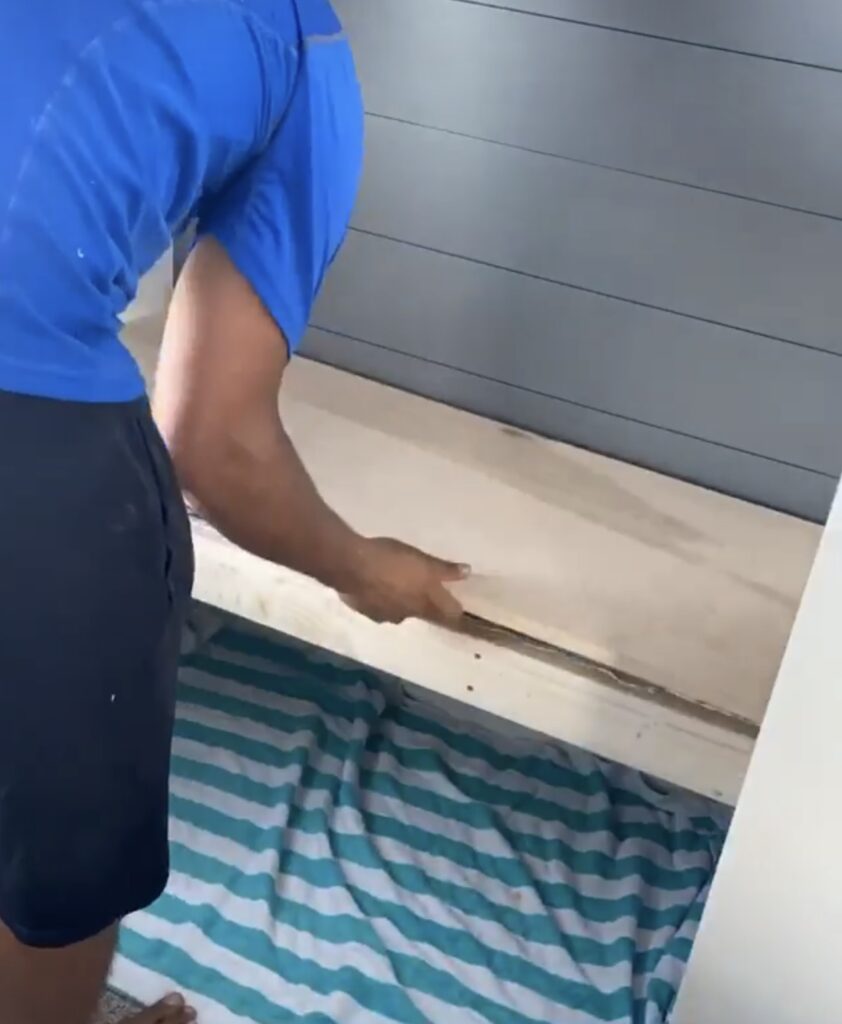
We didn’t want and nail holes on the top of the bench so we used wood glue to attach the seat to the frame. We put the glue on top of all of the boards on the frame, including the center board and cross bracing boards and then laid the plywood seat on top.
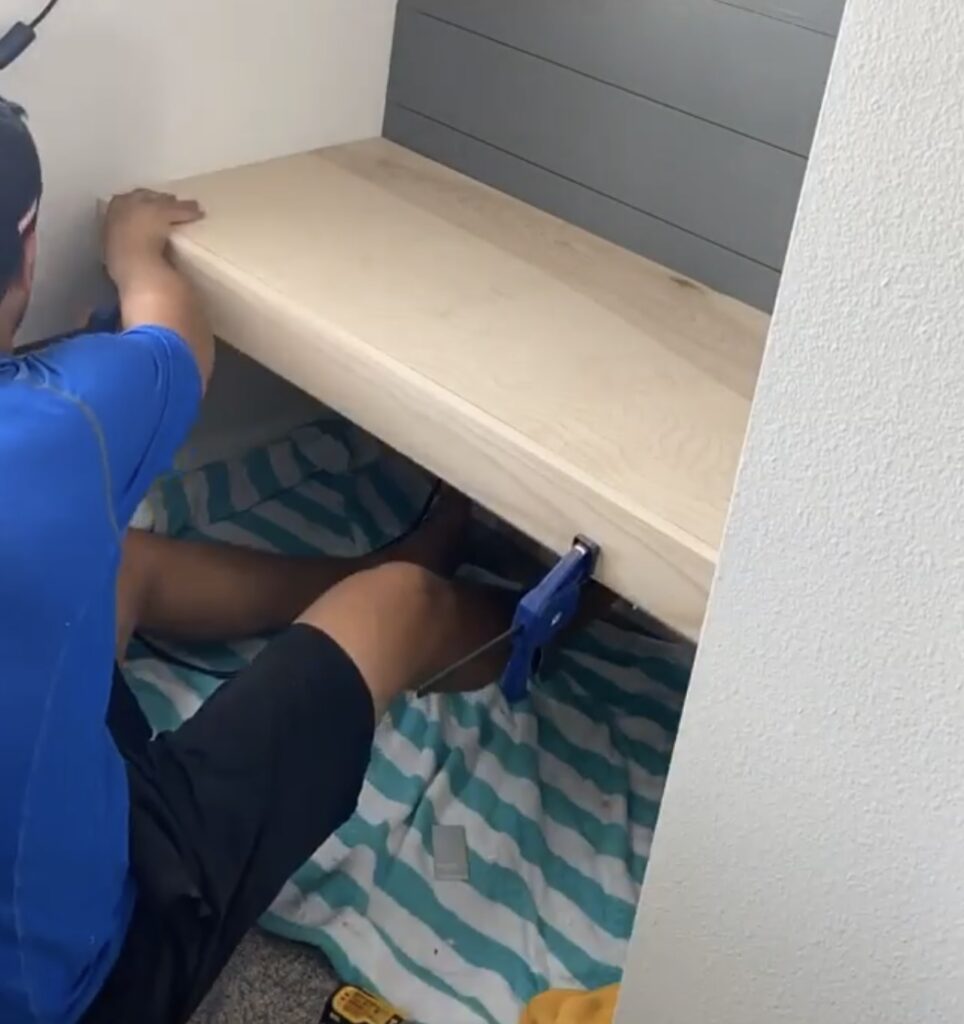
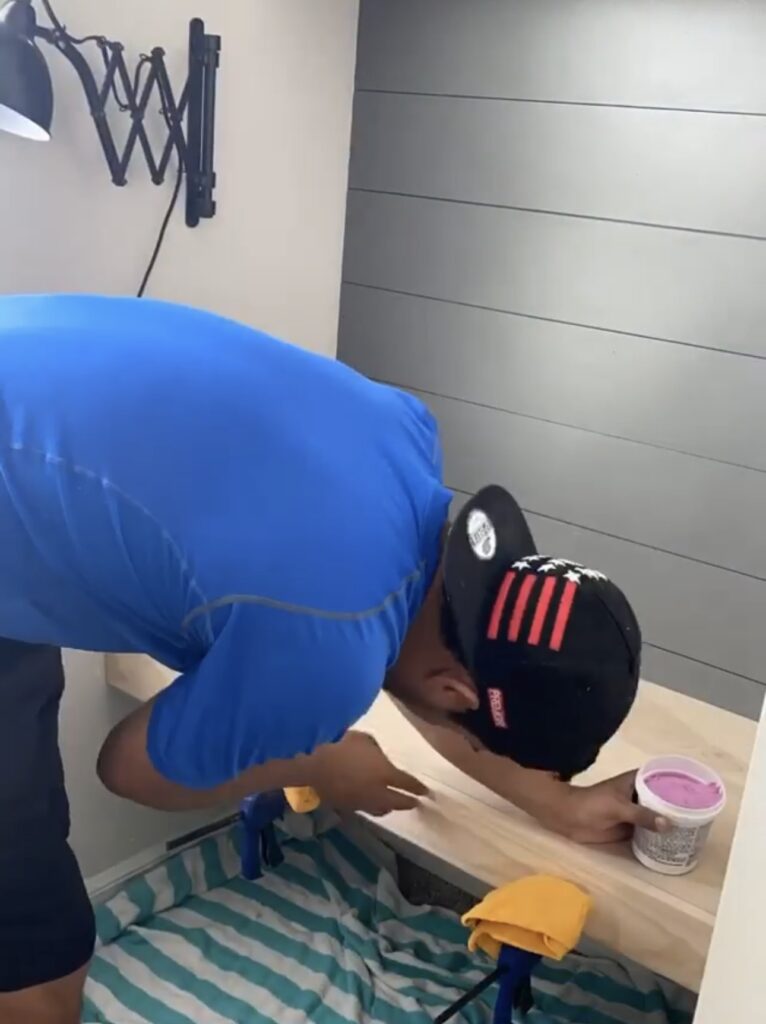
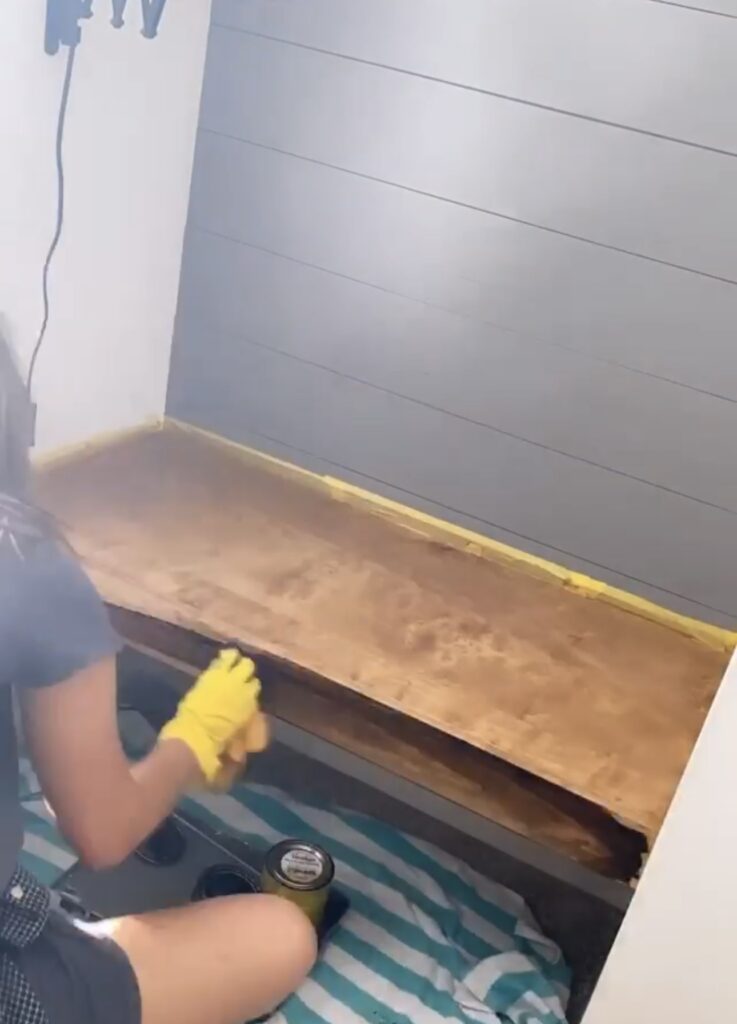
We also added a 1×4 for the front face of the board. We used wood glue for this as well and nailed it in with a few of finishing nails for good measure. We clamped it to keep it in place while the wood glue dried. Then we filled in the seam of the seat and front face board and the small nail holes with wood filler and sanded over them. The last step was the stain the bench! The color was a little darker than the floating shelves so I gave the bench a light sanding over the stain and it was perfect! We finished with a coat of polyurethane to seal the bench and give it a semi-gloss finish!
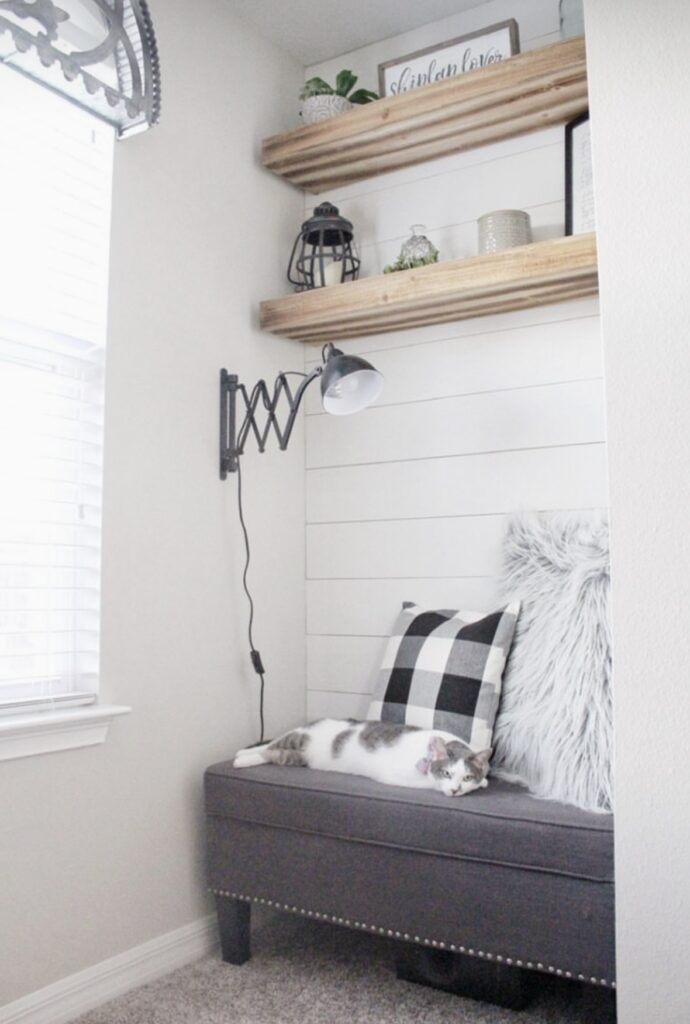
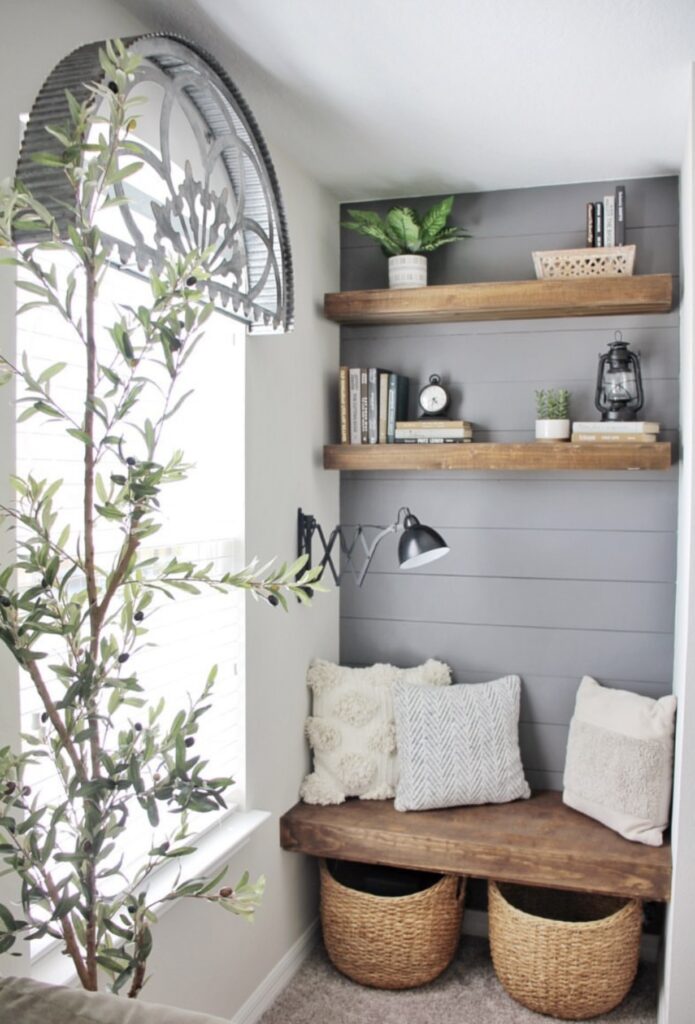
It turned out so good and really elevated the look of that small corner! This was such a fun project that we loved and hope it inspired you to see that functional spaces can also be beautiful!
Leave a Reply
Grab our FREE download
Wanna know the 5 must have tools you need before you start?
Considering a DIY Project?


Be the first to comment