


Jeffrey Court Renovation Challenge: Week 1 Demo
Week 1: Demo
ITS DEMO DAY (WEEK)!!
We’ve always wanted to say that, and it FEELS SOOOO GOOD. You may think we’re crazy for wanting to demo our bathroom and rip out our one year old floor tile, but hey here we are folks! Quality content coming at ya, haha. This renovation challenge was really intimidating to us when we first got asked to join, not gonna lie, but we love a good challenge, so we’re diving right into it. We’ve never demoed anything, never done tile work, and especially never done one of our projects as a part of a competition, so all of this is new to us.
Game Plan
Lets talk our plan for a minute so you guys all know what’s going to be happening over the next several weeks. We are replacing our floor tile and adding tile on the wall, both supplied by Jeffrey Court. We are removing the large builder mirror and replacing it with two individual mirrors over each sink. We are replacing the builder grade light fixtures and all faucets (sinks, tub, shower head). We will also be painting the cabinets and adding new accessories such as new cabinet hardware, towel rings, a toilet paper holder and a towel bar. We are also changing all of the decor throughout the bathroom, making it more modern/farmhouse and getting rid of that basic bathroom feel! Lots of exciting things and I can’t wait to see it all come together!
Now back to the demo
Remember those old Staples commercials where they push the big red button and it says “That was easy”? Well, after we completed this demo I wish I had one of those buttons to push. It was honestly not as difficult as we anticipated, and it was so fun! The demo took us three days, but we also work full-time jobs, so it would have taken us probably only two days if we didn’t have work also. As long as you have the correct tools, the demo isn’t going to be as bad as you think. Before we get started, I think you need to see some before pictures of our bathroom!
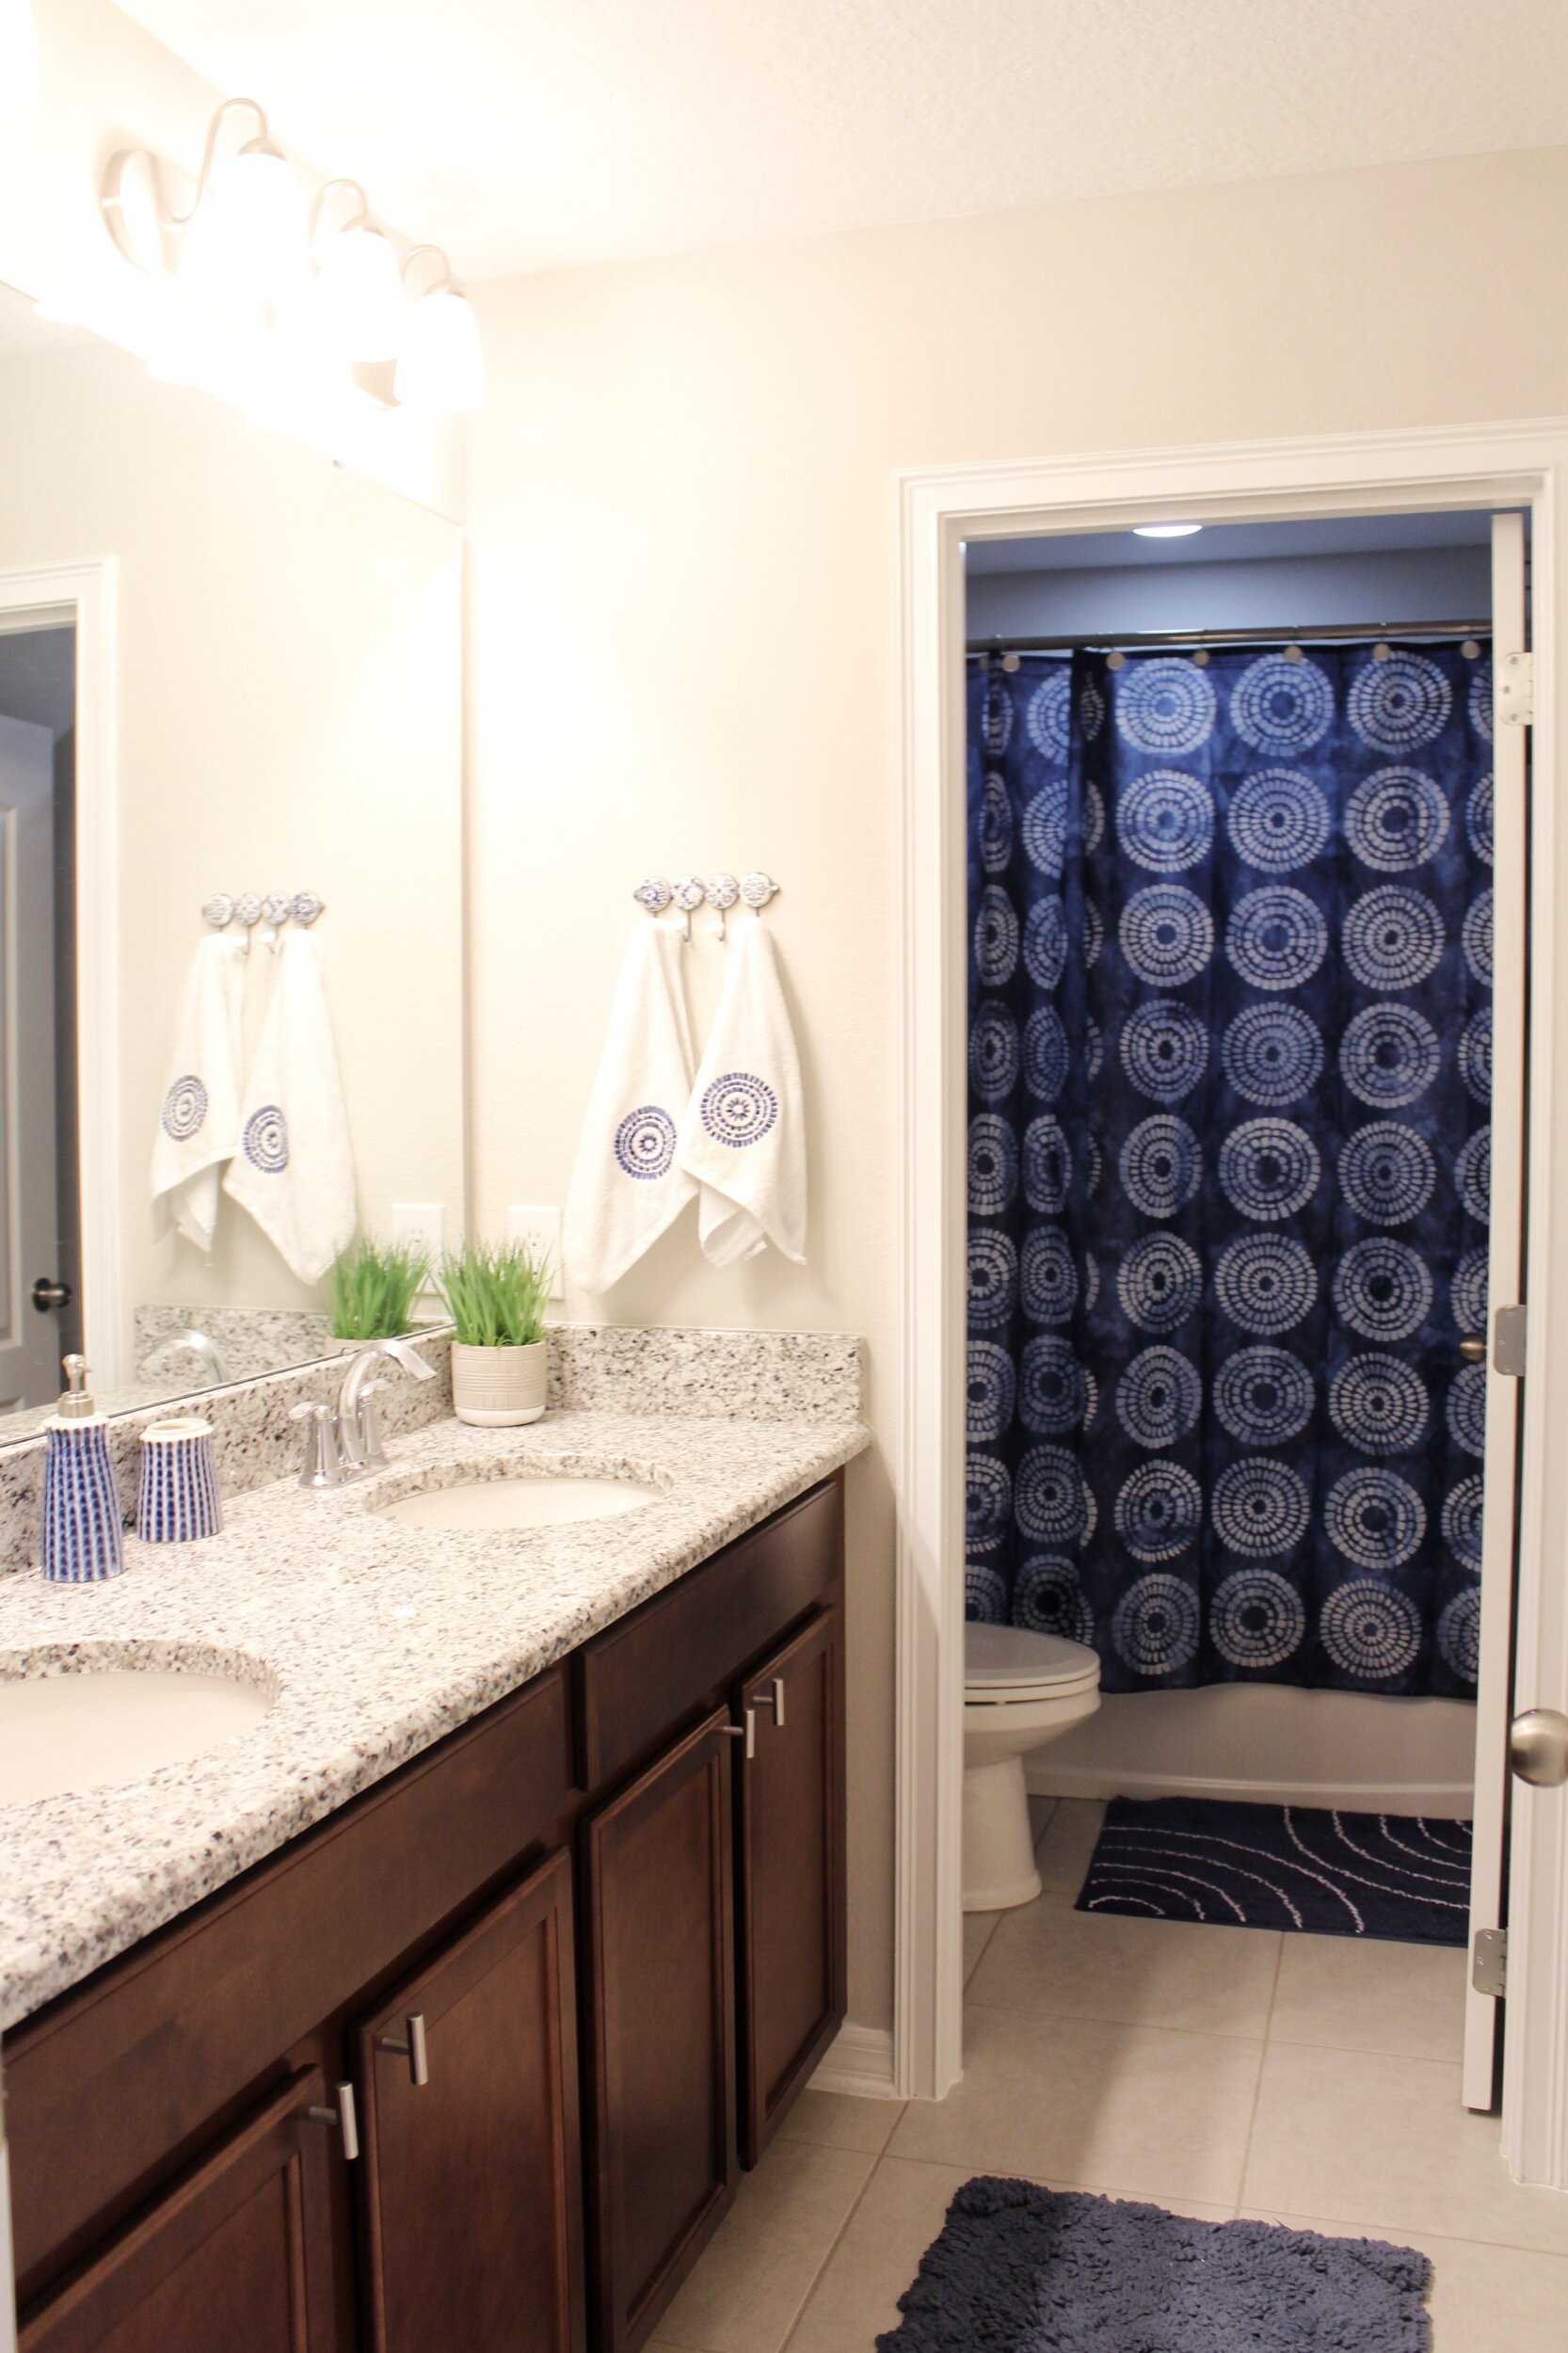
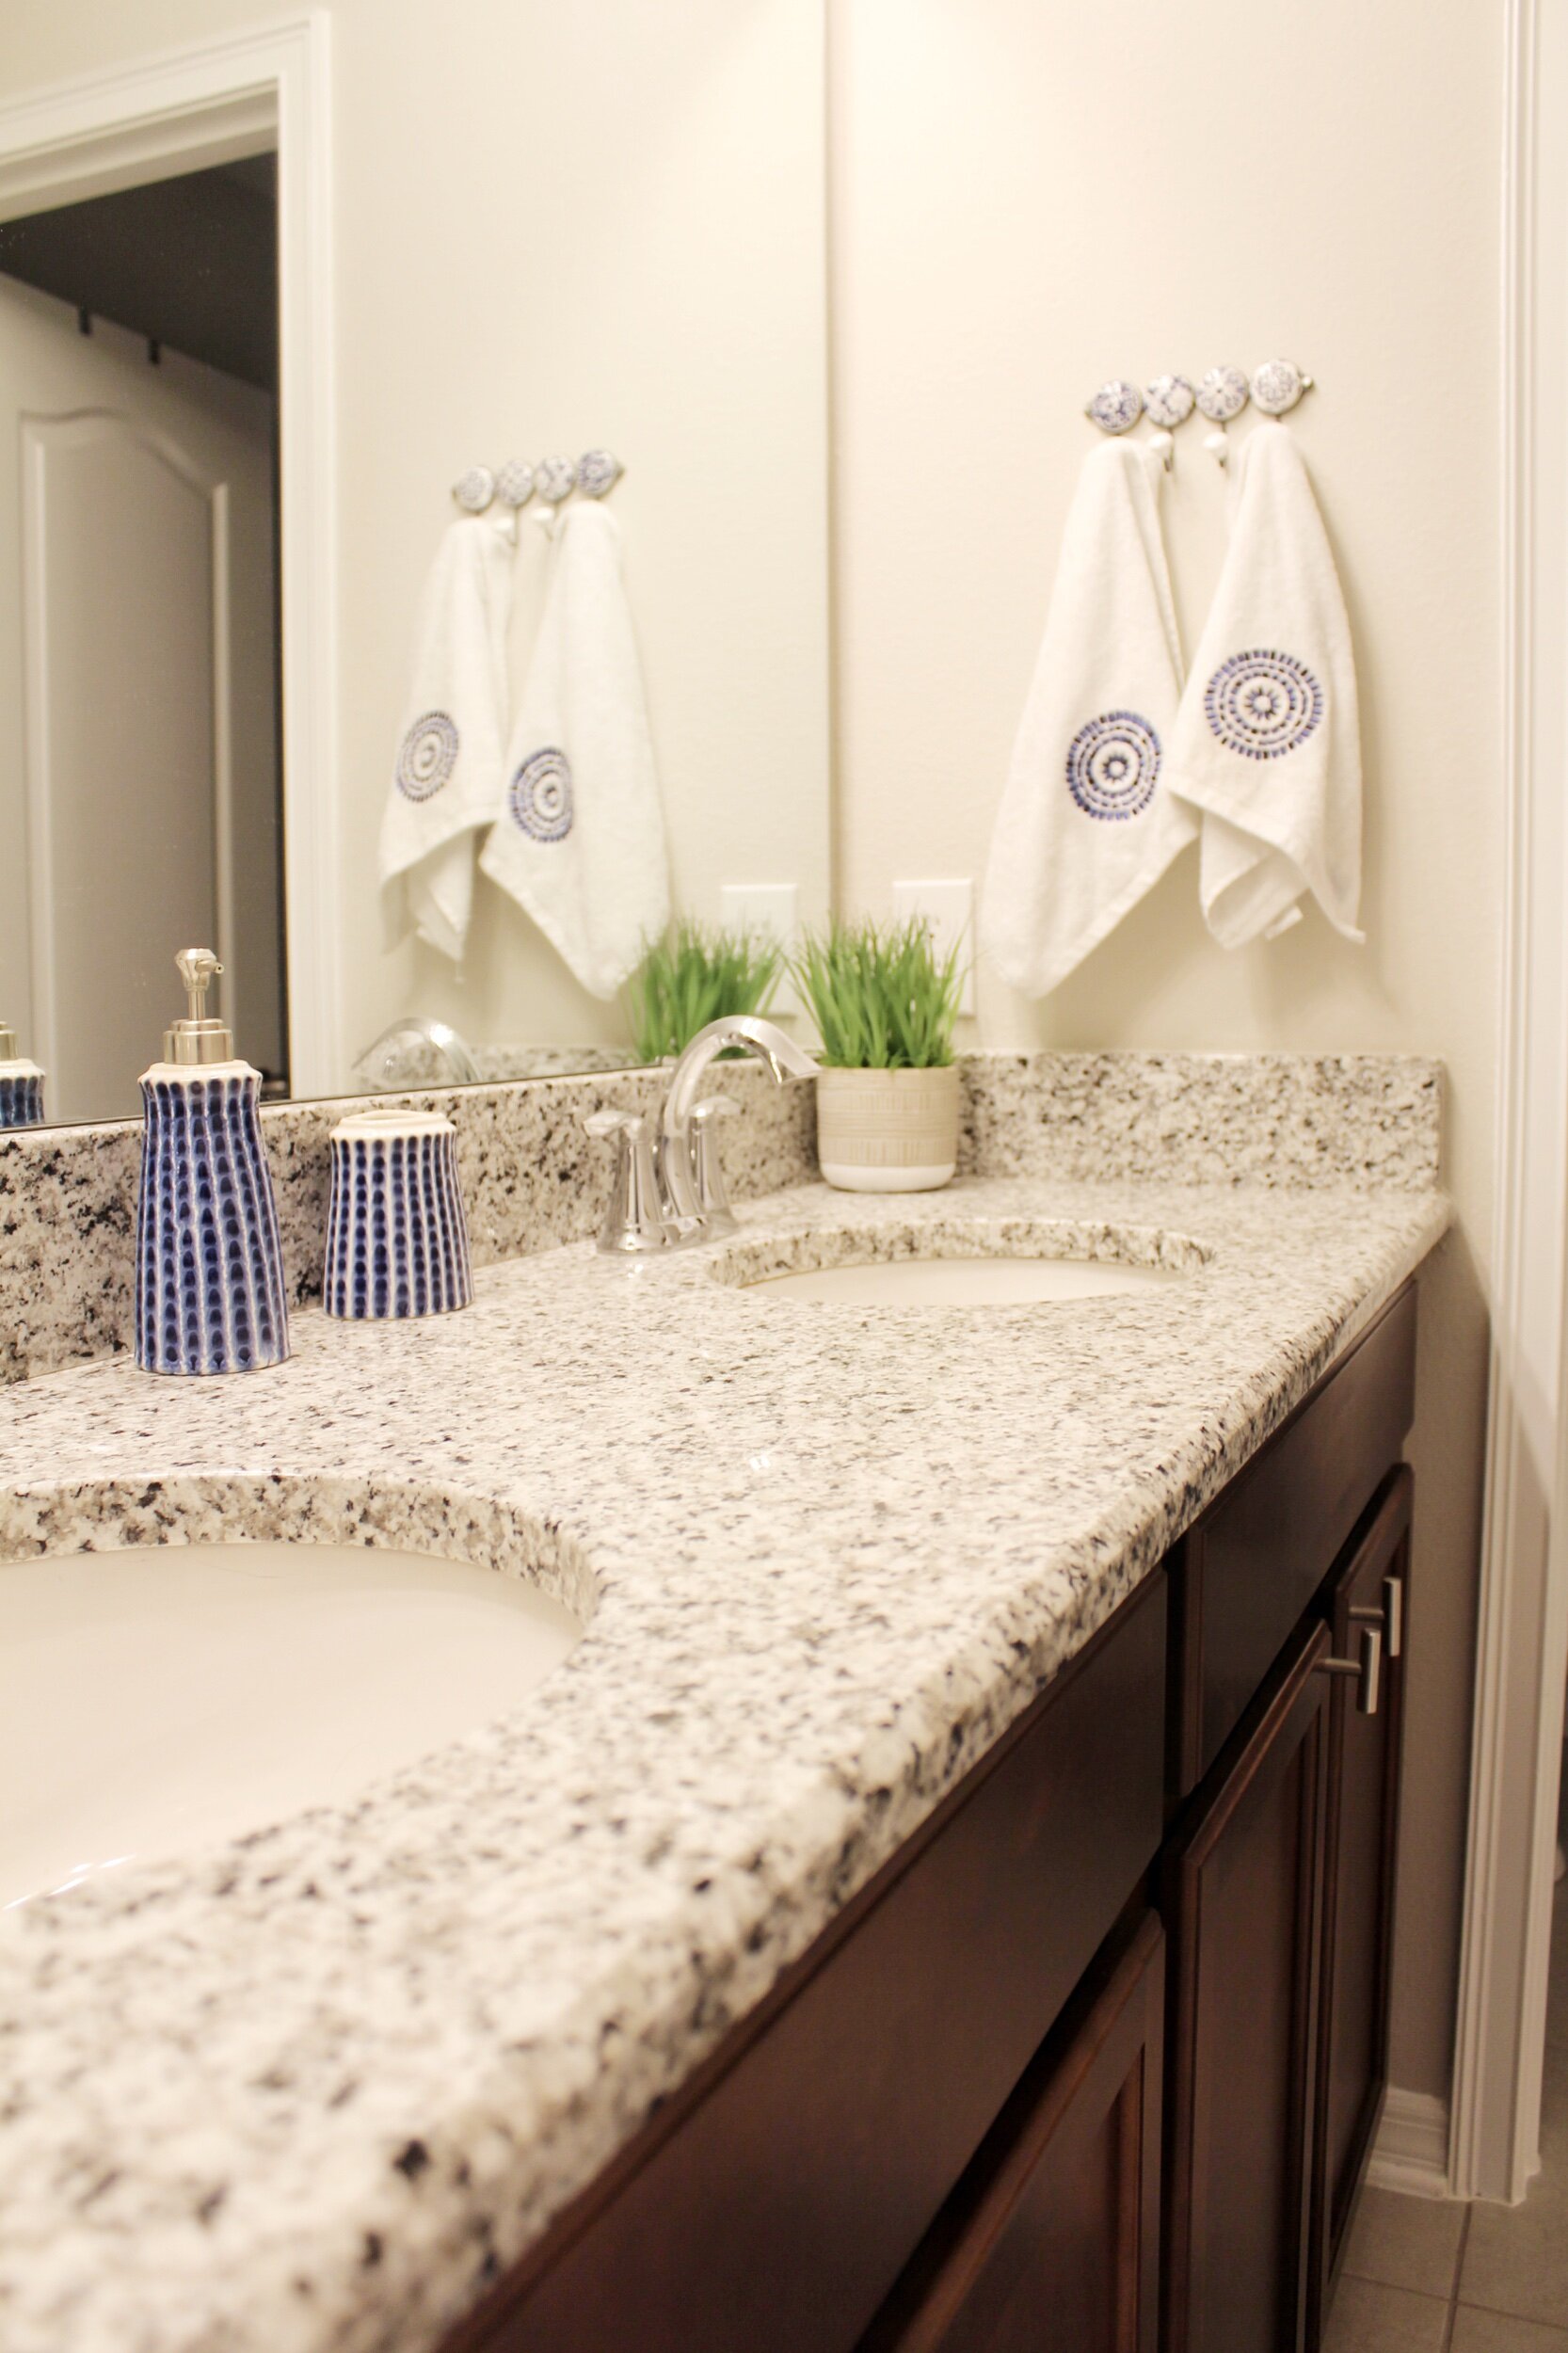
Before.
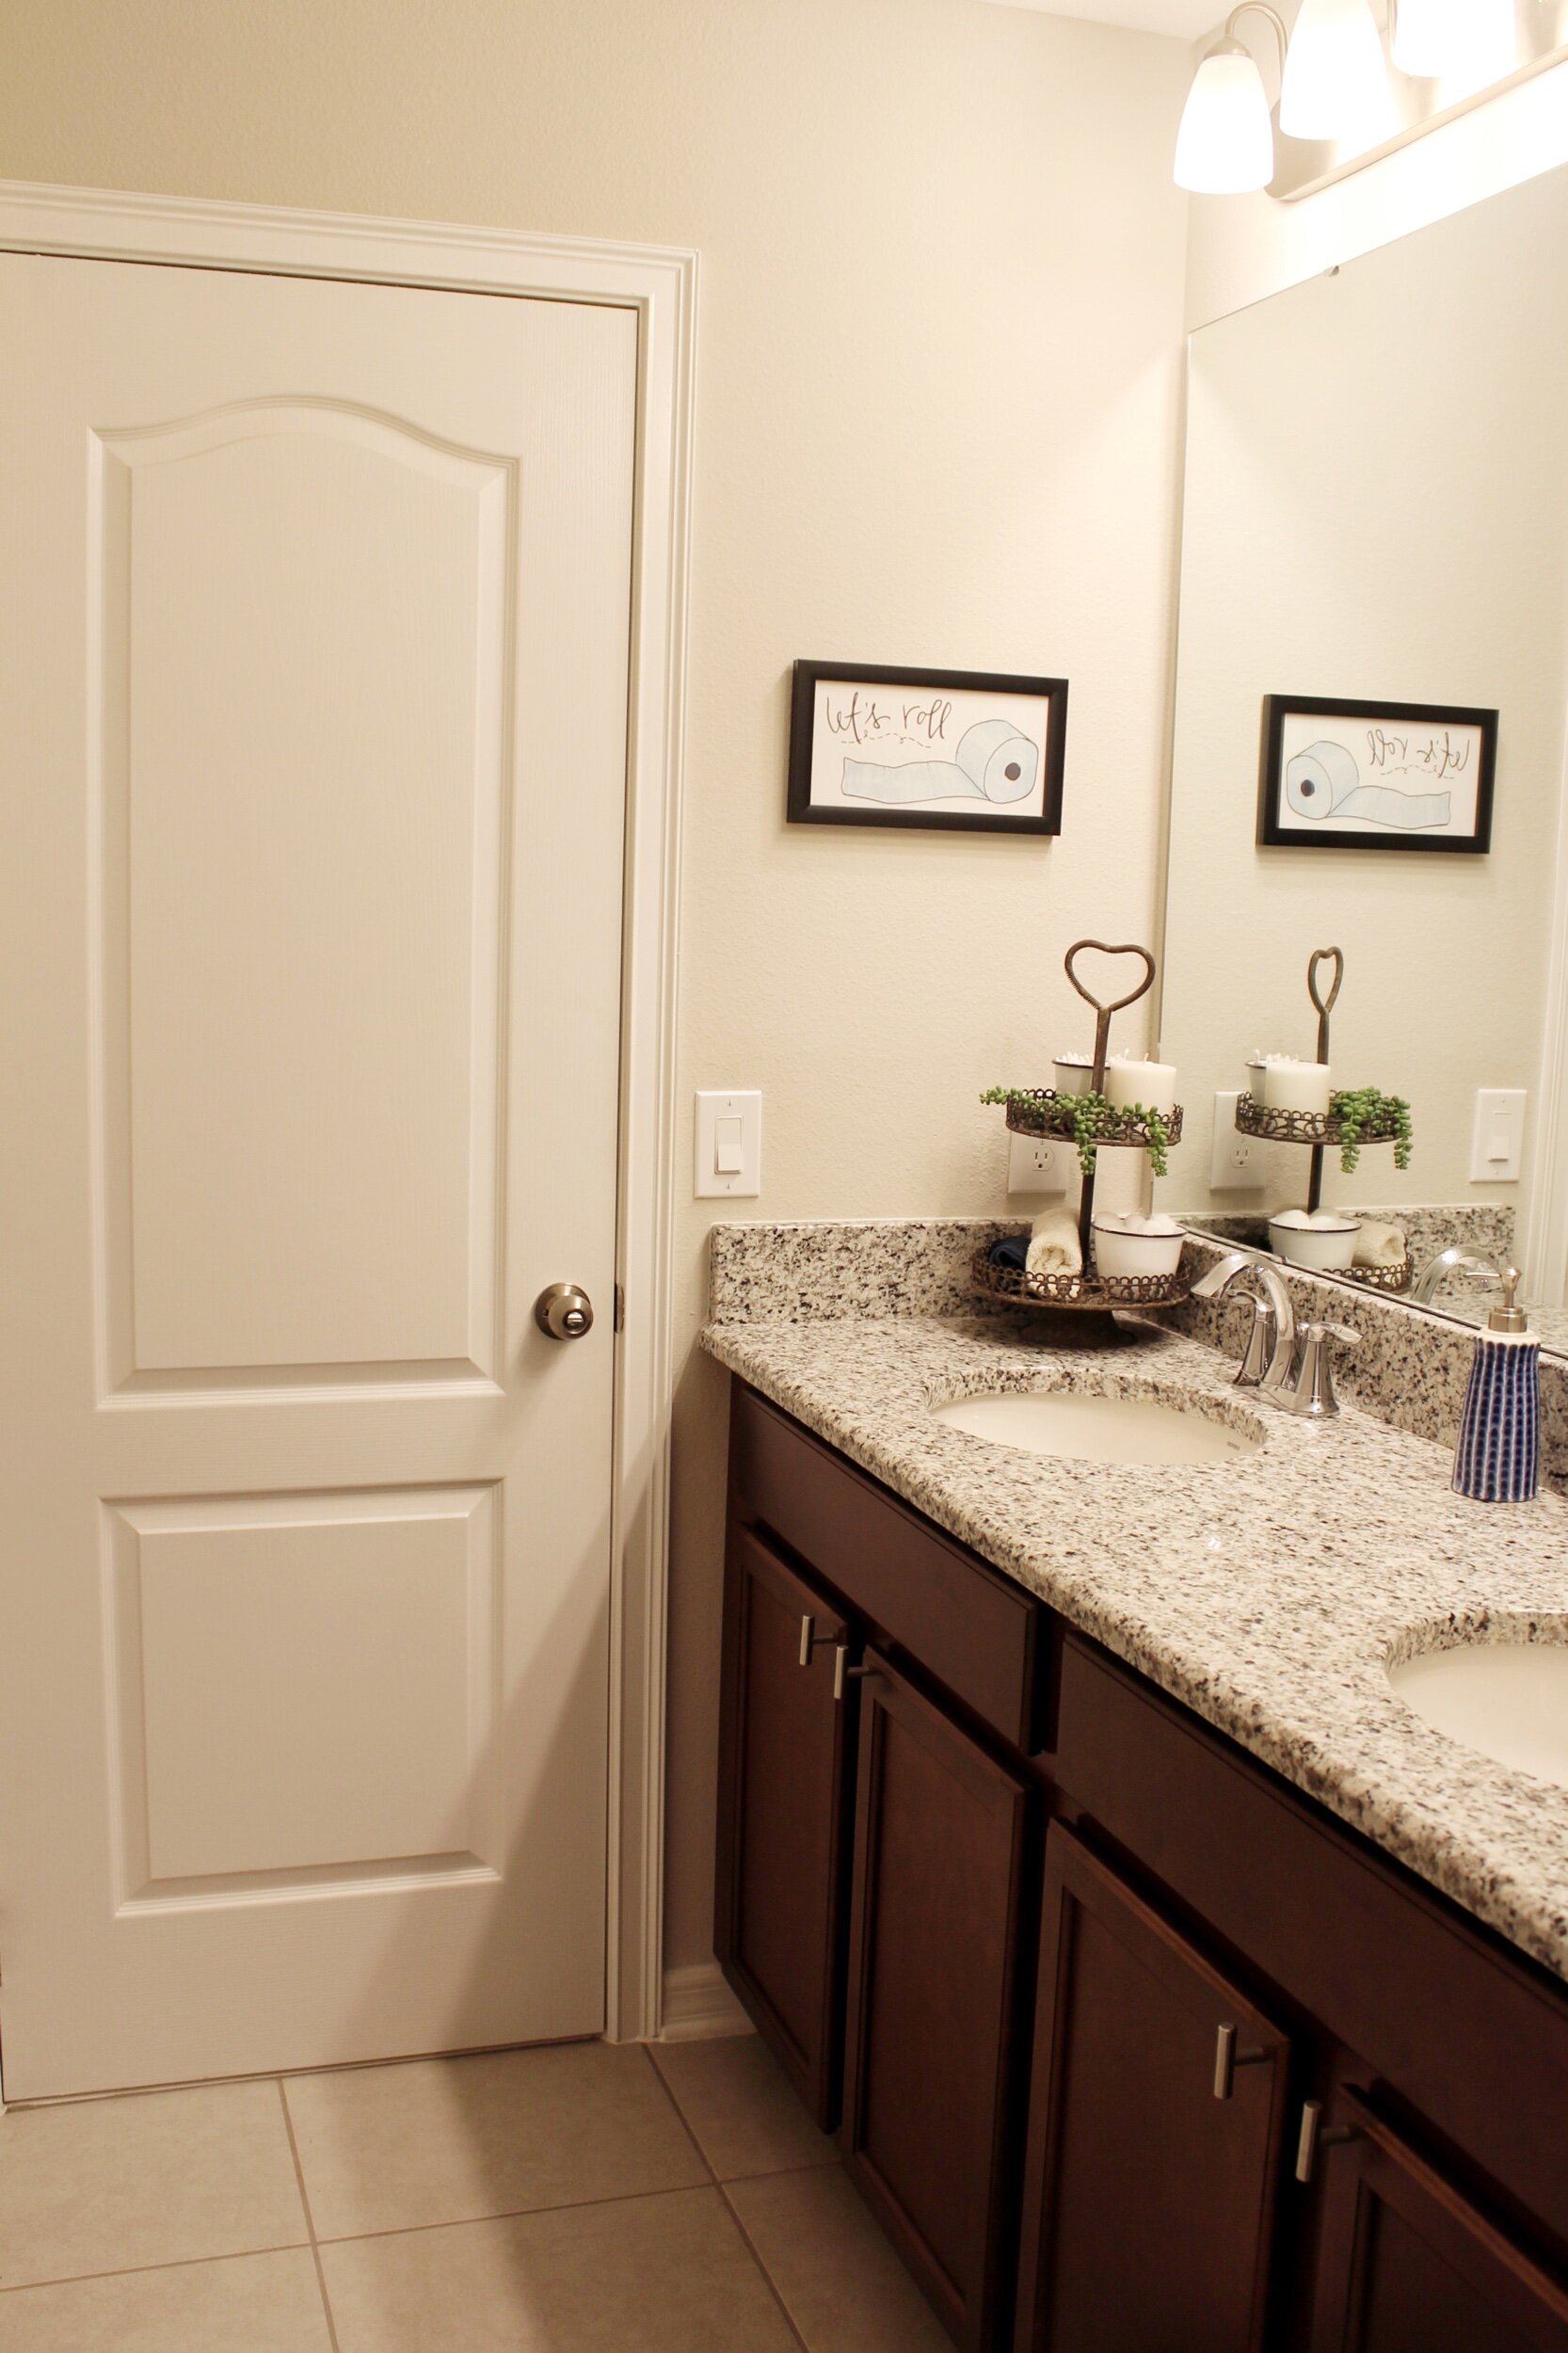
Before.
Ok, lets start with the tools/supplies we used for this tile demo:
*All products are linked and compensation is rewarded for purchases made through those links.
3. Genesis multi-purpose oscillating tool
4. 1/8” in grout removal blade
6. 1/4” HardieBacker cement boards/screws
7. Shop Vac (not our exact one)
9. Jig Saw
10. Pry-bar/hammer
11. Dust mask
13. Safety glasses
14. Large bucket/trash bags
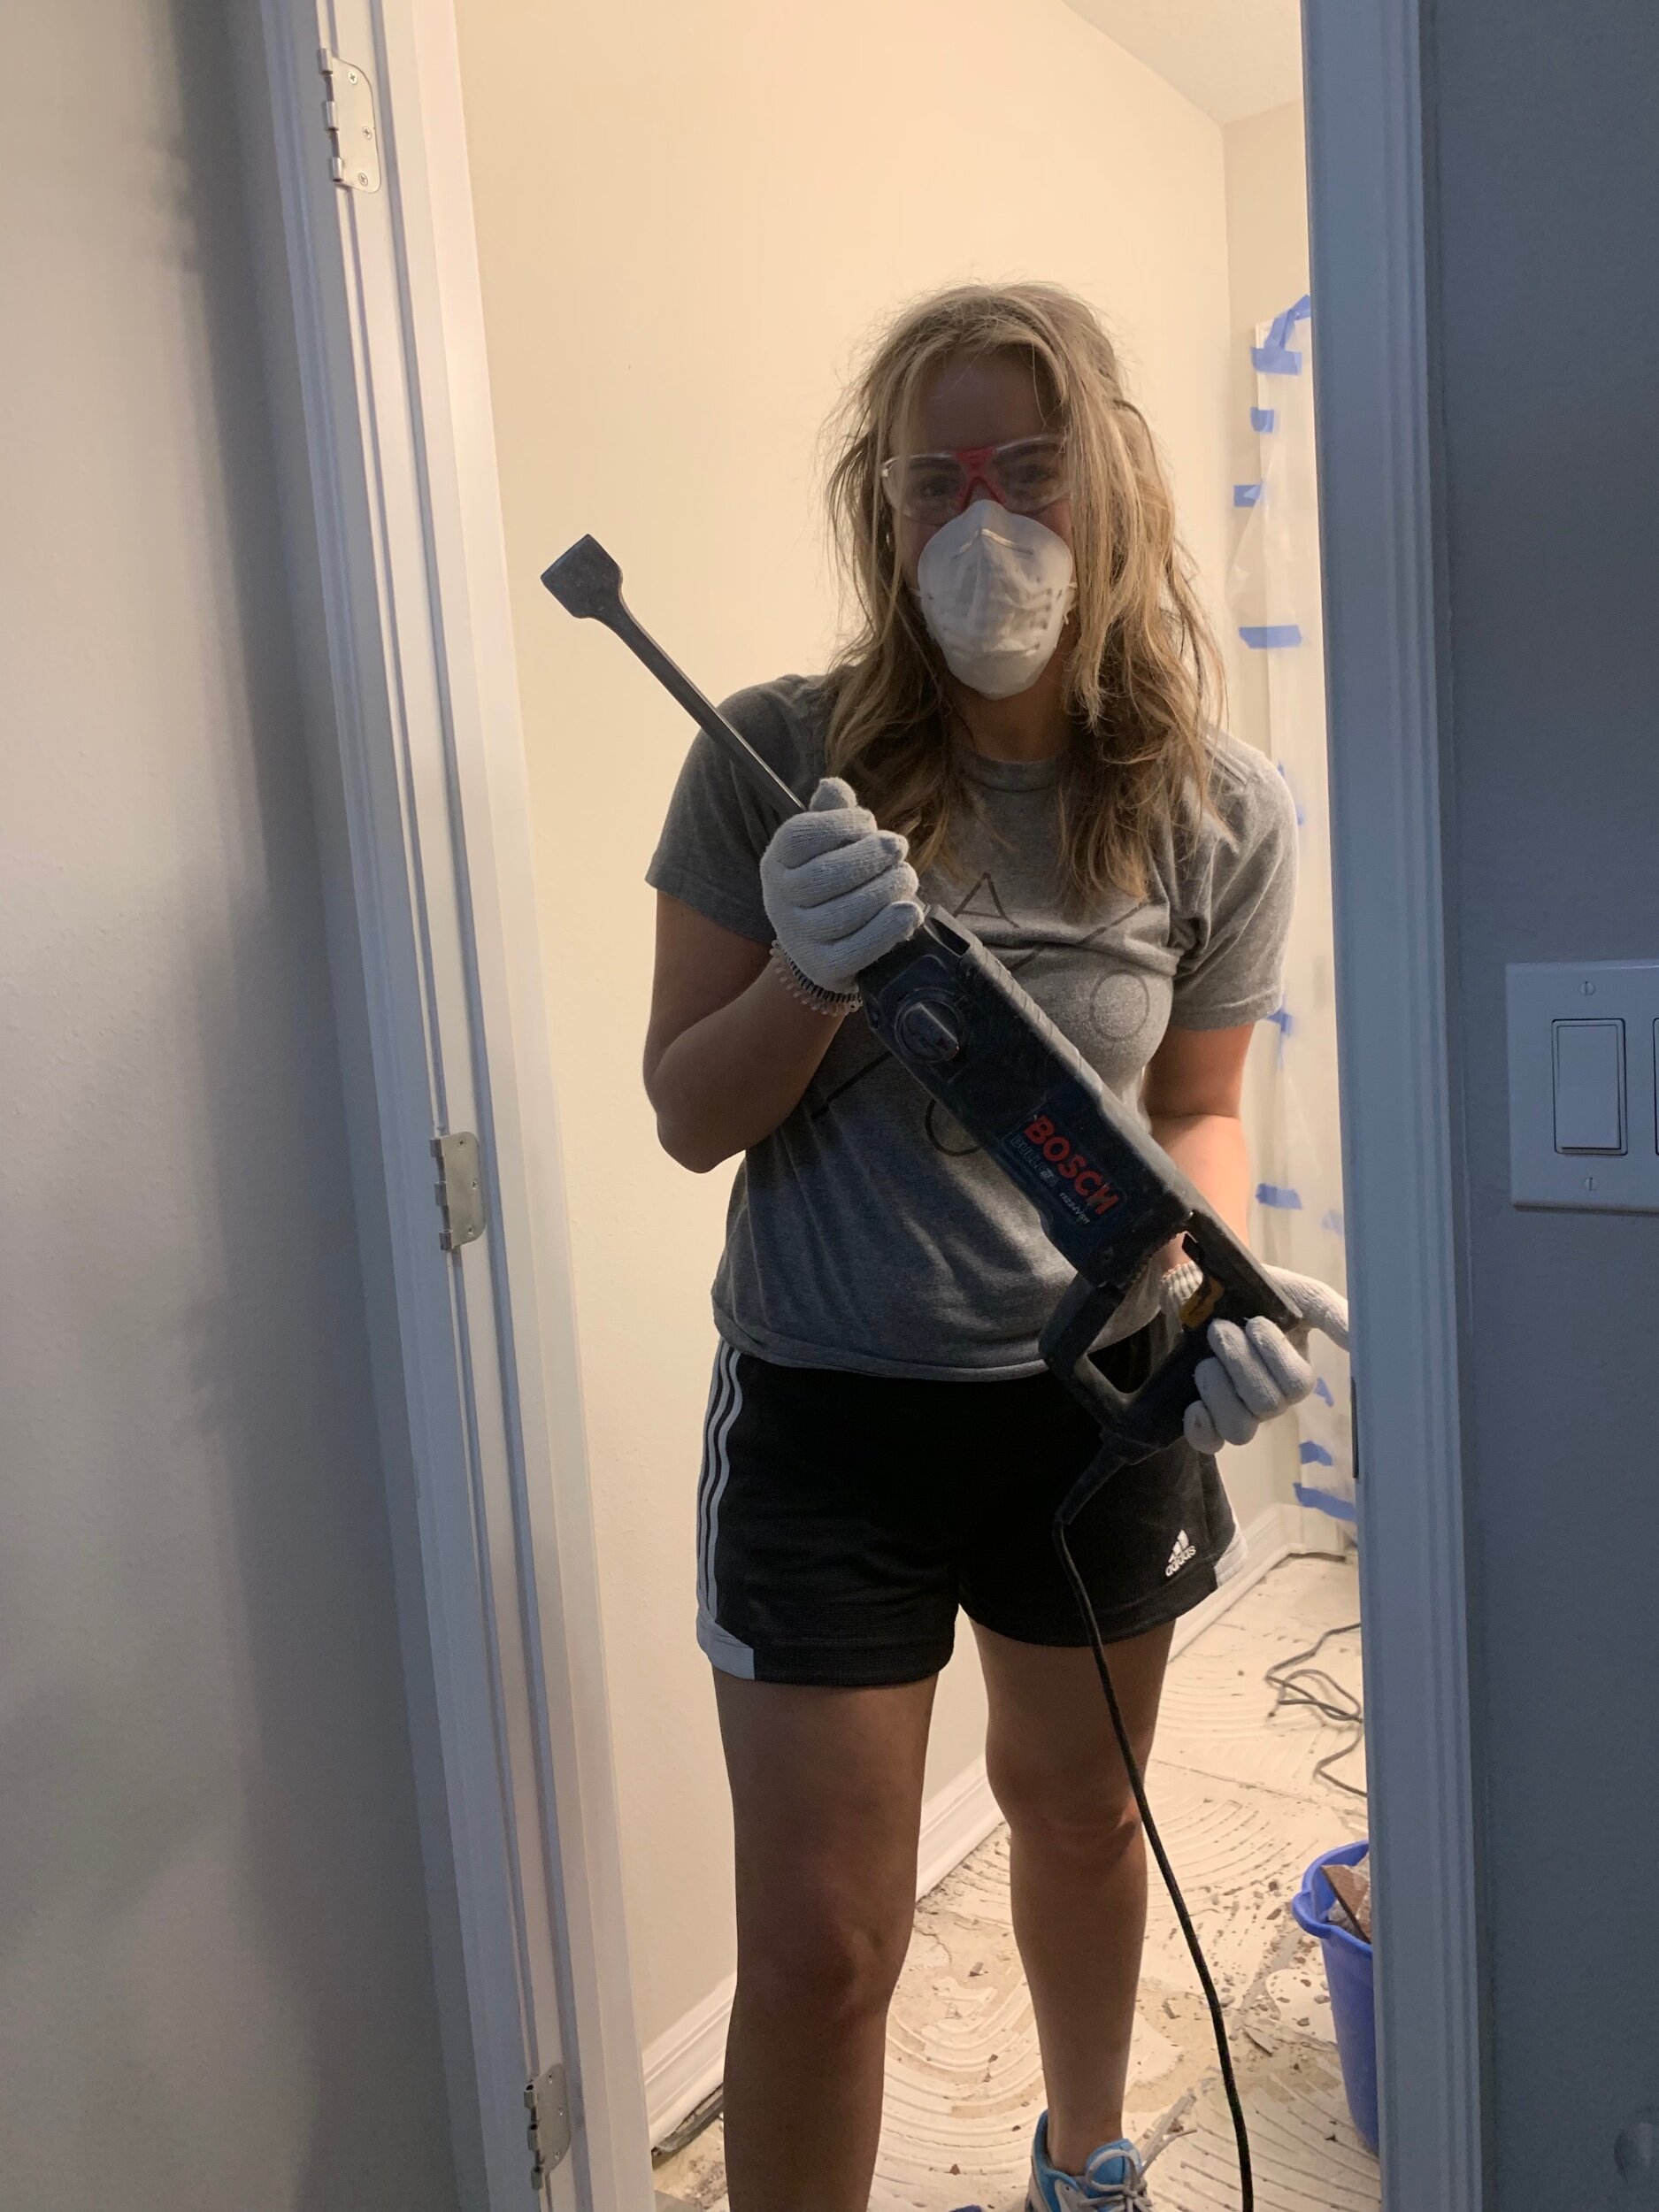
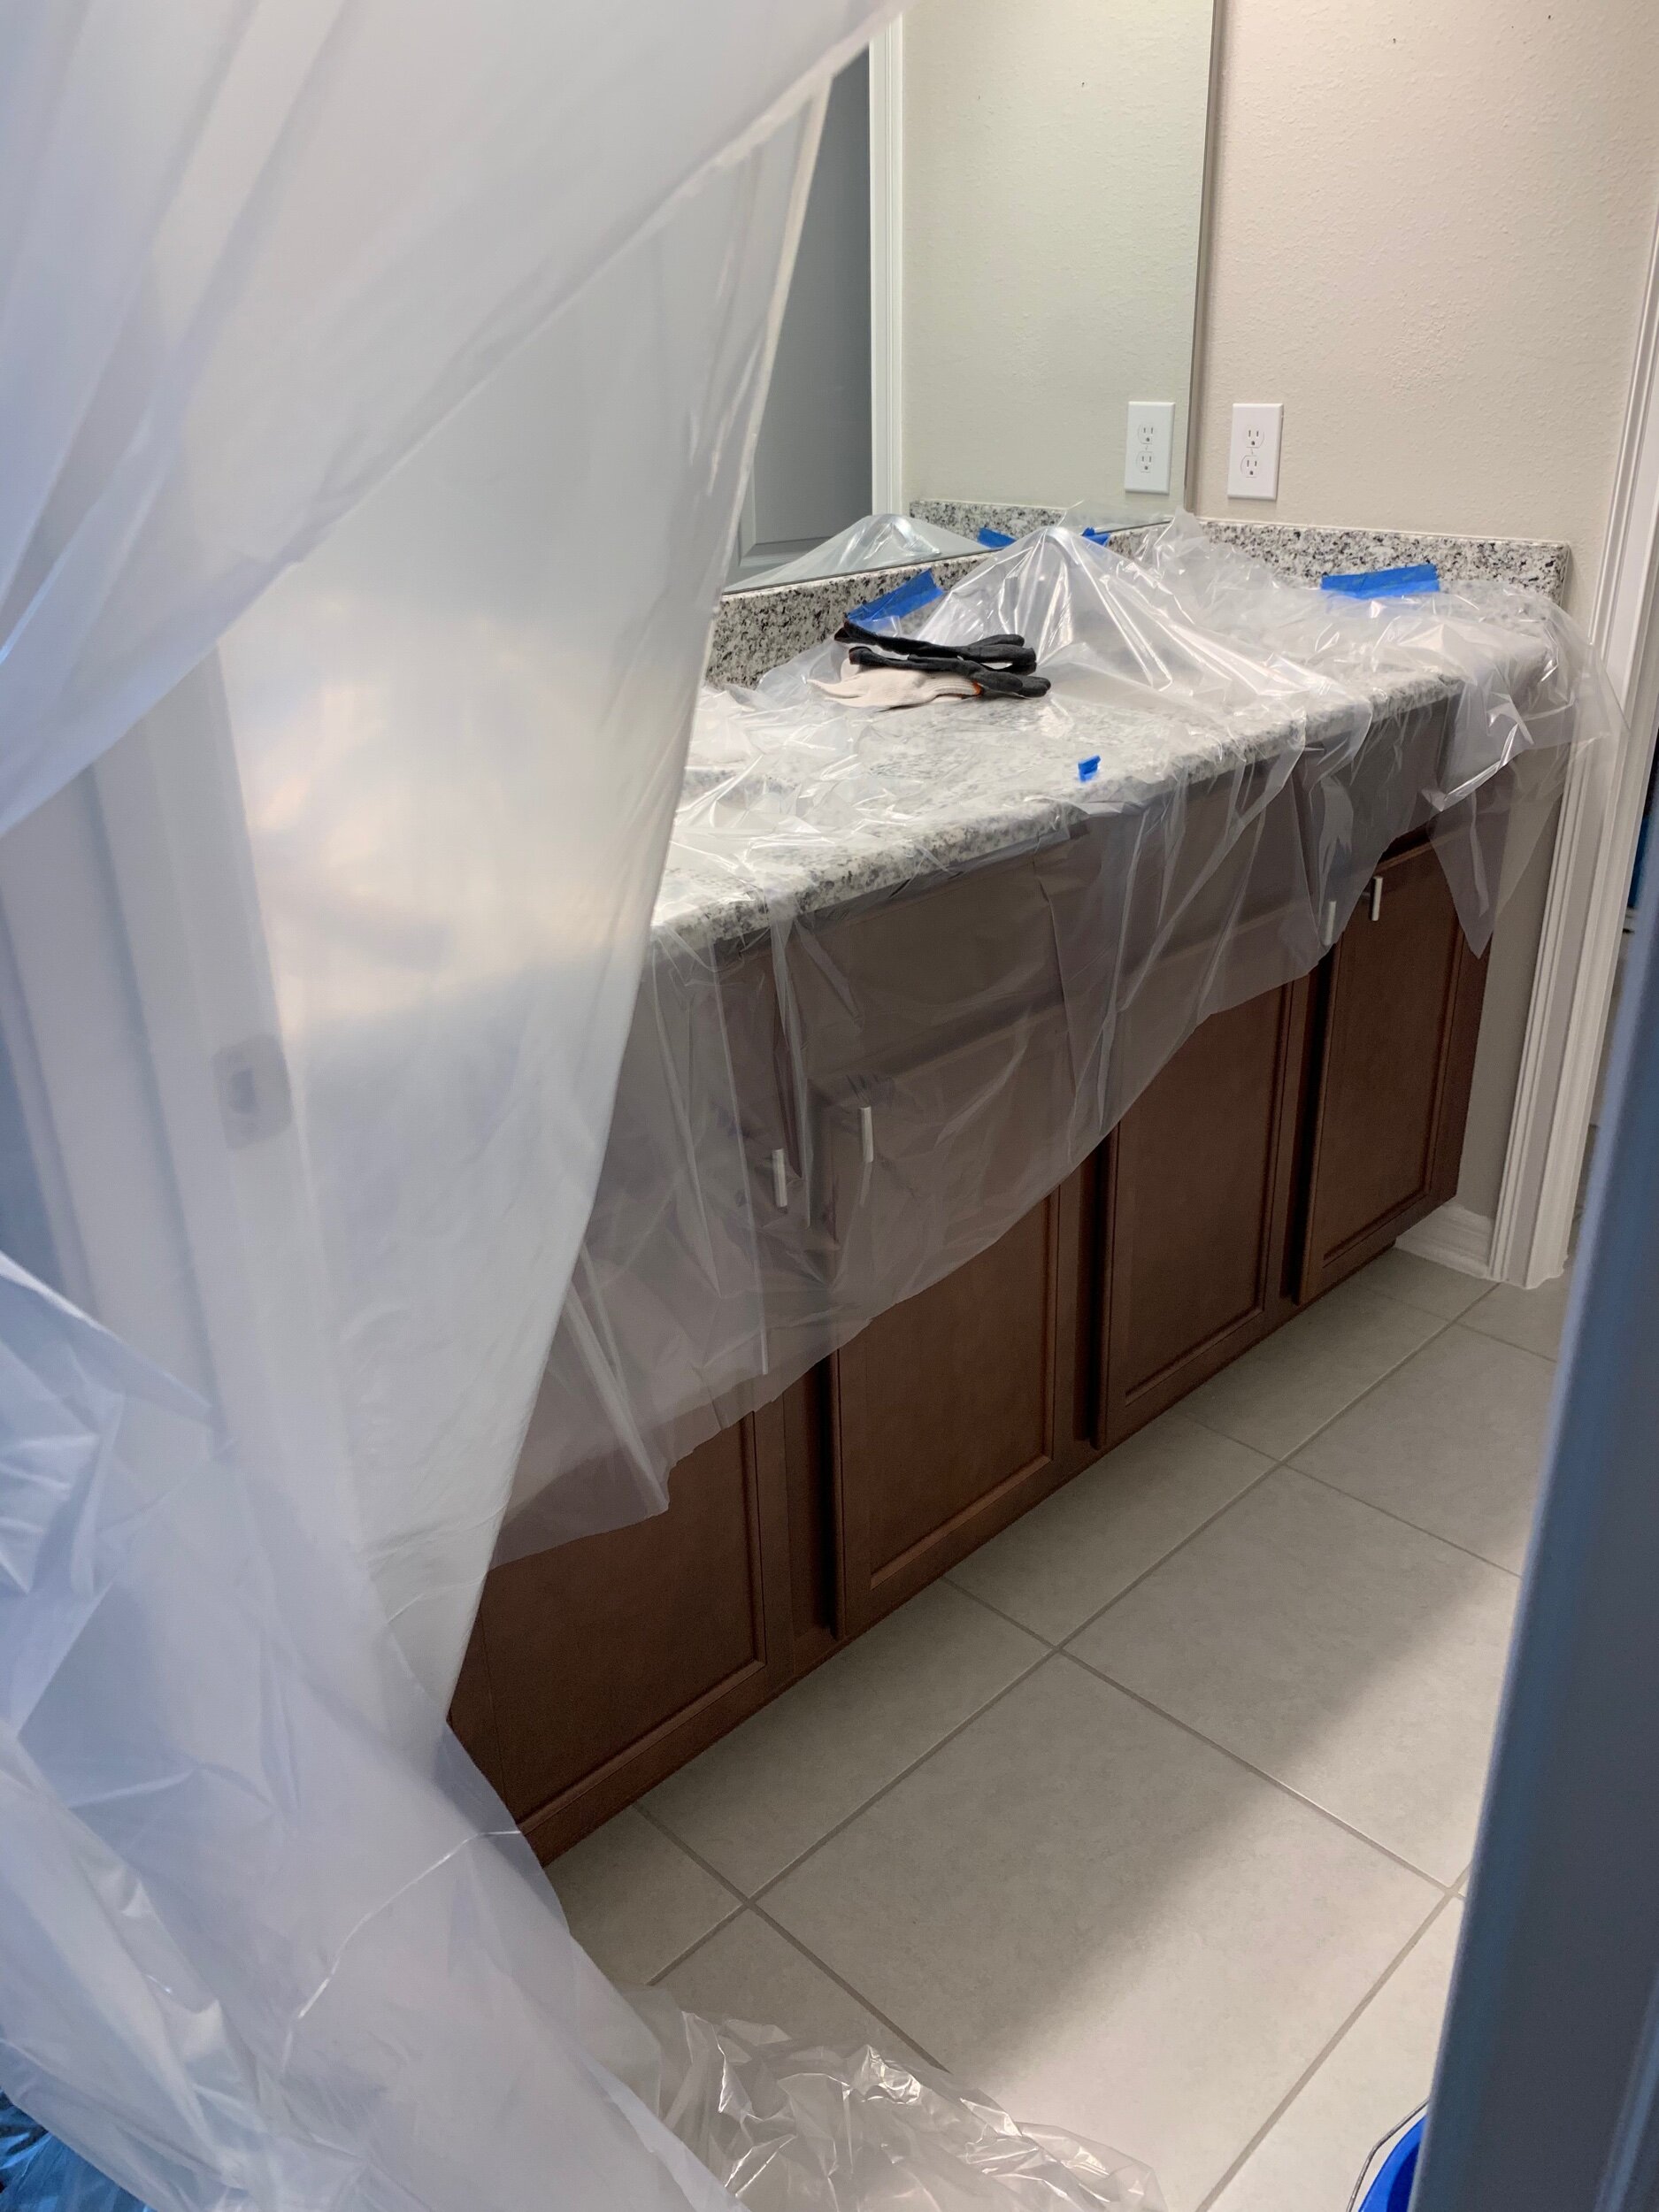
The first thing you need to know is that removing your existing floor tile is going to be MESSY… There is going to be dust everywhere. I’m talking dust in places you didn’t even know existed. You will need safety glasses and a dust mask, the better of quality, the better off you’ll be, inhaling all that dust is no bueno for your health. We also didn’t want the rest of our home to get messy, so we bought a large roll of plastic sheeting (linked above) and went Dexter style with it. We hung it up and placed it everywhere, we put two layers on the door frame so the dust would stay confined to the bathroom, we put it on the carpet outside of the bathroom, over the countertops, and we covered the two AC vents in the bathroom because we didn’t want the dust to get into our AC ducts. And honestly, no dust left the bathroom, so mission accomplished.
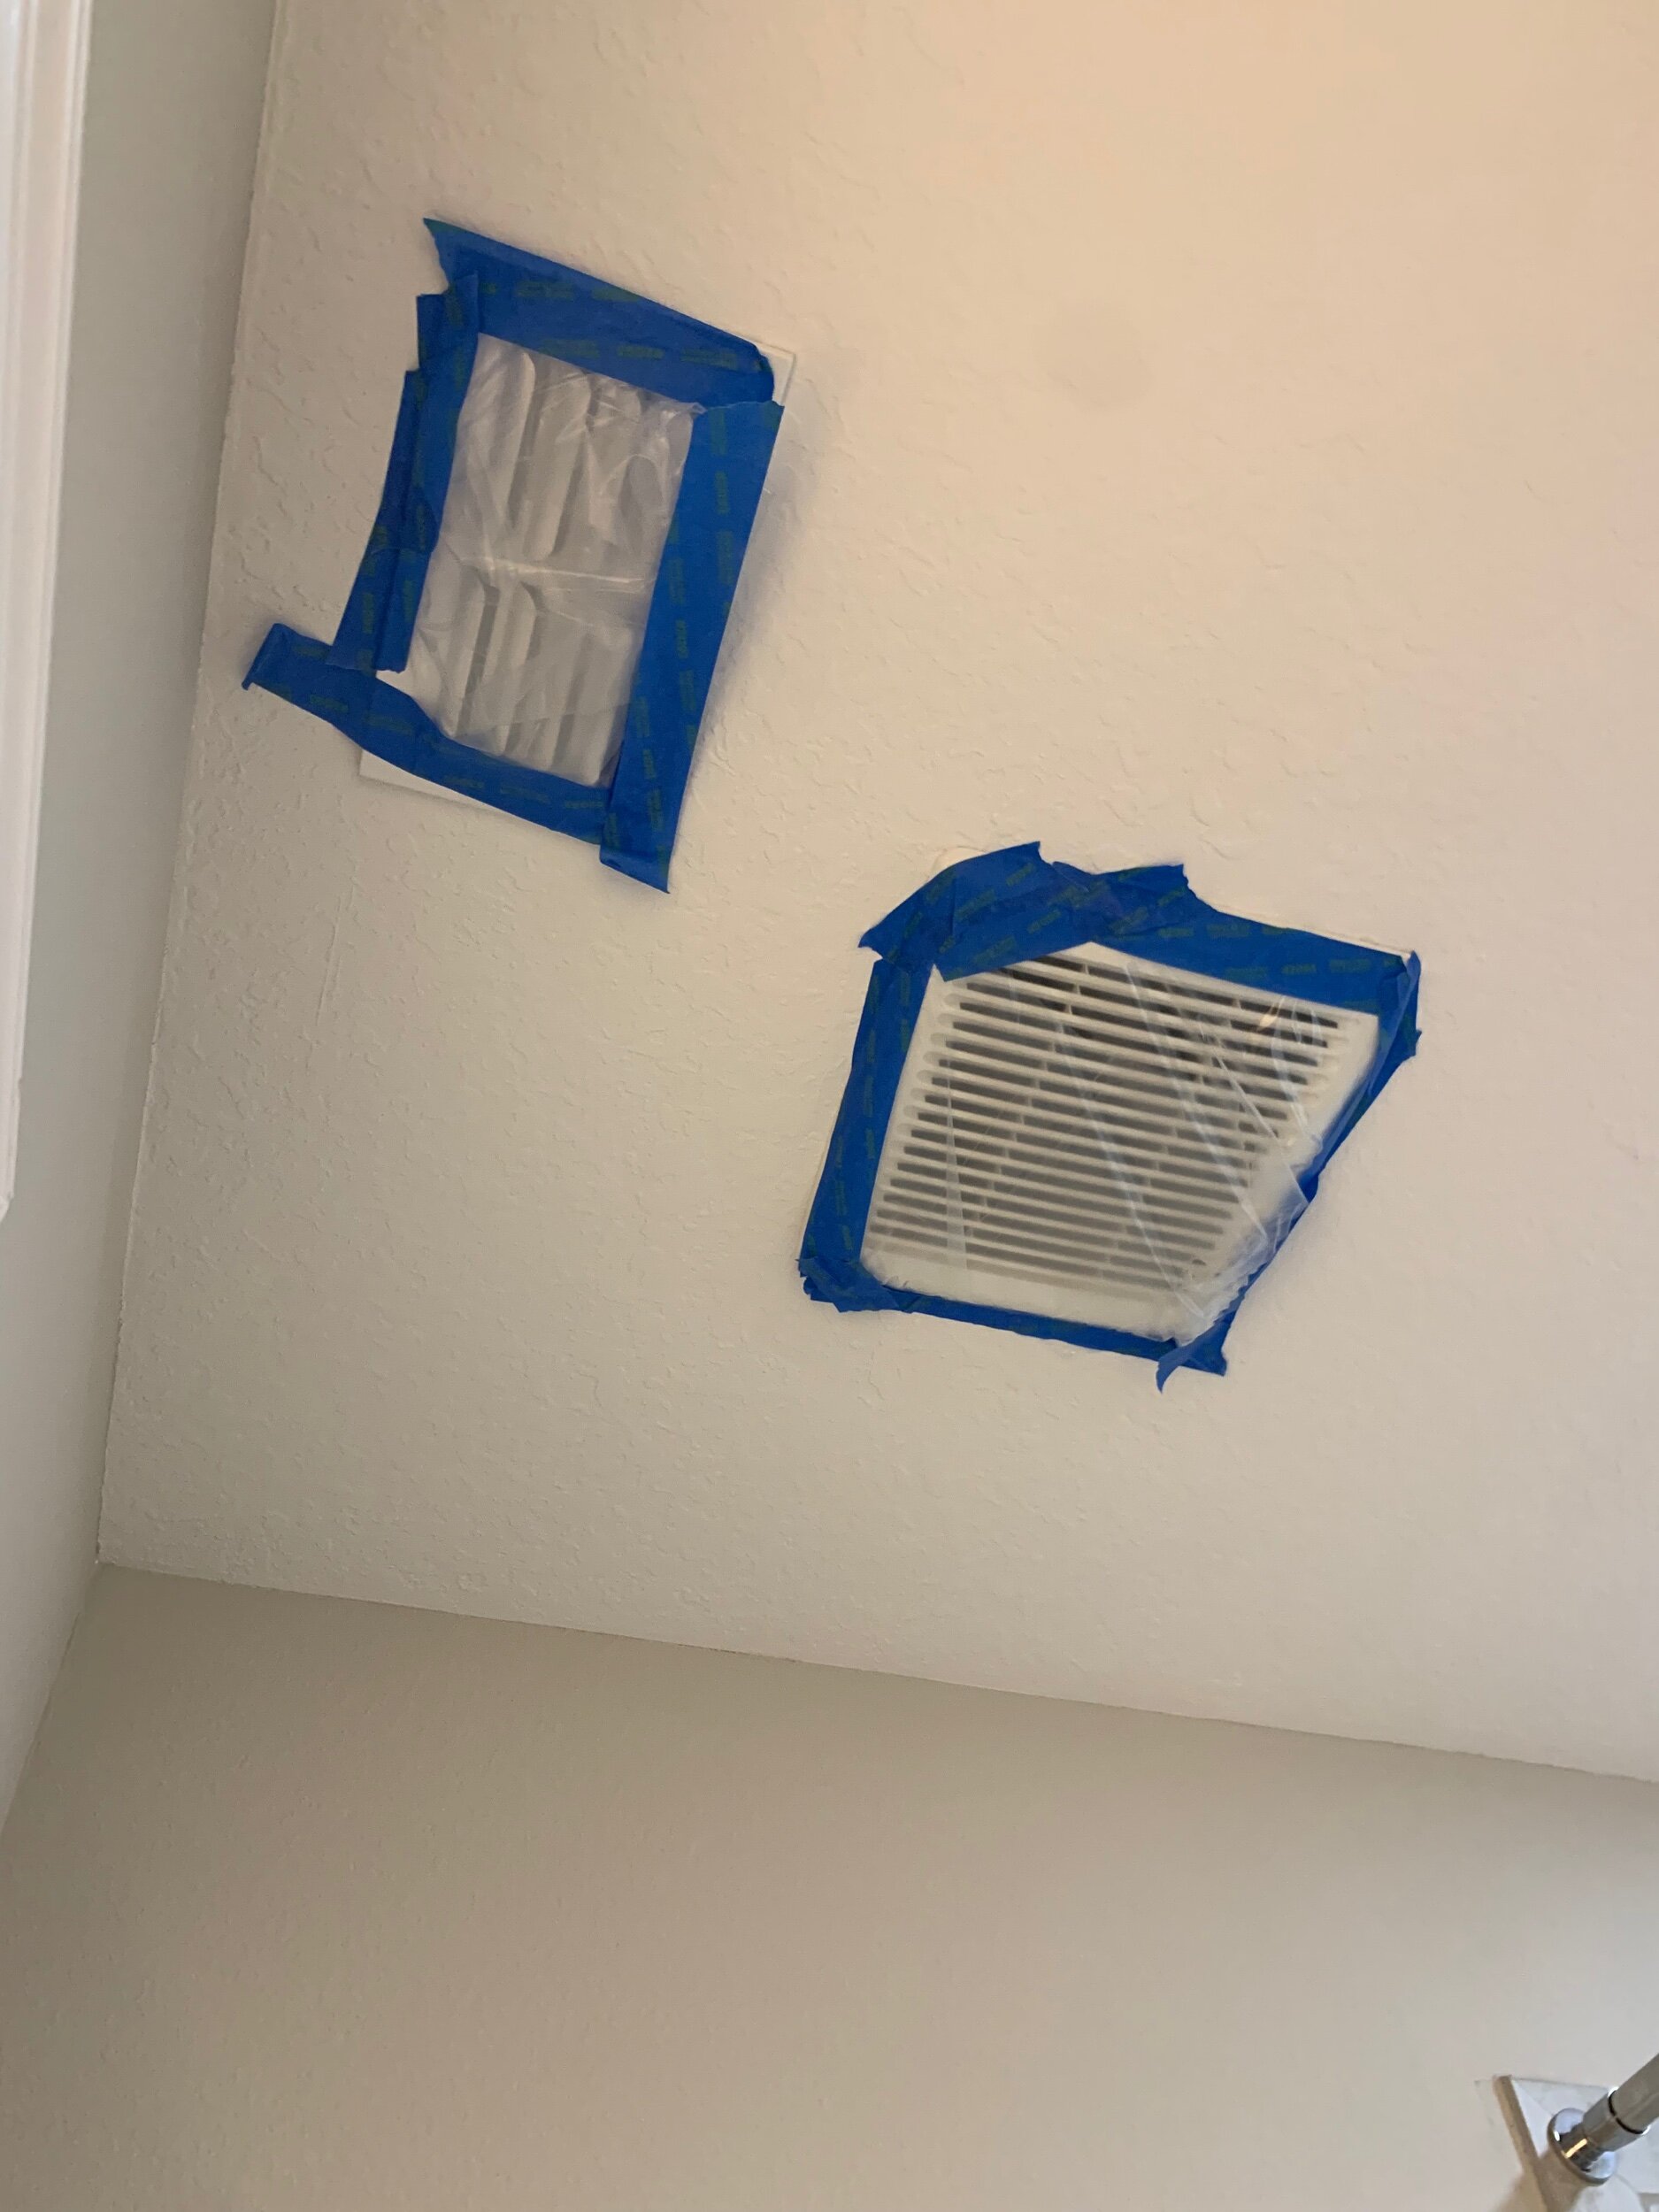
We also covered the AC vents so no dust gets into our air ducts.
Some major Dexter vibes going on haha
Step One: Prepping your Space
You’ll want to start by prepping the space. Like i said, we covered the area with the plastic sheeting and ensured we had the proper safety tools. Although we left the baseboards and door frames on to try to make less work for ourselves later, you may to remove them so they don’t get damaged. Because we left the baseboards on, we needed to take a razor blade and score all of the caulk lines where the trim meets the tile. We also went ahead and removed the toilet because it sat on top of the existing tile and it needed to be taken out before any demo started. We also took off both doors so they did not get in the way, and removed the kick plate from the bottom of the vanity cabinets.
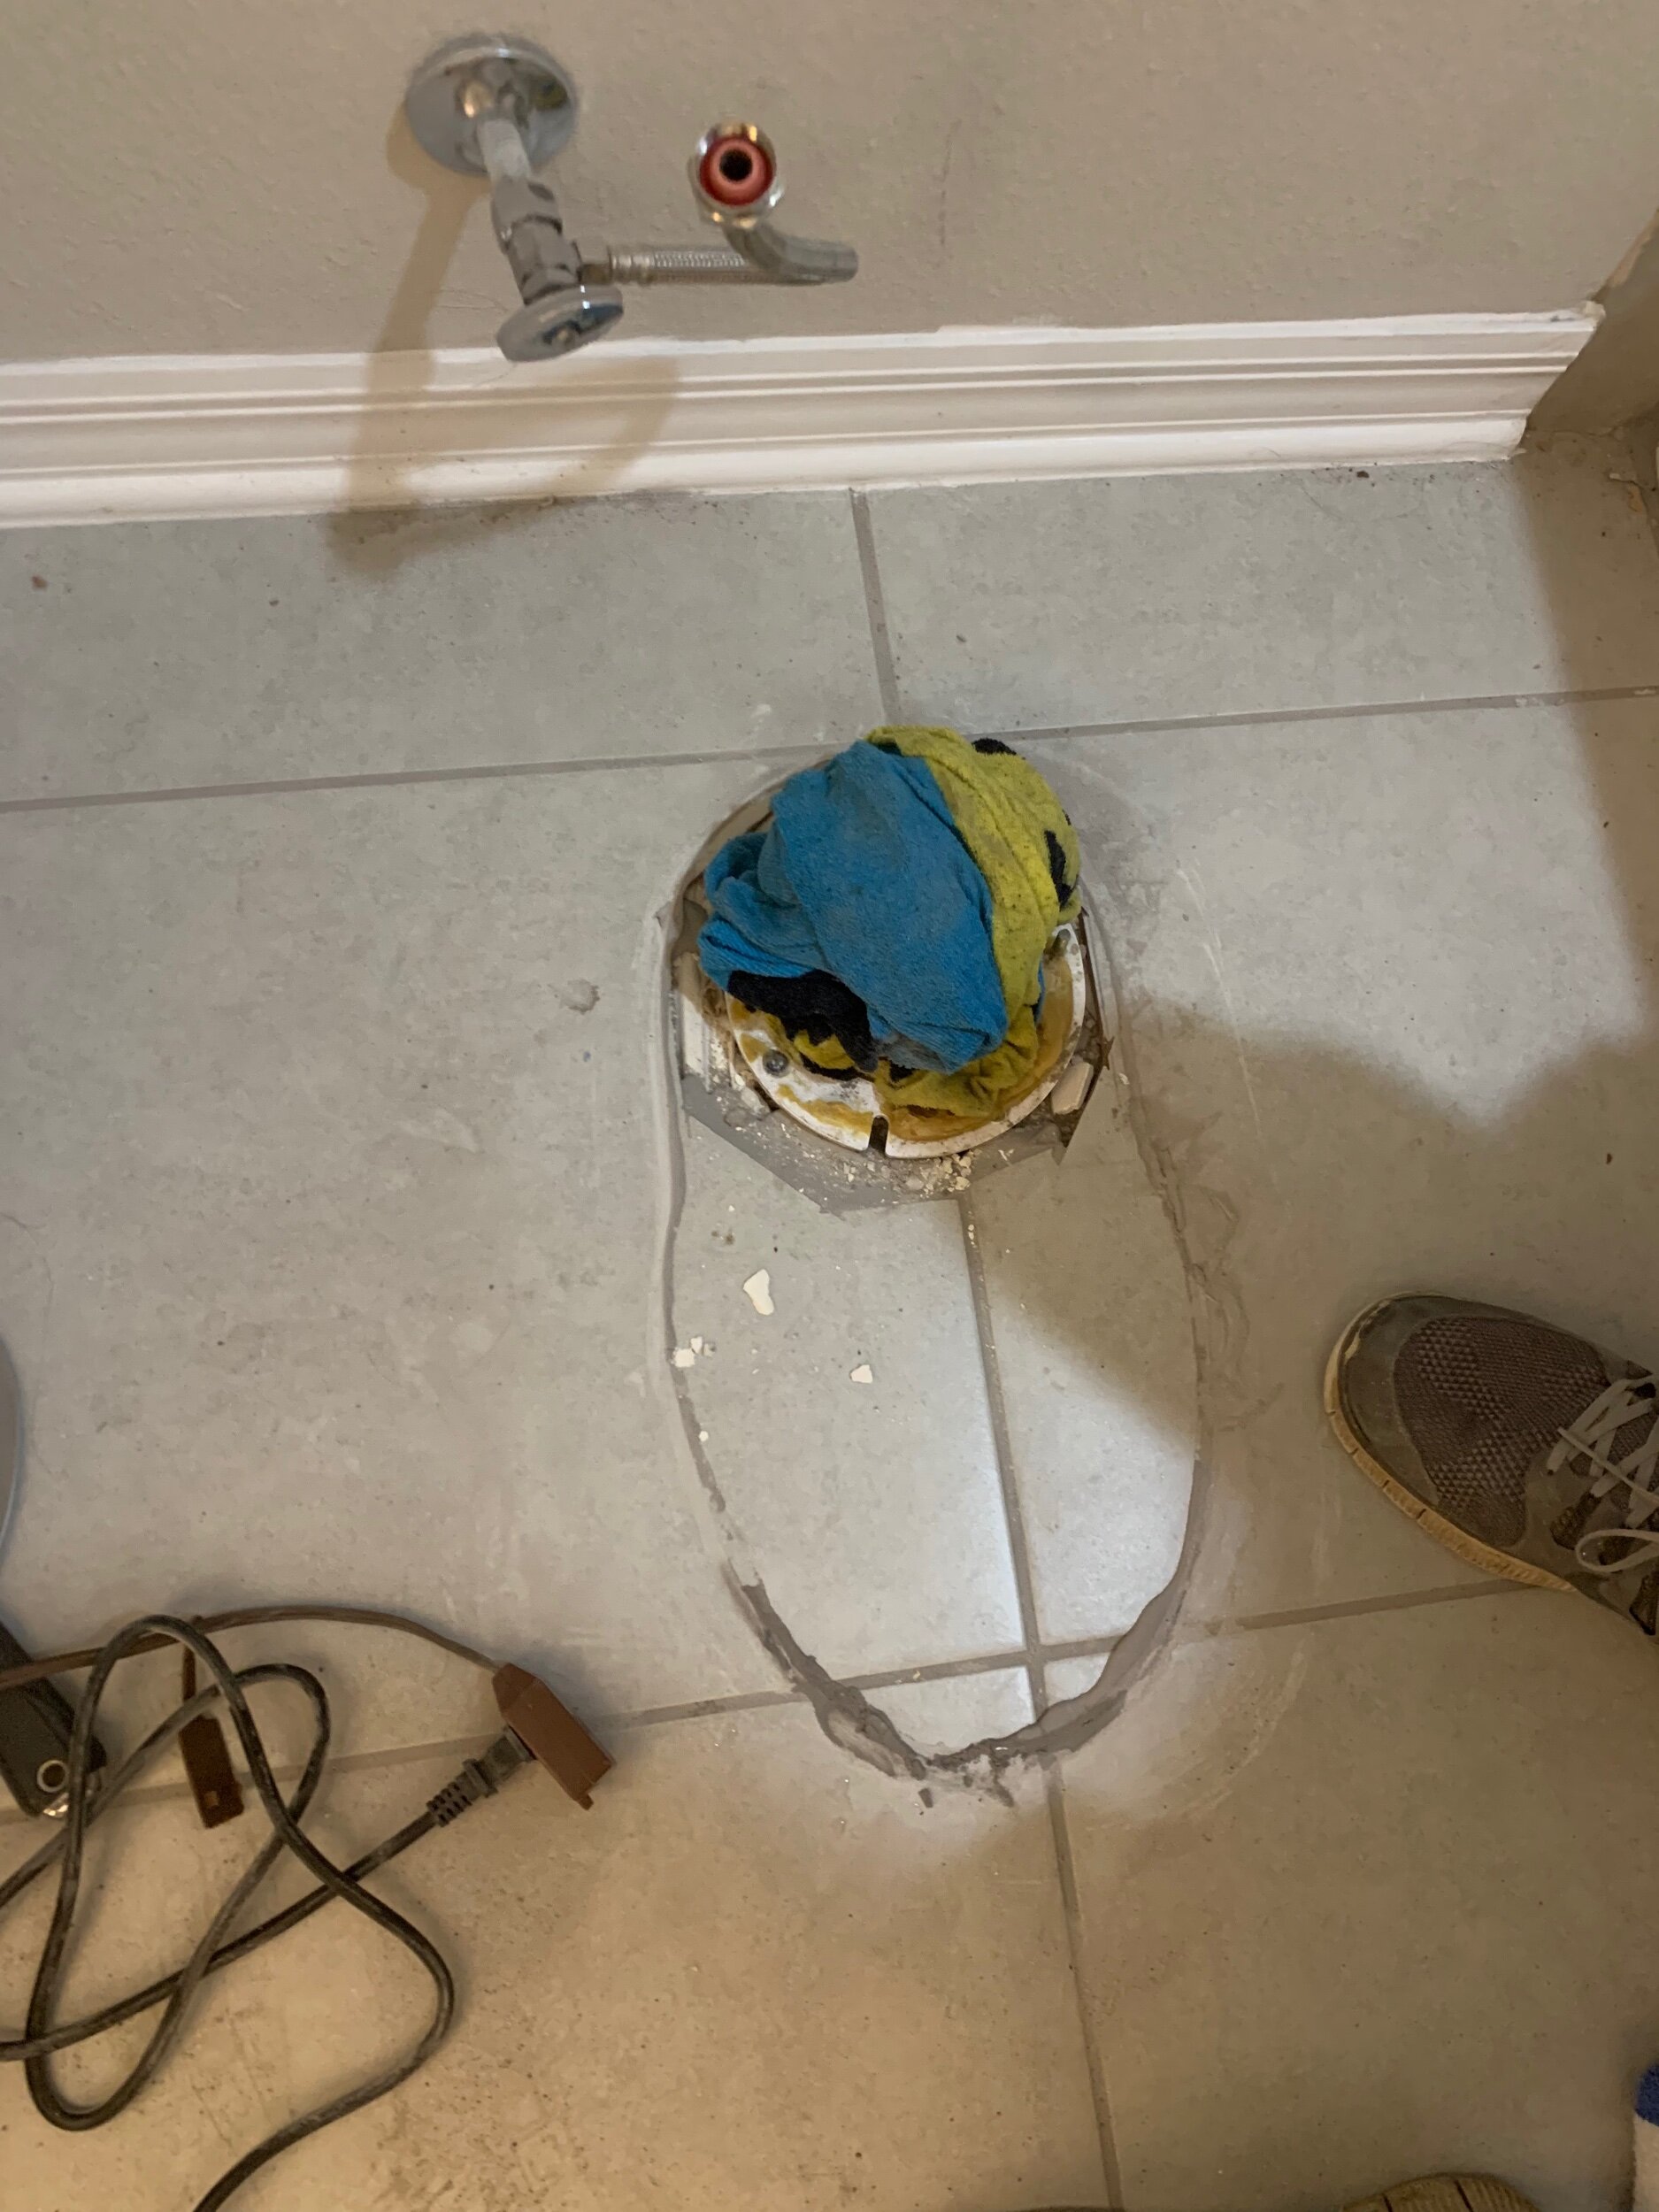
We definitely recommend removing the toilet, it was very simple!
Step Two: Remove Grout
Now its time to grind down that grout so tile removal is easier. We took our Genesis multi-purpose oscillating tool and the 1/8” grout removal blade and starting grinding down all of the grout lines. This is the dusty part. We suggest putting water on the grout to reduce the amount of dust that is created, and also using the shop vac while the grinding is happening, this is where having two people is super helpful! While Ryan used the oscillating tool, I ran the shop vac right next to him and vacuumed up a majority of the dust…There will still be some, but nowhere near as much if you didn’t do these two things.
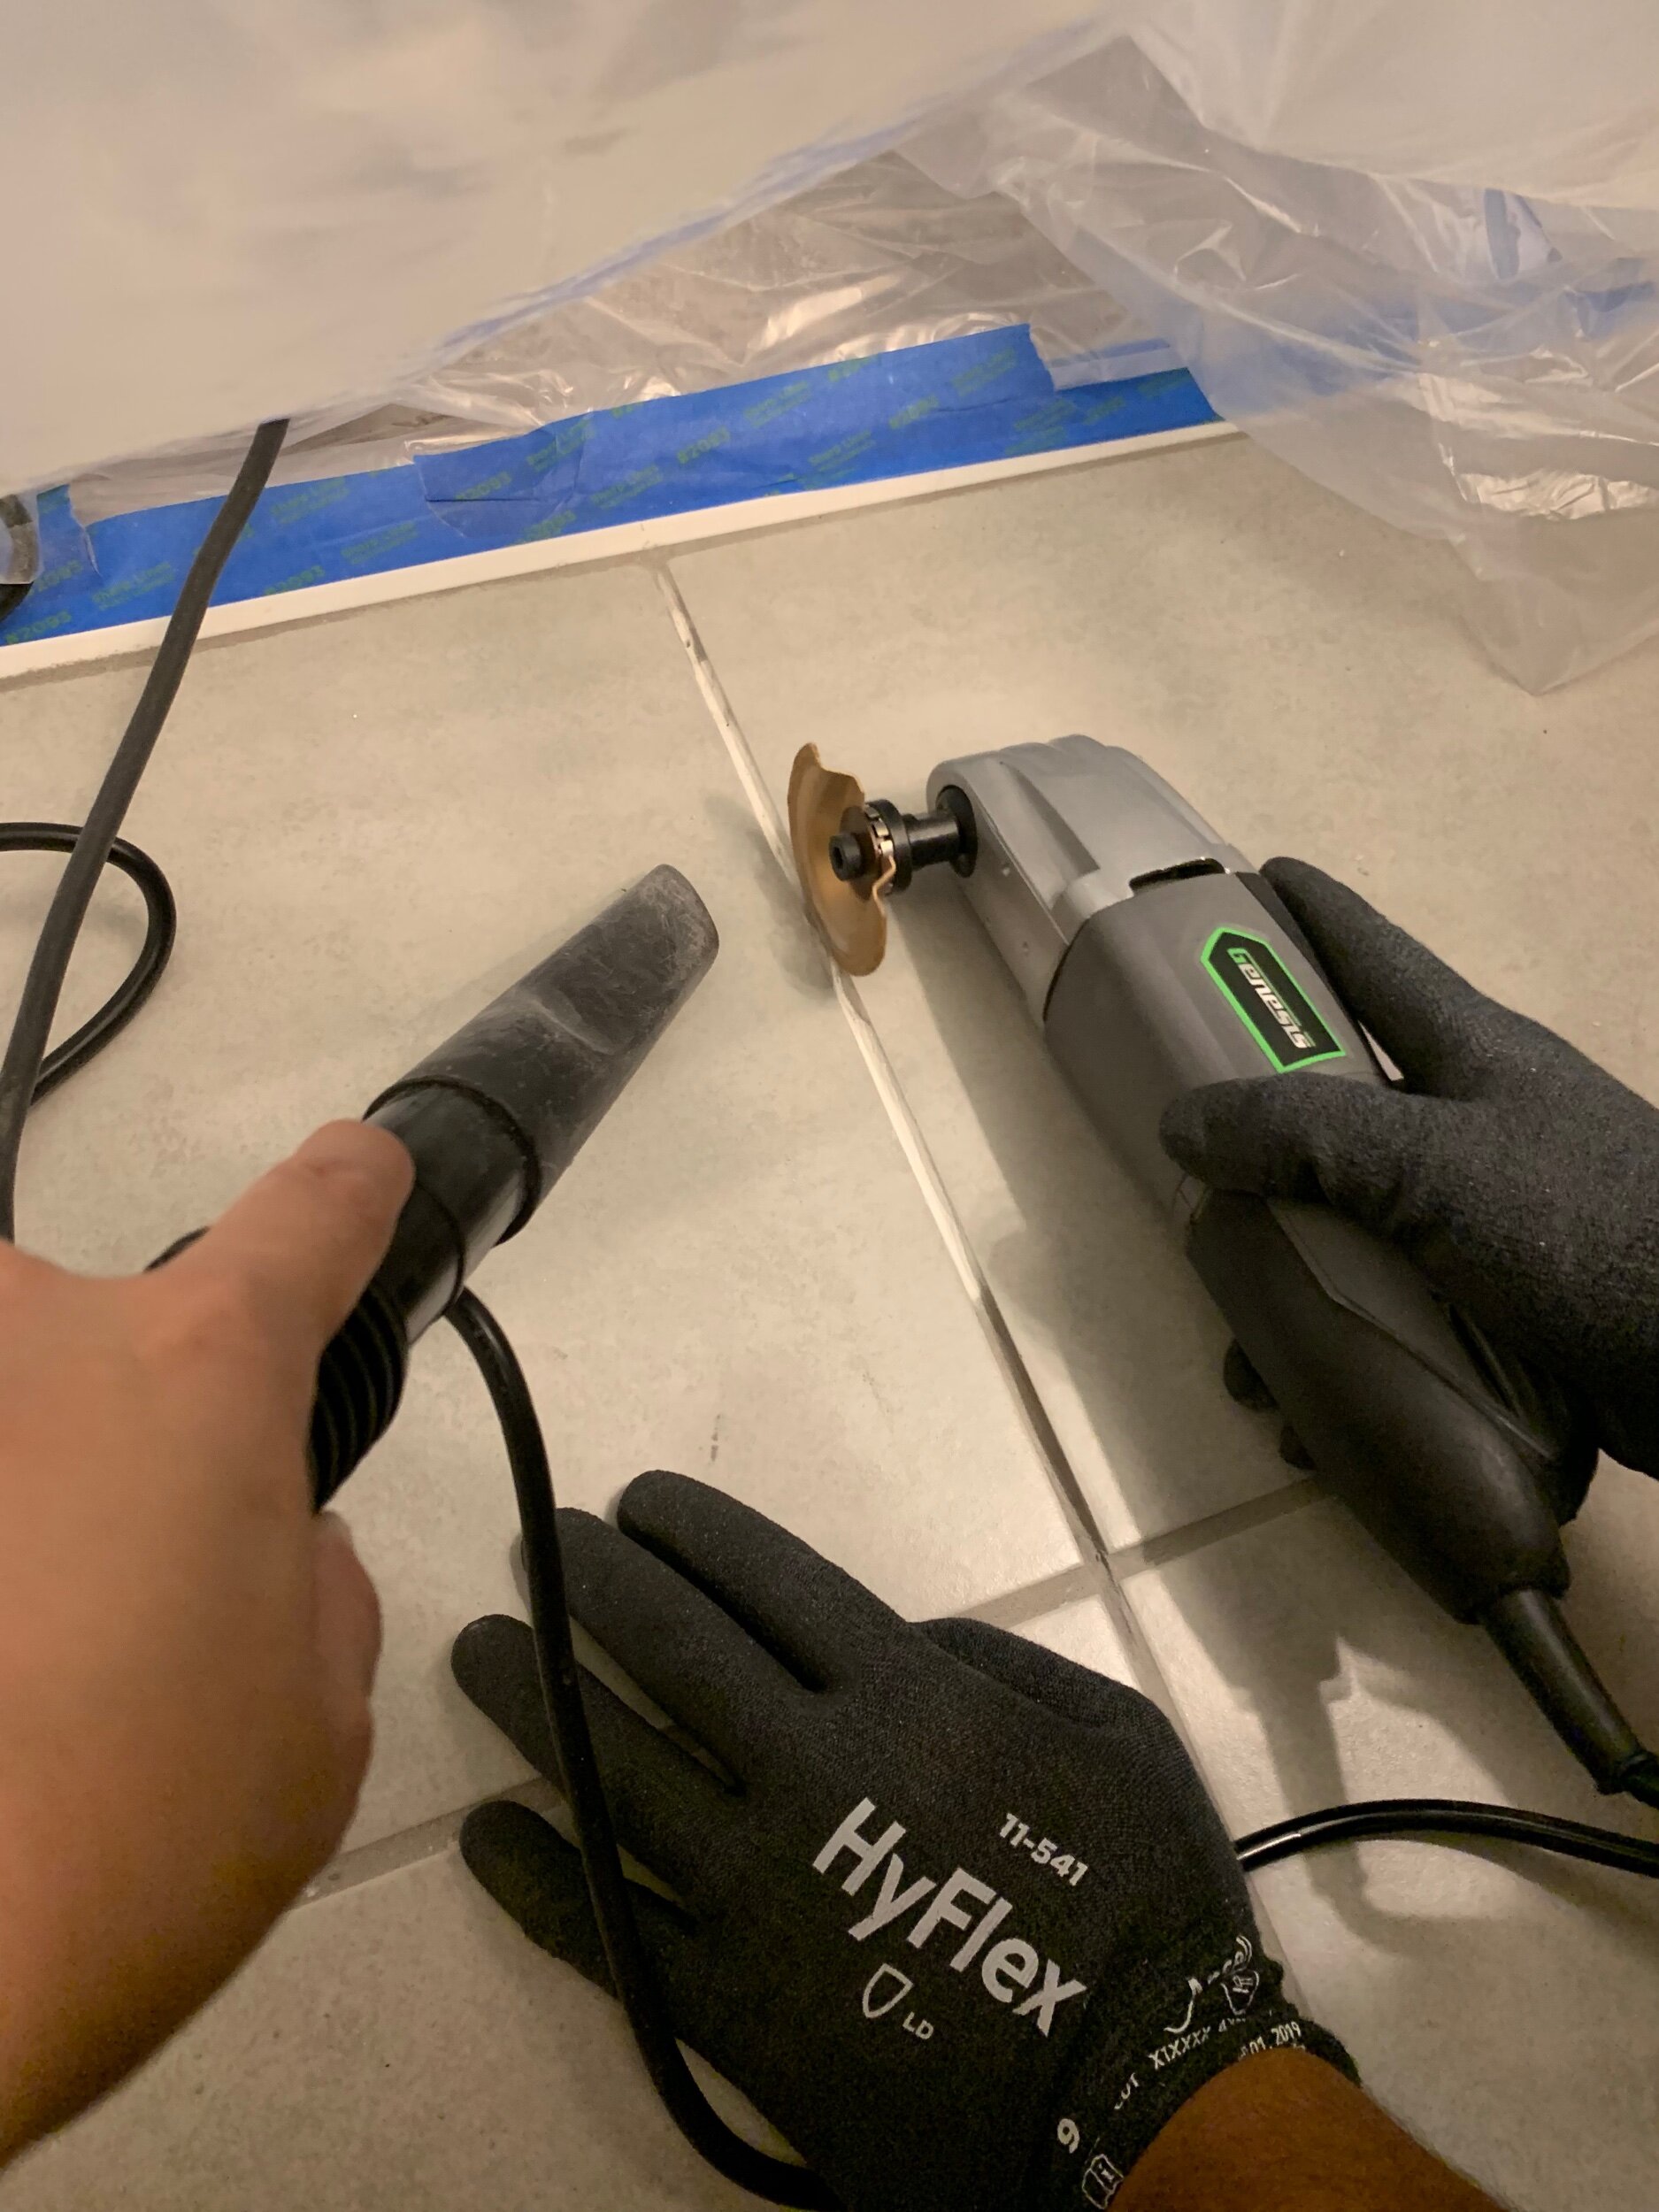
Using the shop vac right next to the oscillating tool helps capture more dust.
You don’t have to completely remove the grout with the multi-purpose tool, that would take way too long, but you want to get it about 3/4 of the way removed, this will make it way easier to remove the tiles during the next step. We also used the handheld grout saw when we got close to the edges of the walls and cabinets when the multi-purpose tool couldn’t finish the job.
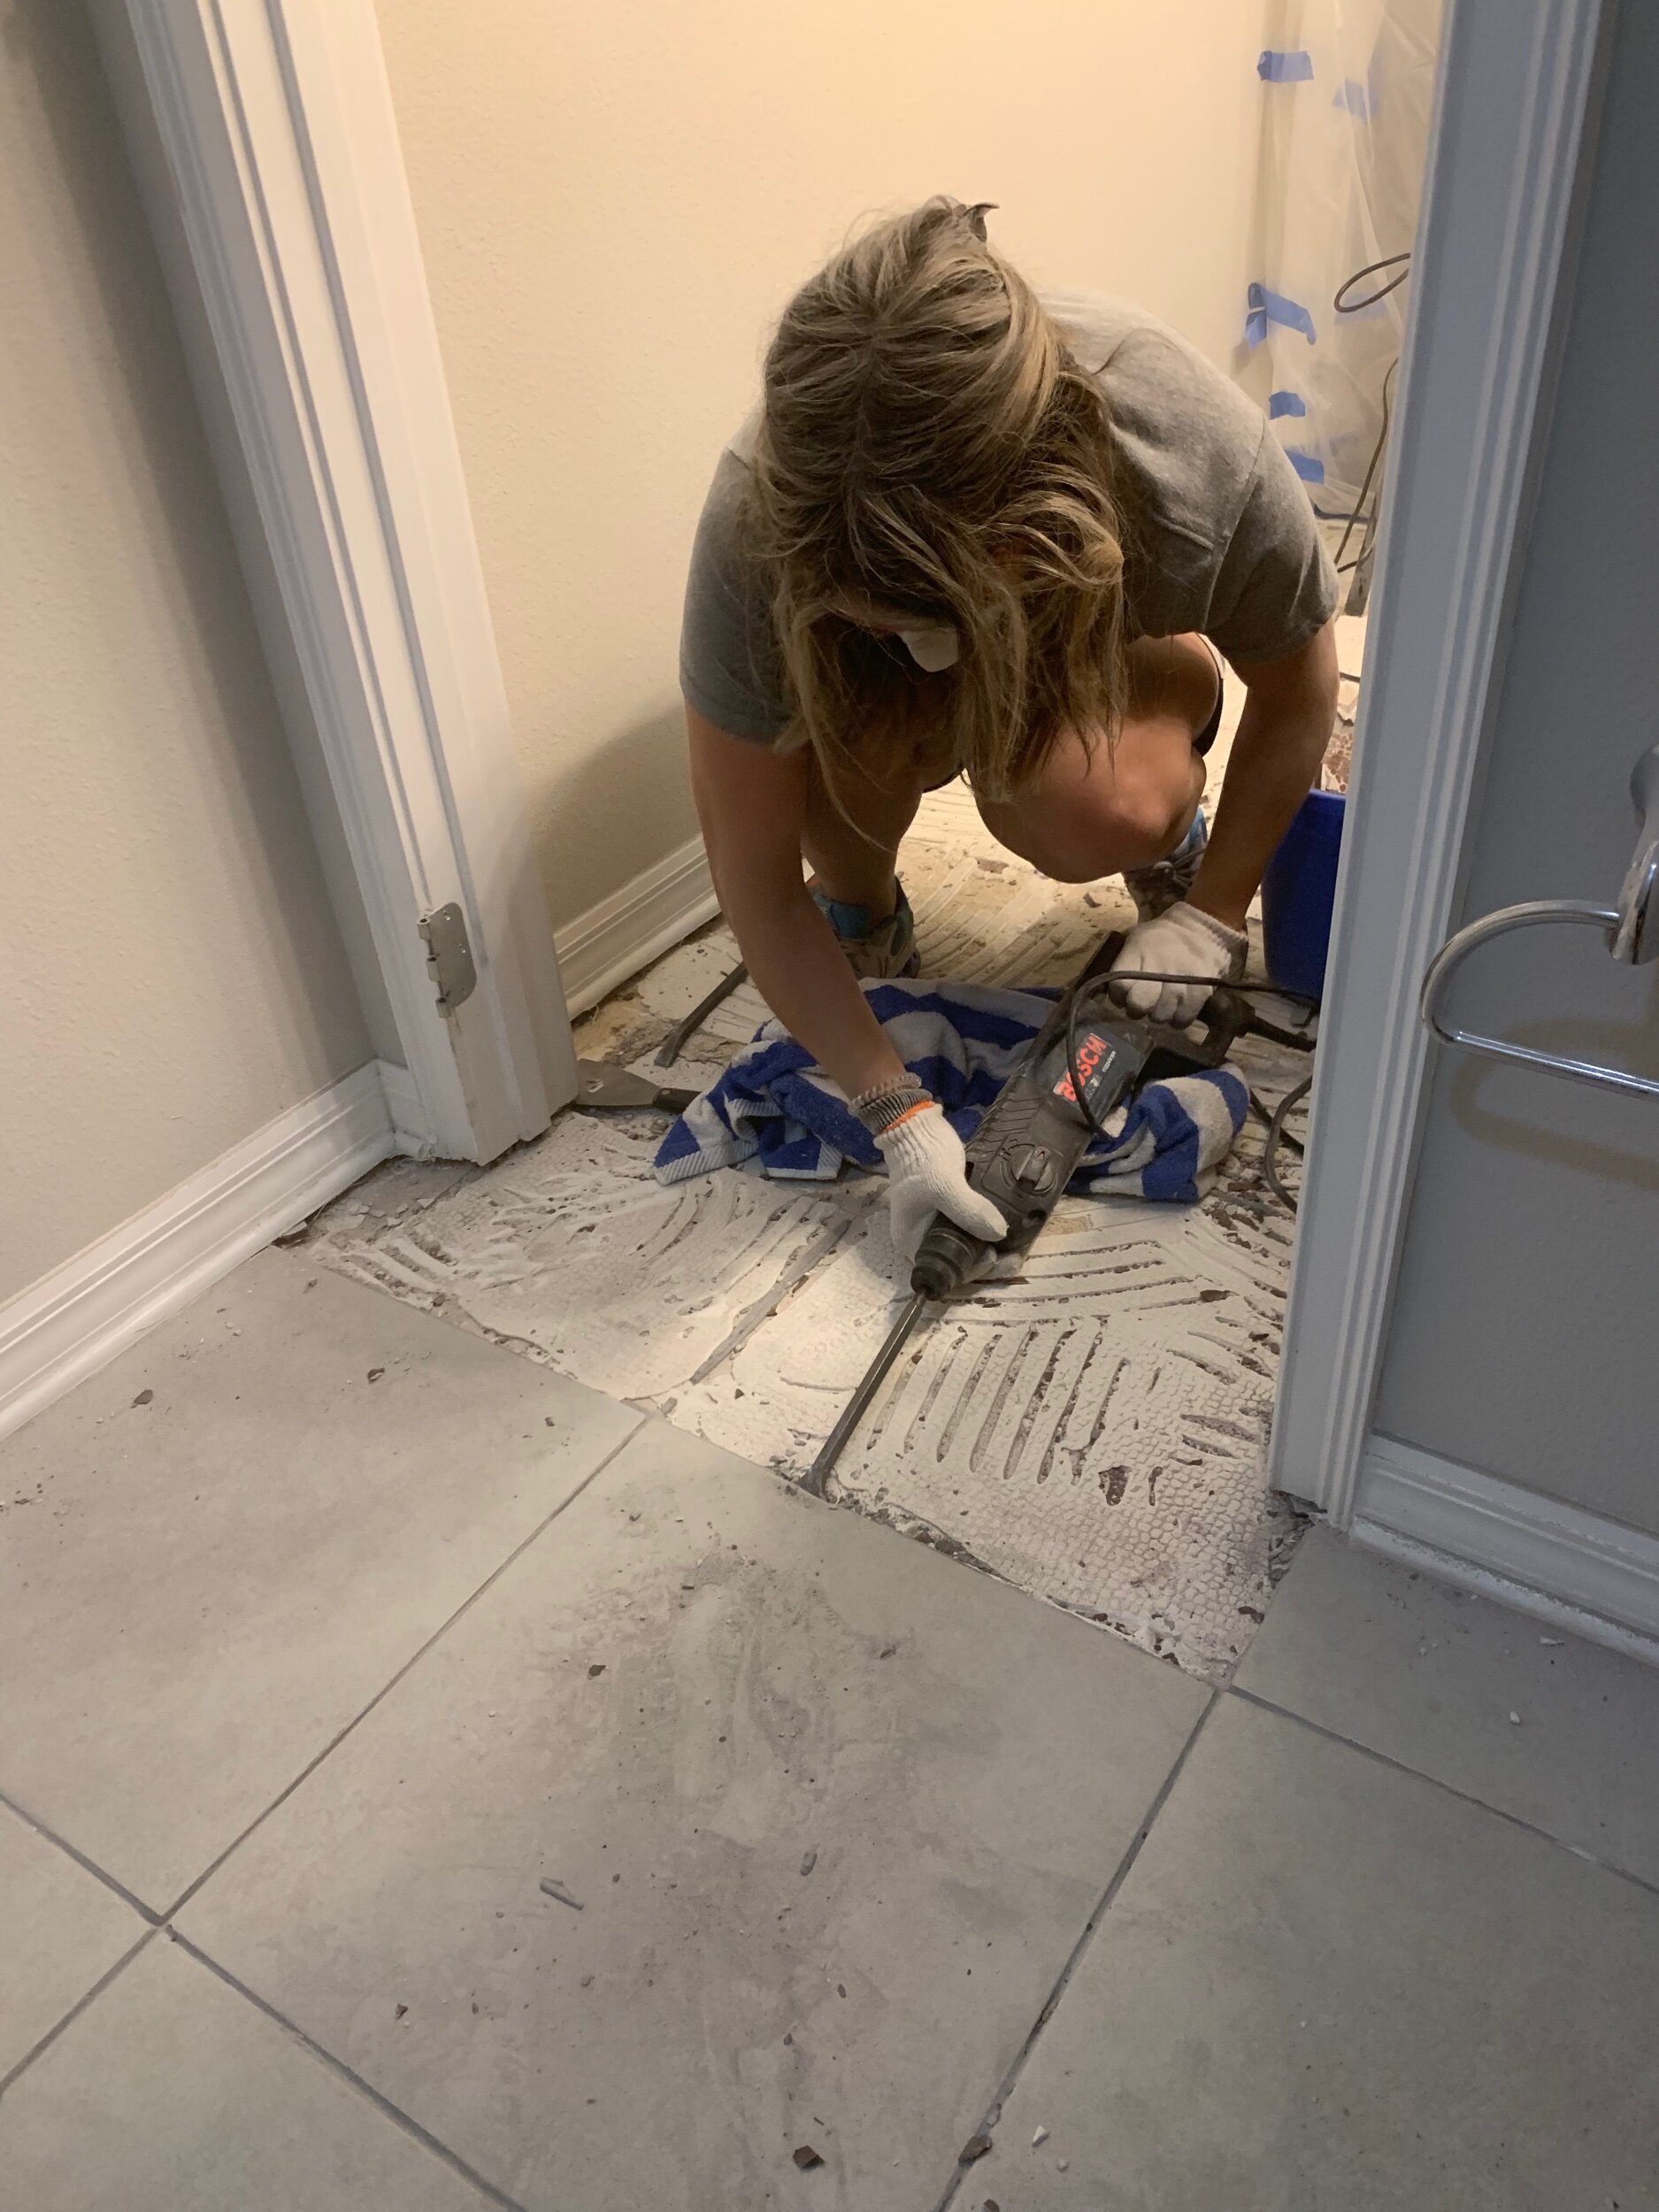
Step Three: Remove the Tile
Once you have the grout ground down as much as possible, its time to remove that tile! This is where you need to grab your hammer drill and chisel attachment, and possibly a drill. Ryan decided to drill three small holes, in the shape of a triangle, into the middle of one of the tiles to create a starting point, because according to him we didn’t have a good starting point and he didn’t want to start at the toilet. But if you take your baseboards off, you should have a good starting point along the edges. The first tile is always the most difficult.

The hammer drill with the chisel attachment worked like a charm.
When using the hammer drill, you want to keep it as flat against the ground as possible, so you don’t damage the underlayment, and its easier for the chisel to get between the tile and mortar and “pop” the tile lose. Like I said at the beginning, we have never removed tile before, so this is just what we found worked best for us! You’ll need a large bucket or trash bin to throw the tile in once its removed-be careful and be sure to wear cut resistant gloves when handling the tile because it can be VERY sharp!
I love when I get to help!
If your home is anything like ours, the builder quality isn’t the BEST out there, so a lot of the tiles came up in one full piece. Great for us during the removal process because it made it less messy and a lot easier, but also unsettling knowing that the mortar/tiles weren’t applied and installed correctly. It seems the mortar was too dry when they applied some of the tiles, like they may have mixed up too much at a time or something. We also discovered that some of the mortar was too thin in spots, and the tile was actually stuck to the cement backer board thats underneath the mortar, and as a result it pulled up a lot of the cement board with the tile. Which sucked, because we were going to try to salvage the cement board, but ended up having to completely remove it and replace that because there was too much damage done.
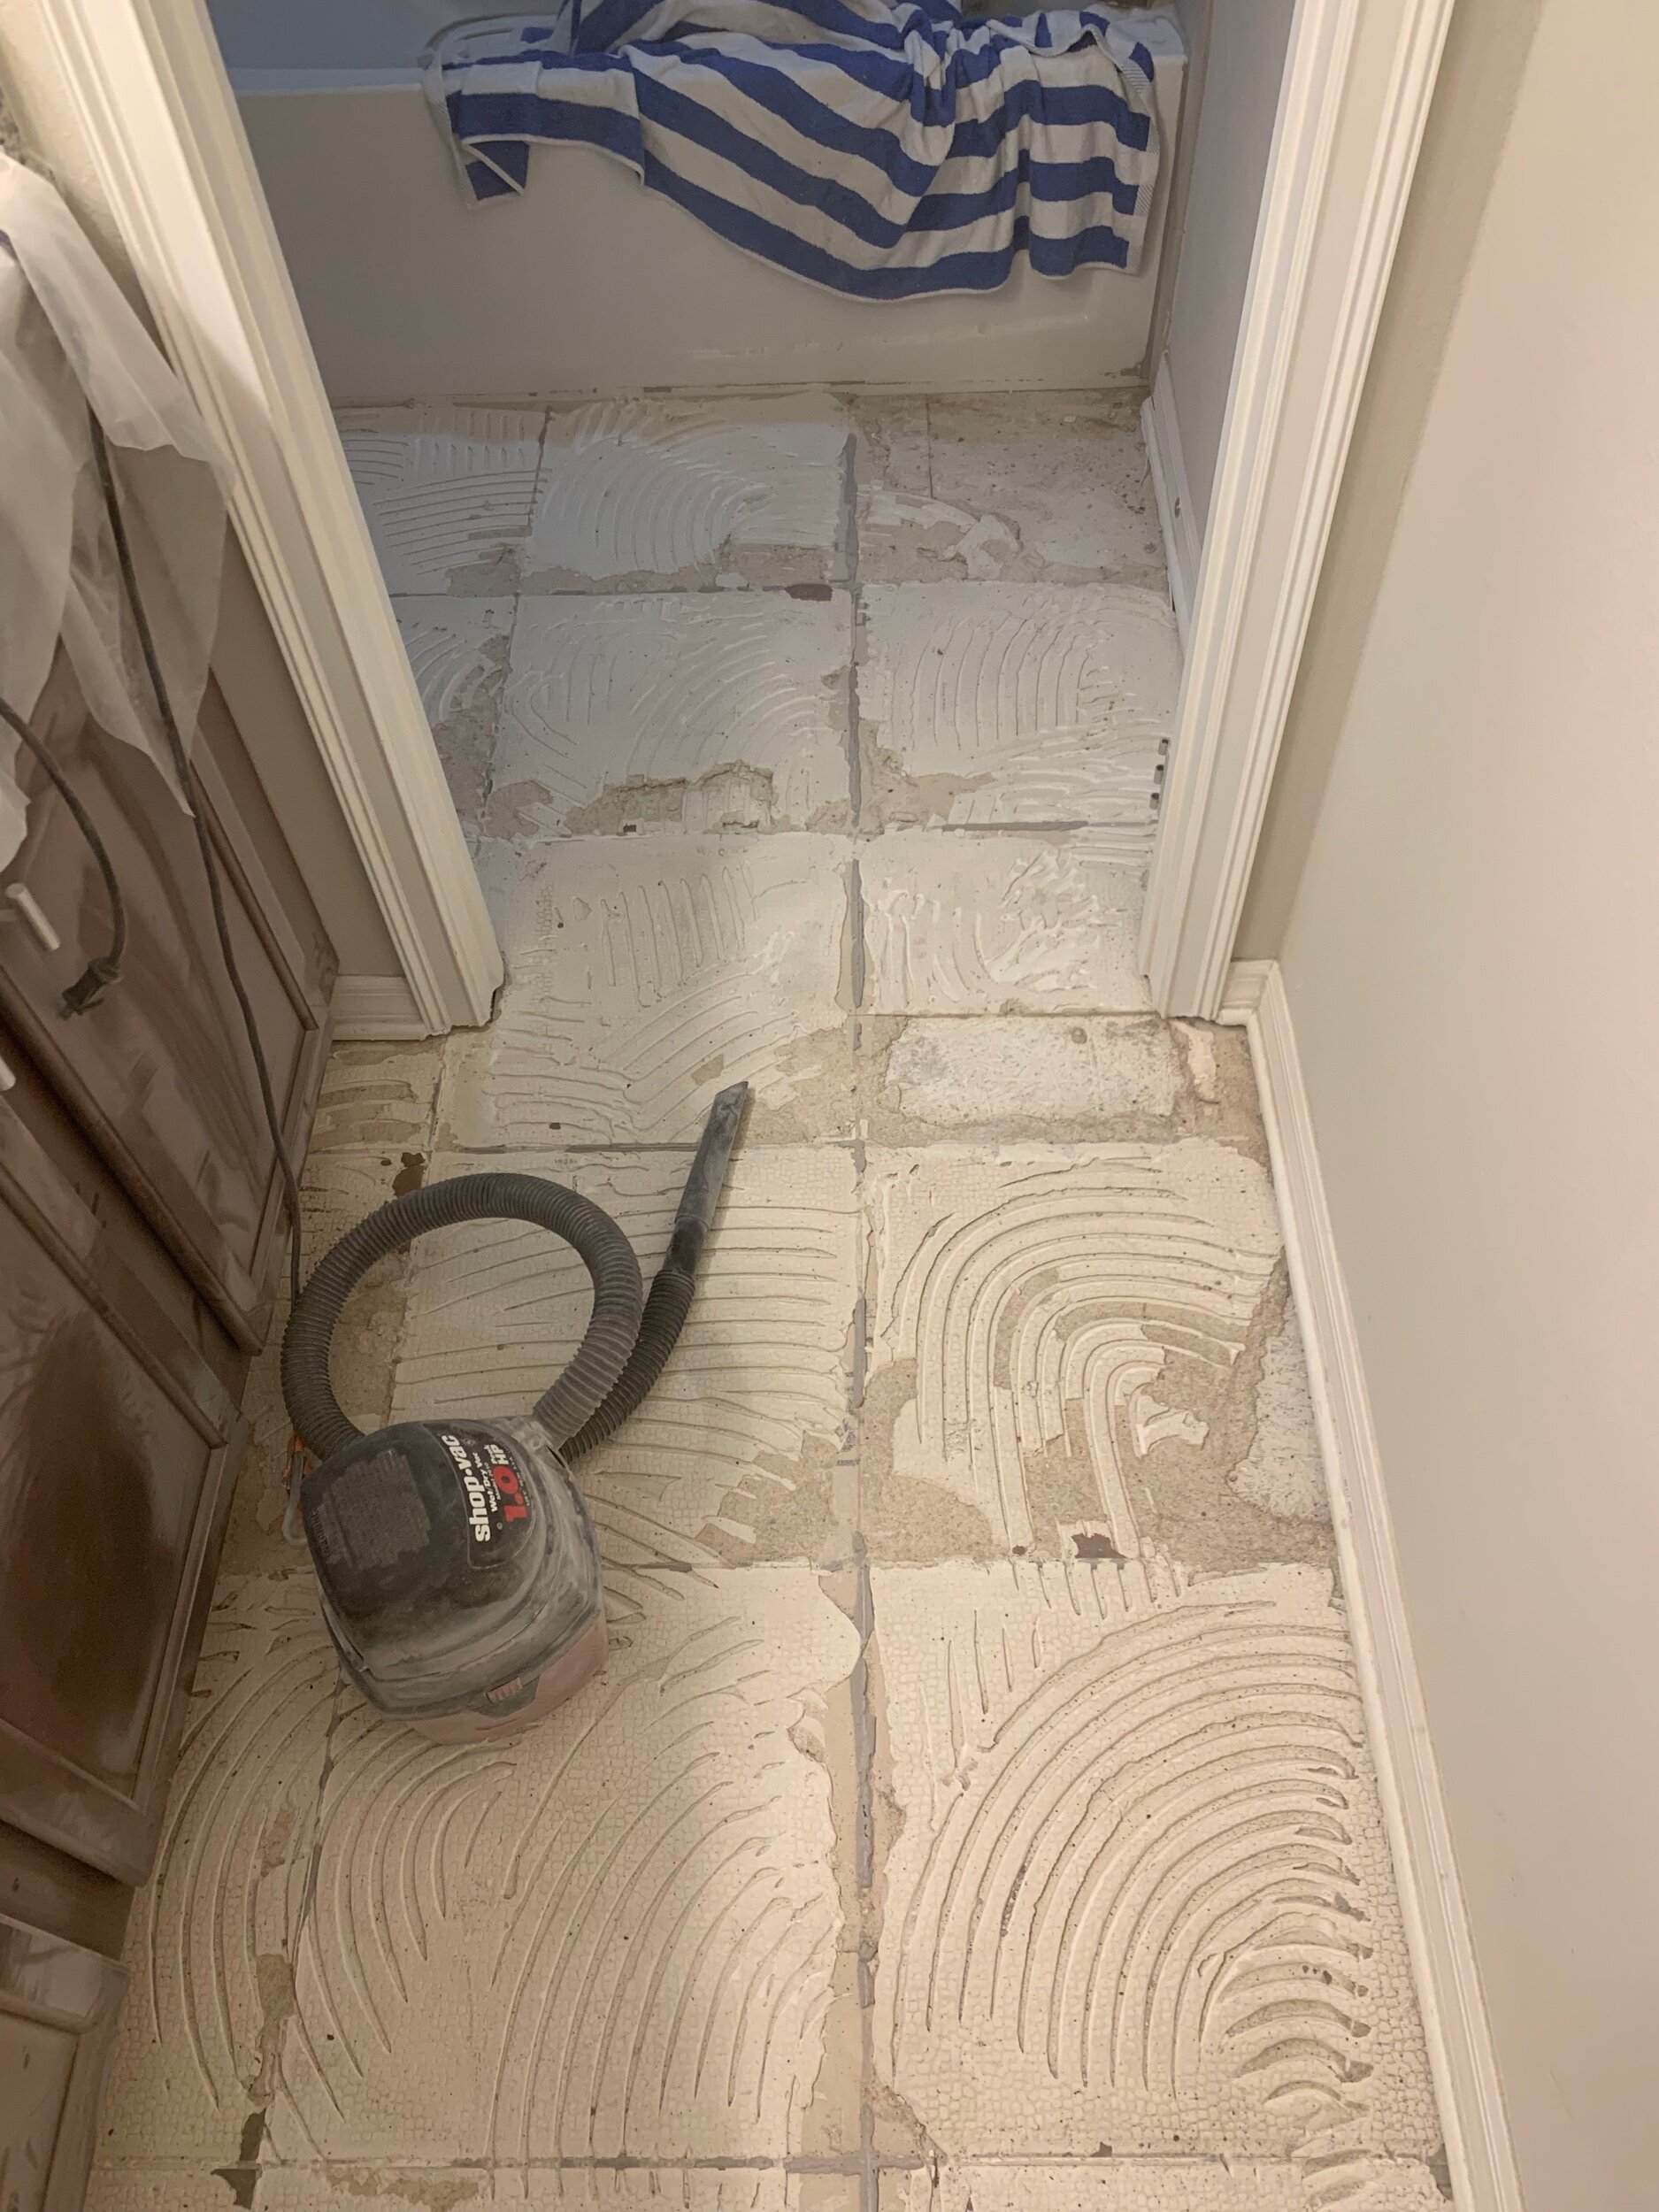
TIle is completely removed. Left with the cement board/mortar.
Step 4: Remove Cement Board
Once the tile is completely removed you need to decide if you are going to reuse the underlayment. This all depends on the amount of damage that was done in the tile removal process and what type of underlayment or floor is underneath your tile. If you are reusing it you’ll need to try and remove the existing mortar as much as possible before applying more. If you’re like us, and the underlayment couldn’t be saved, you’ll just remove it and not worry about removing the mortar first. To remove the cement board we used a pry-bar and hammer combo and just pulled up the cement board. It will either be attached with roofing nails or cement board screws, our builder used roofing nails. A lot of builders will also apply more thinset or mortar between the floor and cement board, which ours did not, so the cement board was very easy to pry up. Once the cement board was all removed, you need to go around and remove all of the roofing nails or screws and vacuum up any debris with your shop vac.

Cement board is completely removed, you are looking at the plywood underlayment now.
Step 5: Replacing Cement Board
Once we had the area completely swept clean of any dust and debris, we needed to lay down new cement board to get ready for our tile. So whats a demo project without a trip to The Home Depot? A not very fun one, thats for sure! We did our research when it came to what kind of cement board to buy-who knew this was such an important decision? We ultimately decided to use the HardieBacker brand cement board because we learned it was the most heavy duty, easiest to use (it has a grid on it), and it didn’t tend to crumble when you screw into it like other brands. We used the 1/4” thick board because thats what our builder used, and thats what is typically used on floors. They come in 3 ft x 5ft sheets and we bought four, but ended up returning one we didn’t use. We also used the 1 1/4” HardieBacker brand cement board screws because they are recommended to be used with the cement board, the other brands have their own recommended screws (see pictures below for both items)
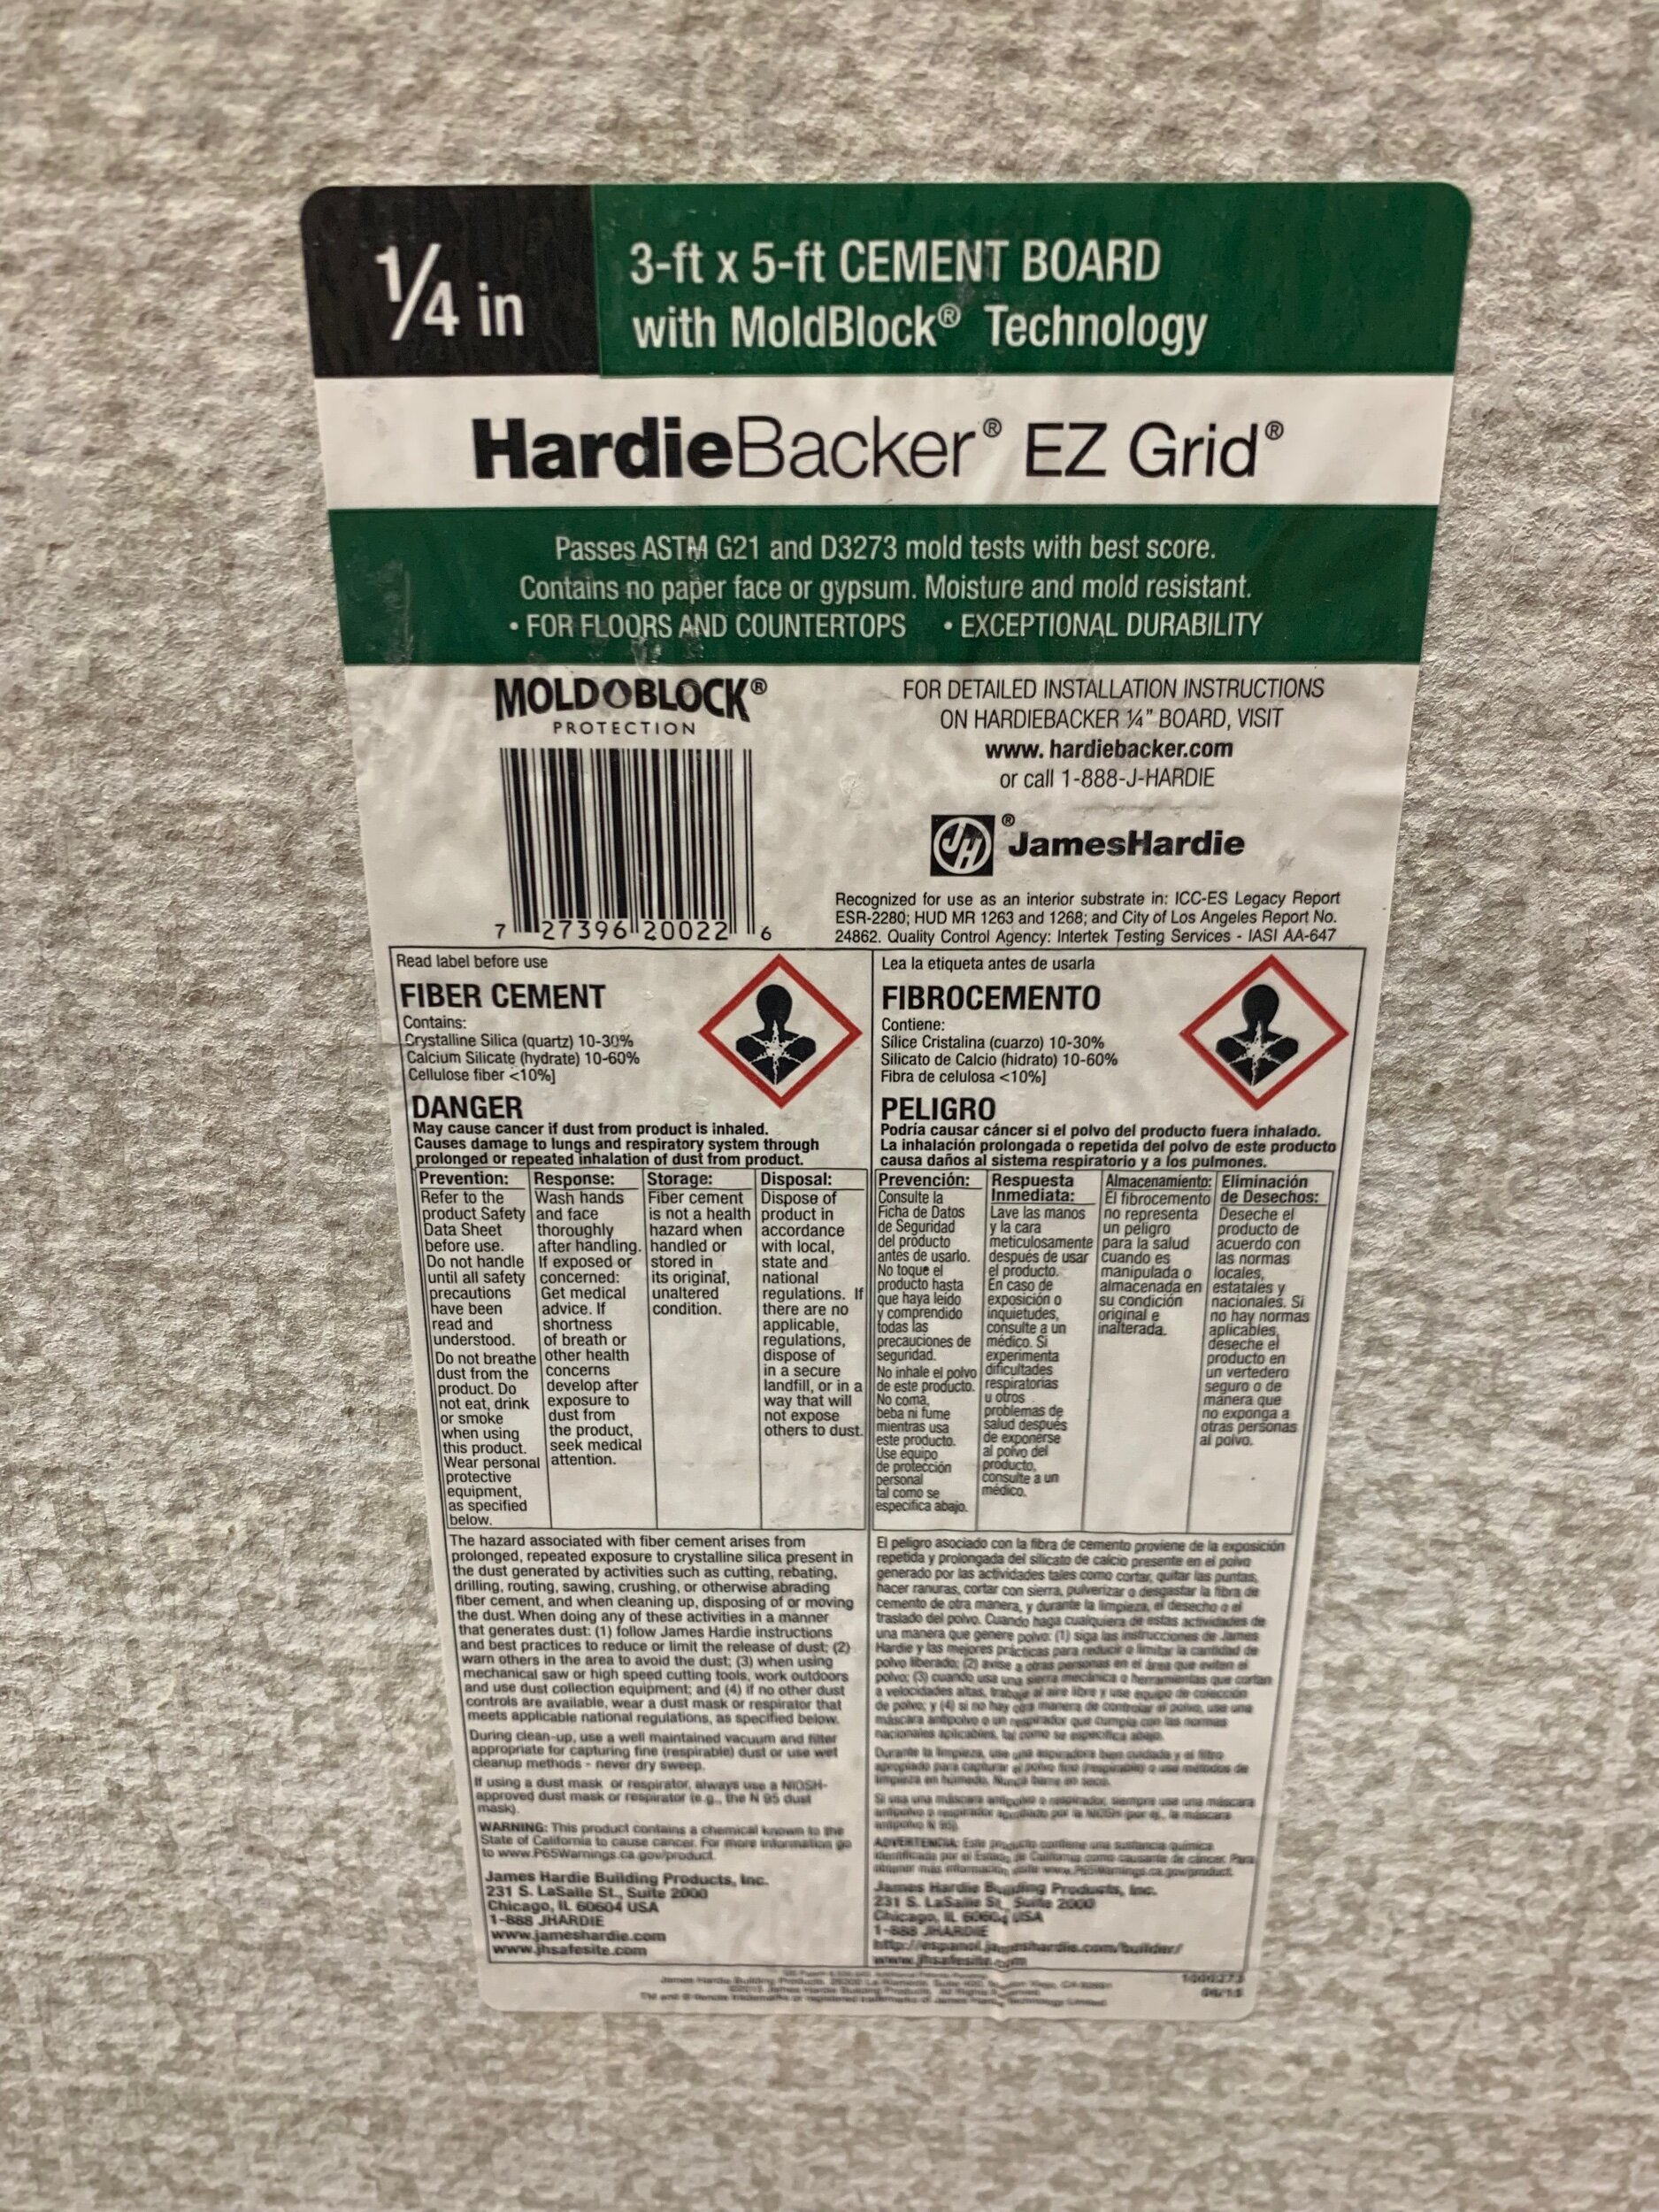
The brand that was recommended to us as it’s the best. We went with the 1/4” inch size versus the 1/2” size.
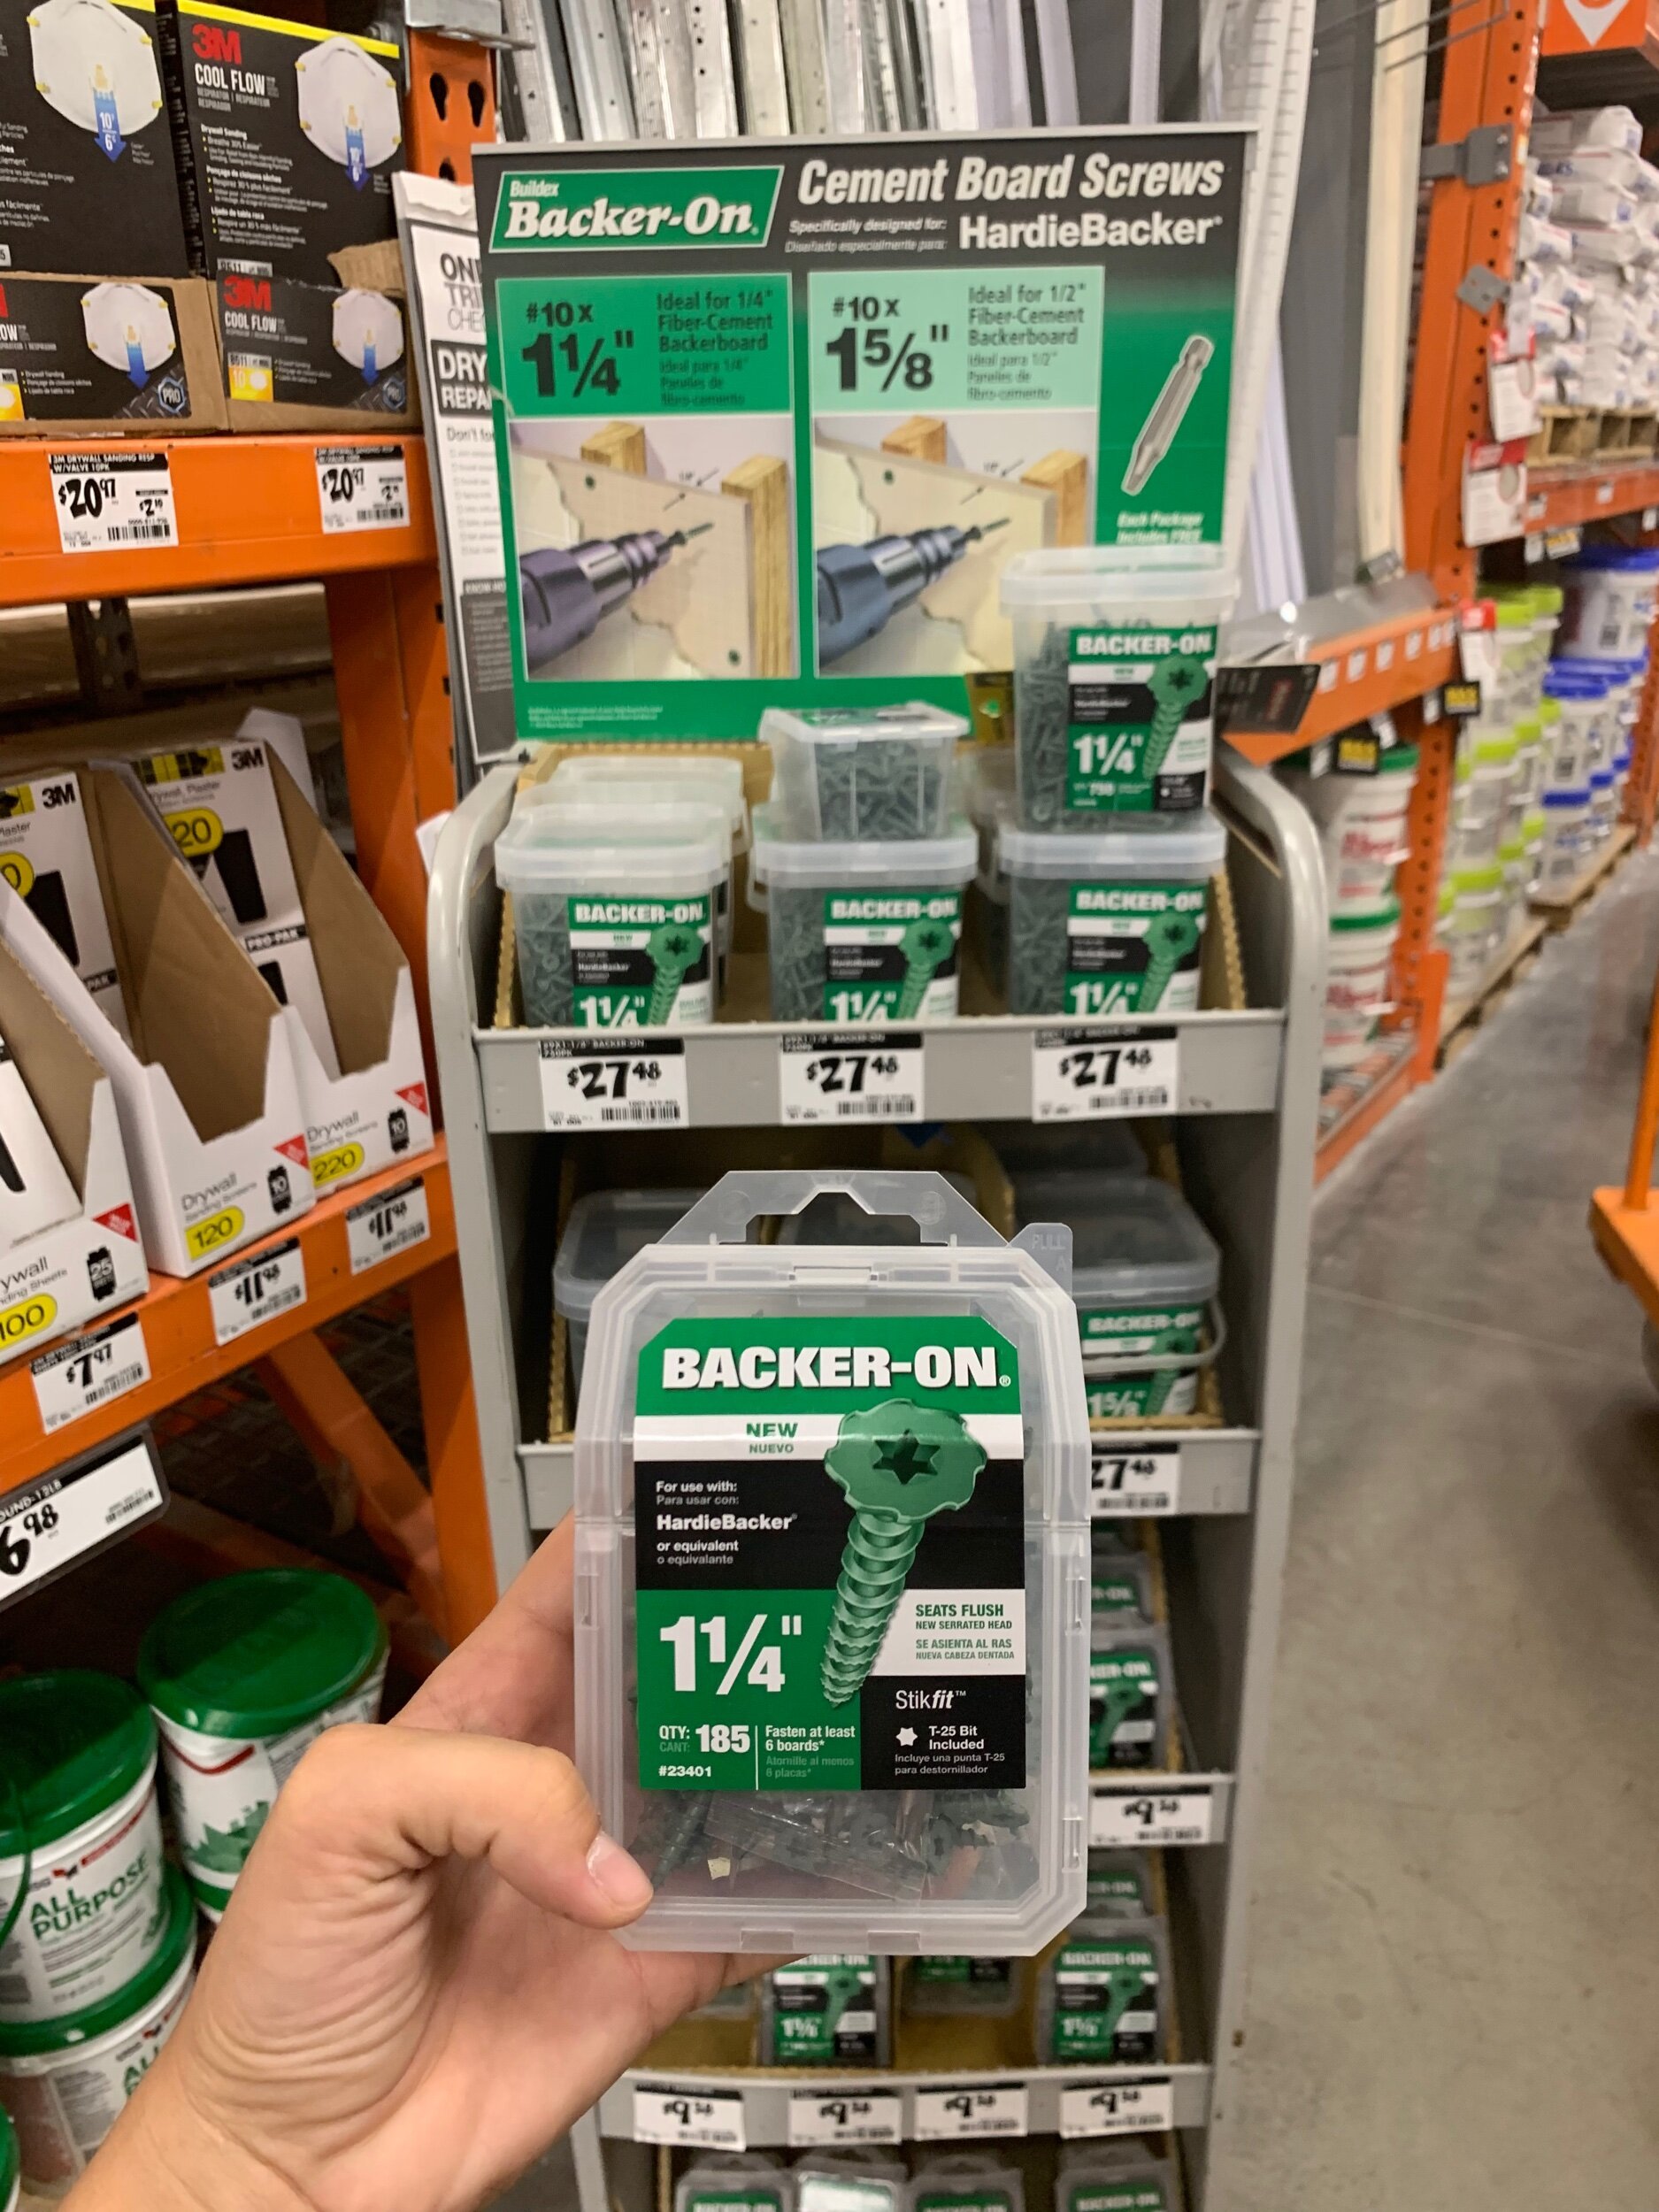
You need to use these exact screws.
Because our builder didn’t use mortar between the plywood floor and cement board, we decided not to as well. You will need to cut down your cement board, so we used our jigsaw to cut, which was fairly easy, but you can also use the score and snap method too. Once we had the cement board cut down and fit into place, you drill in the cement board screws. Make sure you use a generous amount of screws for this, you don’t want your underlayment to shift or move, as this will cause your tile and grout to crack later on, and nobody wants that! We used almost the entire package for our bathroom, better safe than sorry!
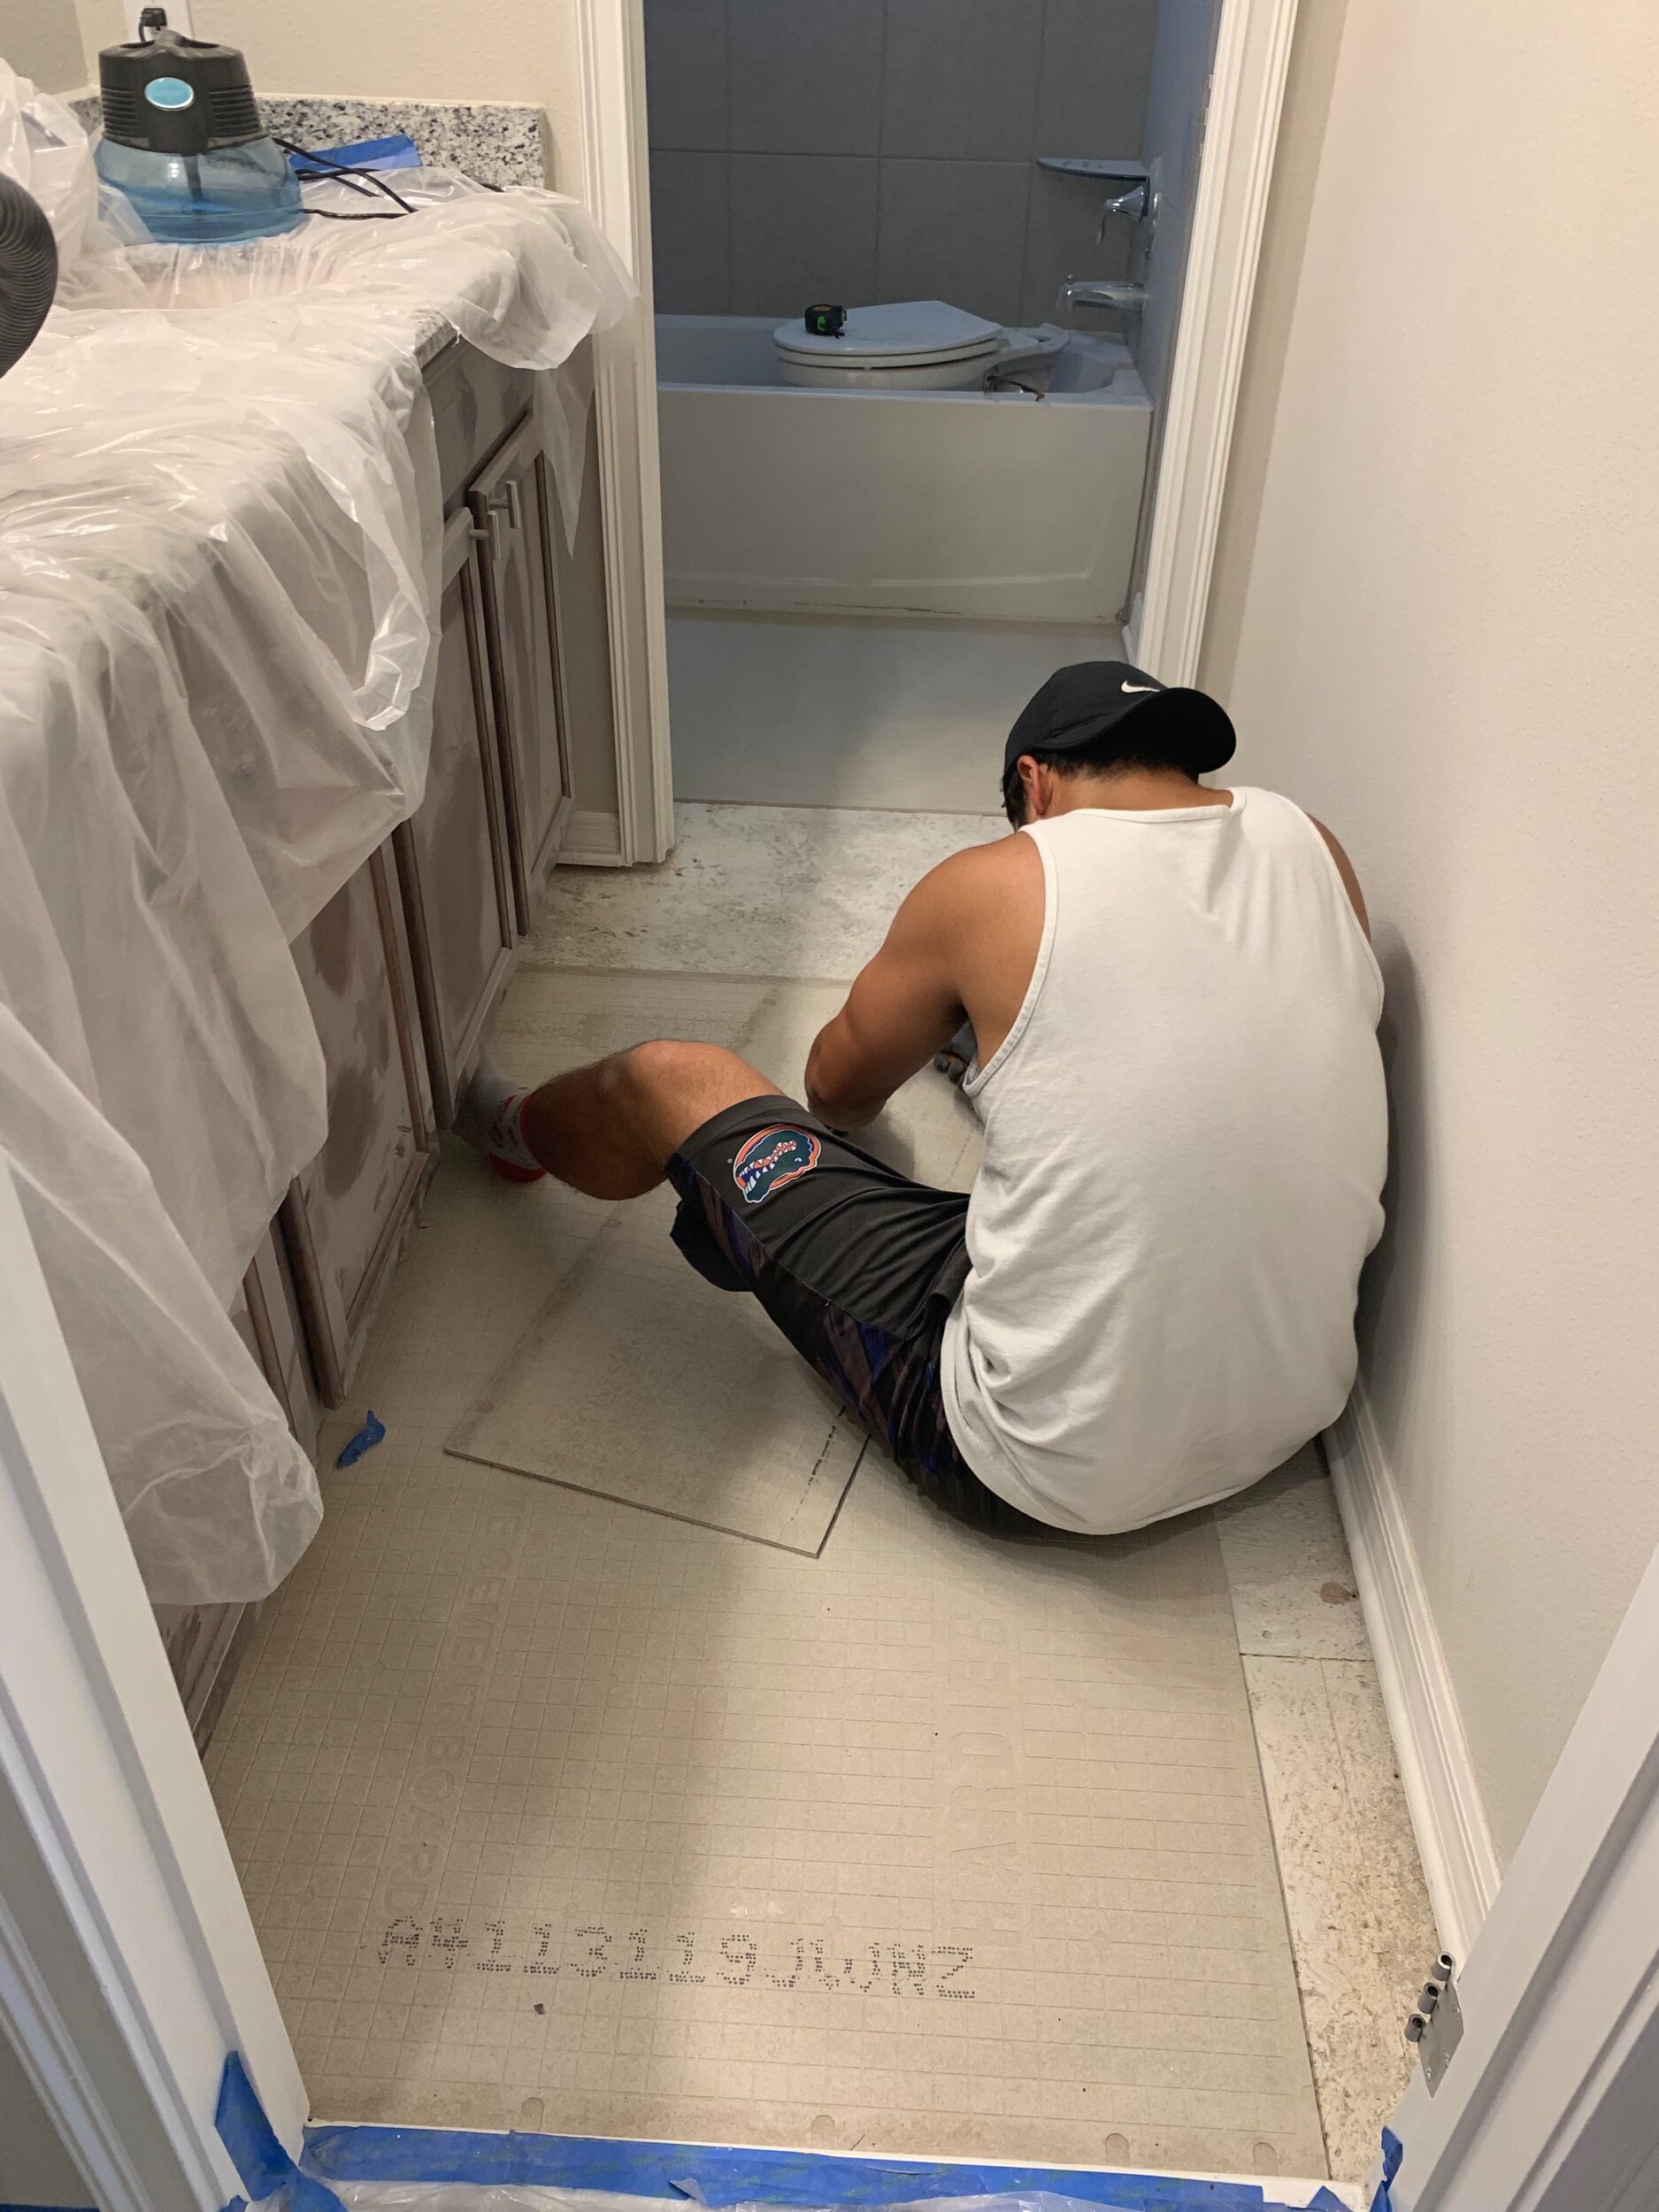
Dry fitting the cement board.
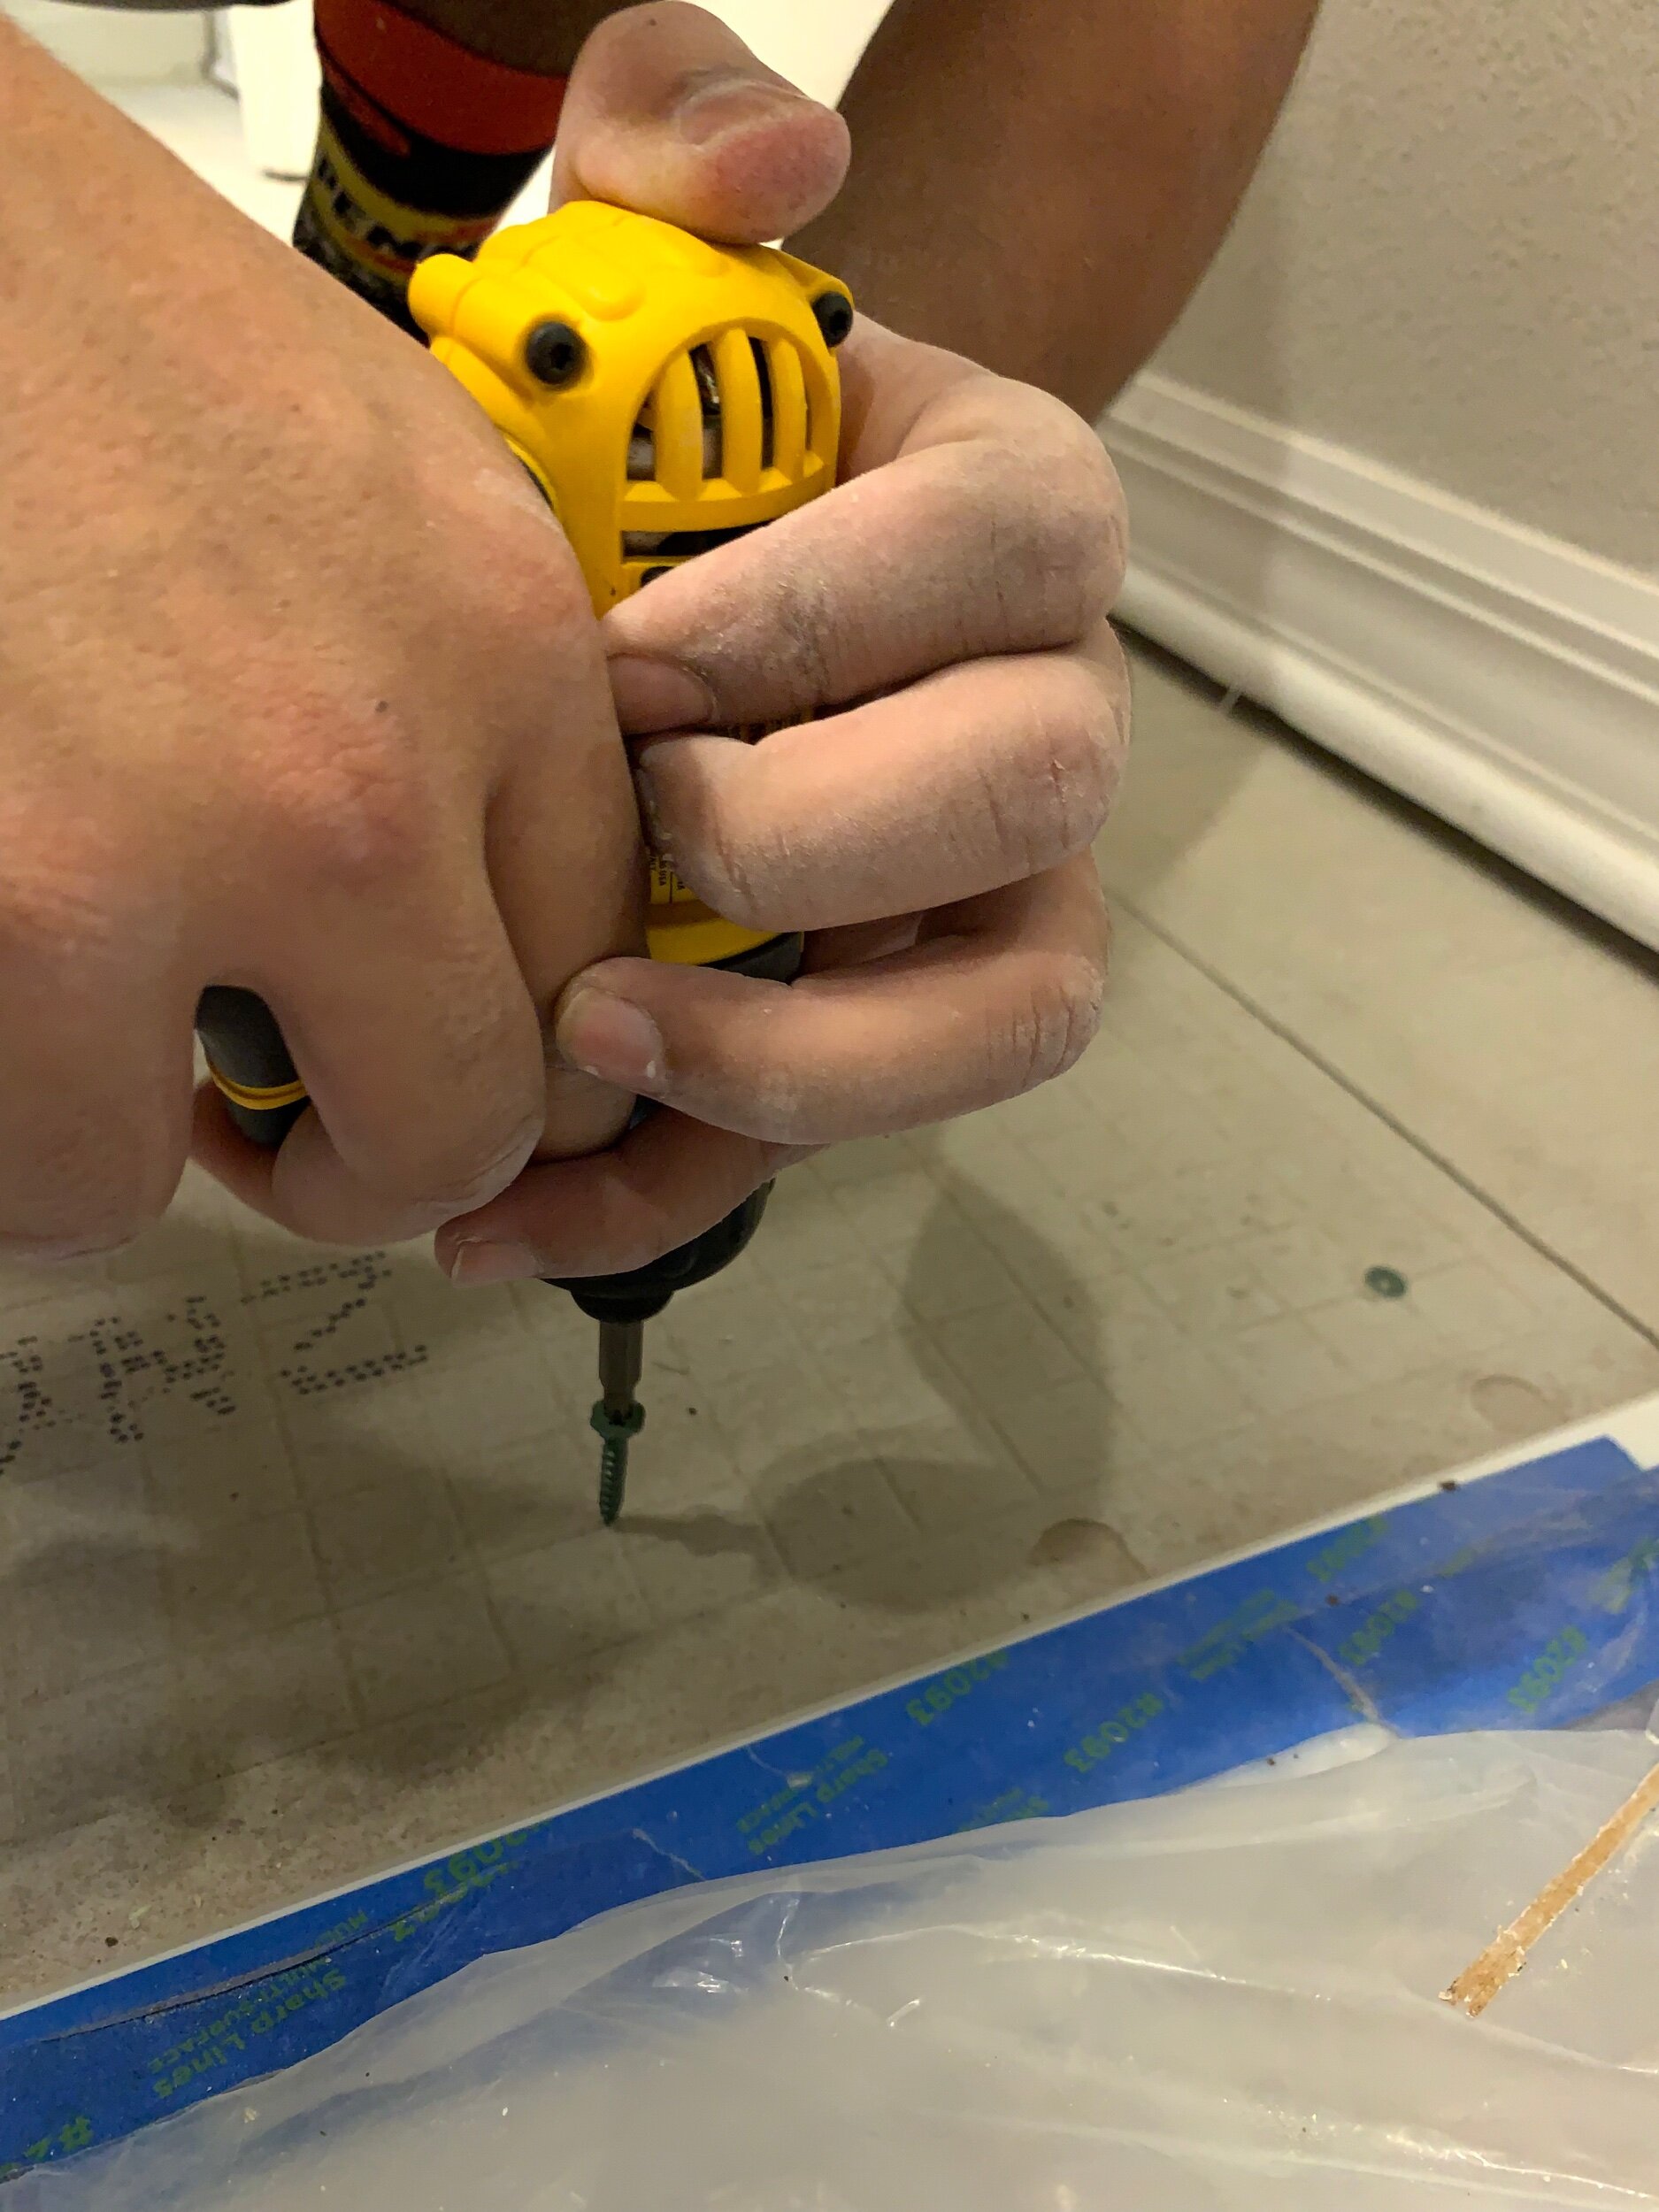
Drilling in the cement board screws.
And thats it for the tile demo! Like I said, that was easy! And coming from us tile newbies, thats saying a lot. We are all ready to lay down the tile in a few weeks, and can’t wait to get started on that! In the meantime, the demo part isn’t quite over. We aren’t just tiling the floor, we are also tiling up the wall above the sinks!
The demo isn’t over yet!
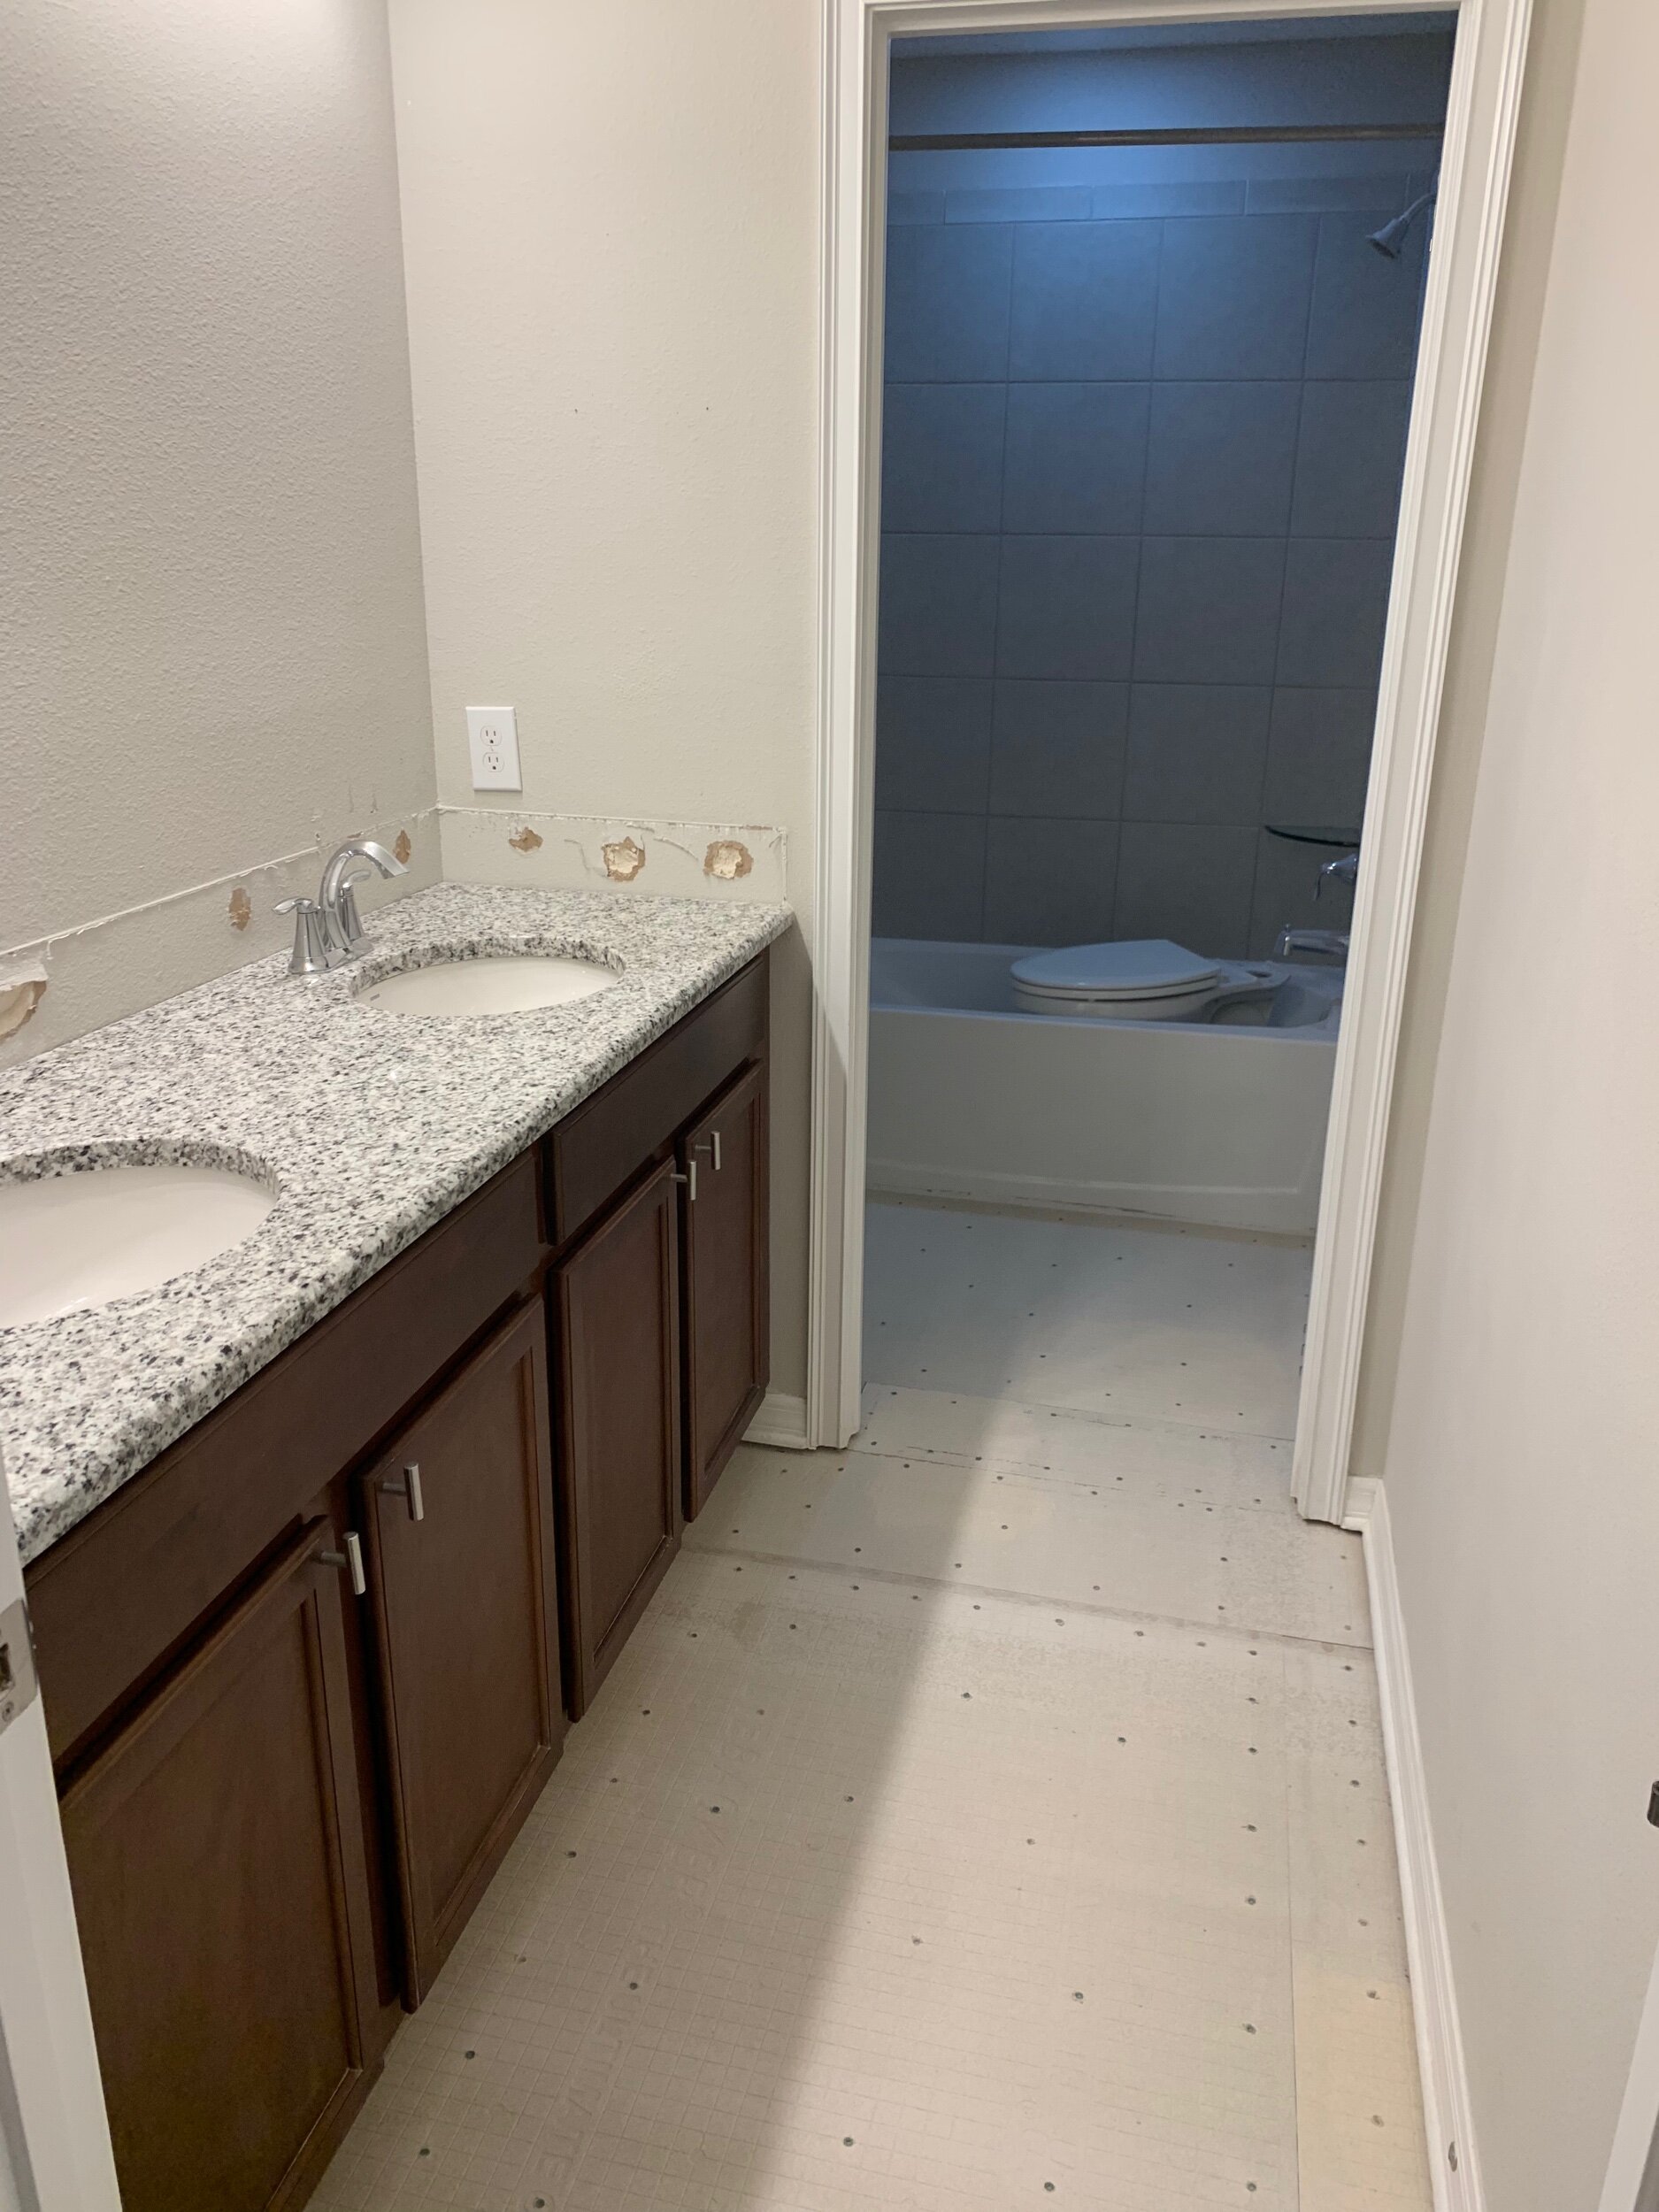
Large builder grade mirror and granite backsplash.
As you can see in the picture above, we had a very large builder grade mirror hanging here and the builder added a granite backsplash around all three sides of the countertops, and since we are tiling that back wall, and adding two individual mirrors, this mirror and backsplash all need to go. Removing the mirror was a piece of cake, you just unhook the clips and lift it off the wall. Also, removing the backsplash really wasn’t difficult either, but it did leave some damage we’ll need to repair. The backsplash is glued on, and sealed with caulk, so the first thing we did was score all the caulk lines on the tops and sides, and also the glue lines where the backsplash meets the countertops. Once those were cut down pretty well, Ryan took a paint scraper and a hammer, and wedged the scraper in all the way along the backsplash and wiggled it around (very technical terms here!) This loosened up the glue and Ryan was able to fit his pry bar in and remove the backsplash from the wall. He did this all the way around, and you’ll see it did leave slight damage like I said, but nothing duct tape can’t fix (kidding!) With this backsplash removed, the tile wall will definitely look a lot better. We are also replacing all faucets, light fixtures and accessories, but we still need to use those for now-so those will be removed later on.
Demo is complete!
Hopefully this helps inspire you to demo your tile floors whether they be 20 years old, or a year old (shoutout if you’re crazy like us). If we could do it, so can you! If you want to see the video process of our demo head to our Instagram, @newbuild_newlyweds, and be sure to wish us luck during this renovation challenge! Check back next week for progress of Week 2, and remember voting starts Week 3!
Click here to go to Jeffrey Courts website and read more about the renovation challenge and see what’s happening with the other designers for week 1!
Leave a Reply
Grab our FREE download
Wanna know the 5 must have tools you need before you start?
Considering a DIY Project?


Hi! I am curious about how you guys went from one light fixture to two? My husband and I are trying to do this in our bathroom and I was trying to find out how others did that.