


Lutron Electronics Serena Smart Shades
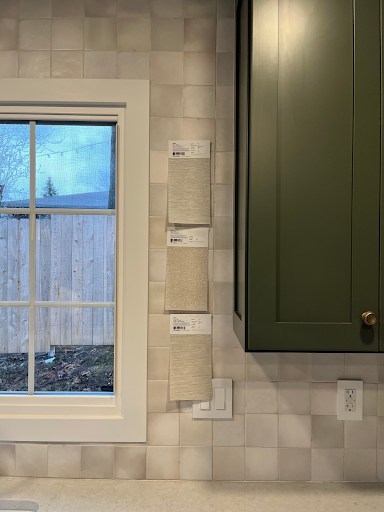
For our new home, we decided to get the Lutron Electronics Serena Smart Shades. We were sent quite a few fabric samples from Lutron Electronics; including black out fabrics, light filtering, textured, smooth, you name it! After comparing them all to our tiled backsplash, we narrowed down our top three favorite choices to the Vista fabric in the color Sand and Chalk and the Stratus fabric in the color Oyster. We ended up choosing the Stratus fabric in Oyster and couldn’t be happier with them! We also chose the lightest weight possible, so they are translucent which lets lots of light in while still giving us privacy!

One of the best things about the Lutron Serena Smart Shades is how many different ways you can control them! The shades can be set up to work individually through the Lutron app and Caseta wireless system, Pico remote control, voice activated through your Alexa or smart device, or placed on timers. We chose to use the remote control where you can either connect all the shades in the house to one remote and control them all together, or have different remotes for different rooms.


Mounting Steps
- Plan & Measure
- Pre-drill the mounting holes on the bracket itself.
We measured ours to be 6” inwards since it was a longer bracket, for smaller windows you may be able to go 4” inwards. - Attach the bracket to the window frame.
We got outside mounting shades due to the way our windows are set up. - Install D batteries into the Lutron Smart Shade
(Our biggest window required 8 D batteries, all others required 6.) - Click the shade into the bracket
The whole installation process only took about 5 minutes per window!
Leave a Reply
Grab our FREE download
Wanna know the 5 must have tools you need before you start?
Considering a DIY Project?


Be the first to comment