


Creating Stella’s Bedroom
Materials:
- Murphy Doors bookcase doors
- Pre-pasted wallpaper
- MusselBound
- Rosie Posie tile
- Grout
- COREtec Flooring
- Paint
- Kitty Pass (cat door)
- Wall ledges
- Wall bed
- Wall stairs
- Glow-in-the-dark paw prints
- Motion sensor lights
- LED name sign
- Velvet couch
- “Frame TV” (Amazon Fire tablet)
- Assorted picture frames
Tools:
- RYOBI Drill and Driver set
- RYOBI Brad Nailer
- RYOBI Jigsaw
- RYOBI Multi-tool
- RYOBI Rotary tool
- RYOBI Shop-vac
- RYOBI Wet Saw
- Edging painting tool
- Level
- Box cutter
- Measuring Tape
- FilStik
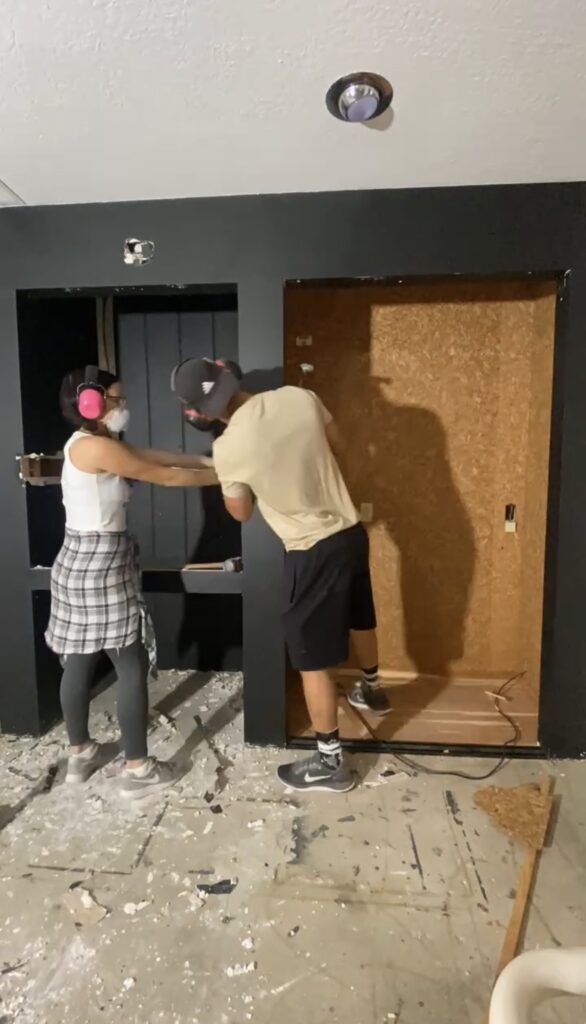
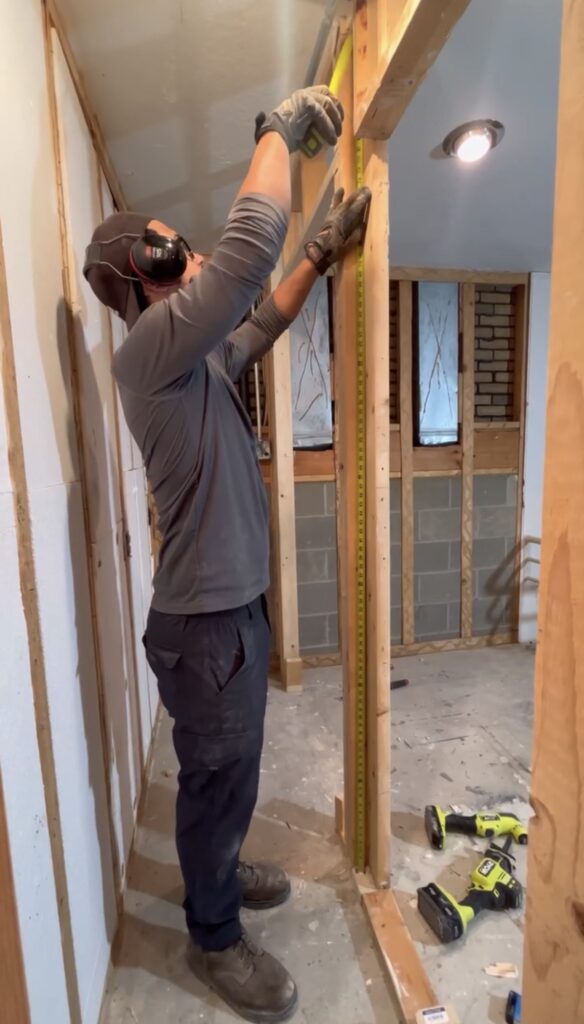
One of the projects we were most excited about when moving into our new home was making a new bedroom for Stella! Since this house did not have a cool “Harry Potter closet” under the stairs, we really had to think about where exactly to place it. We ended up choosing a wall that had two closets on either side, with dead space in the middle and made a plan to install bookshelves in the closet spaces that would hide her room behind them. To begin, we demoed the existing wall, re-framed and added drywall to create a new wall that had extra space behind it for Stella, including a separate closet/ “bathroom” area, and openings fit for our new Murphy Door bookcase doors. (These were custom built to fit the measurements we needed for this project!)
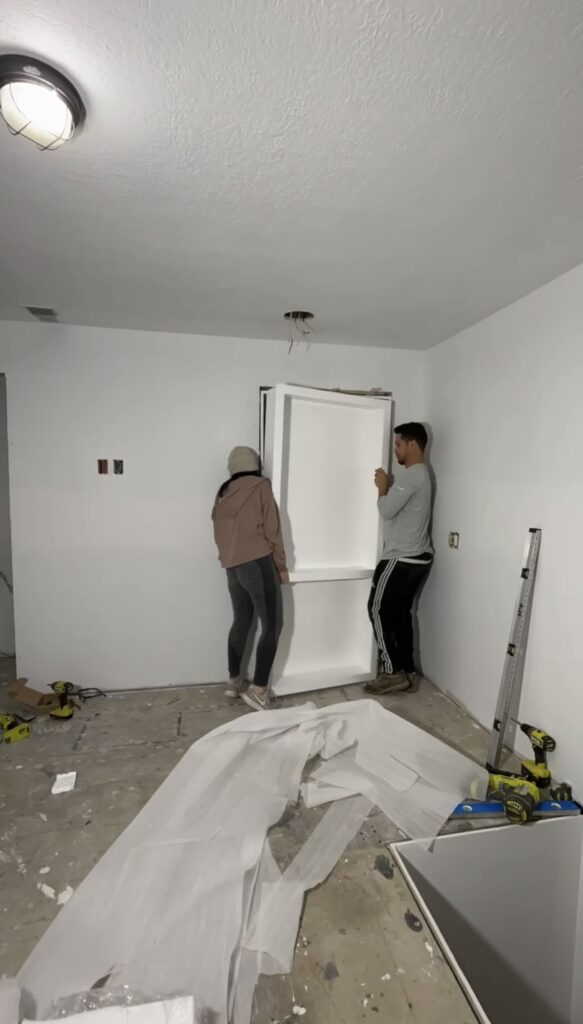
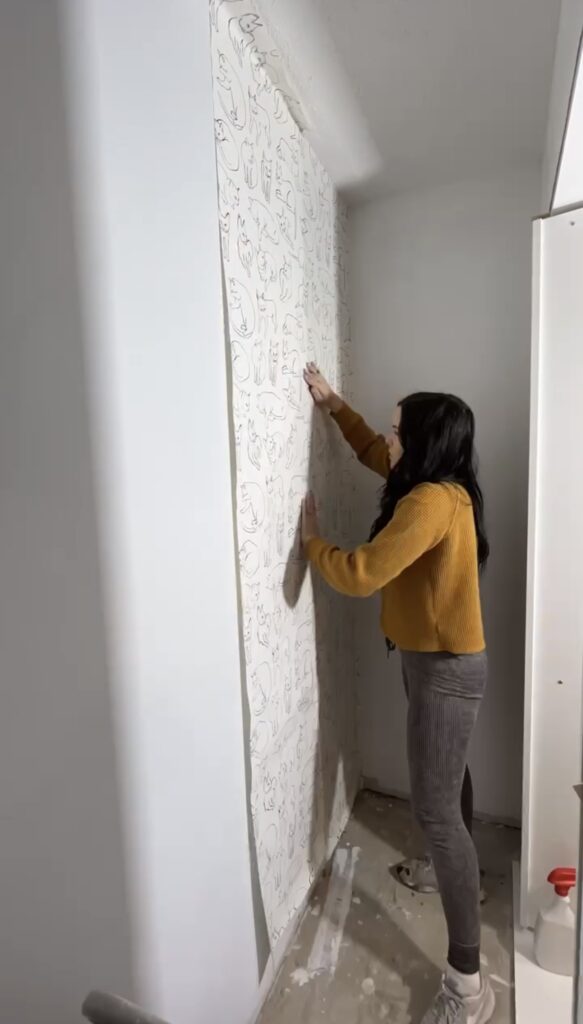
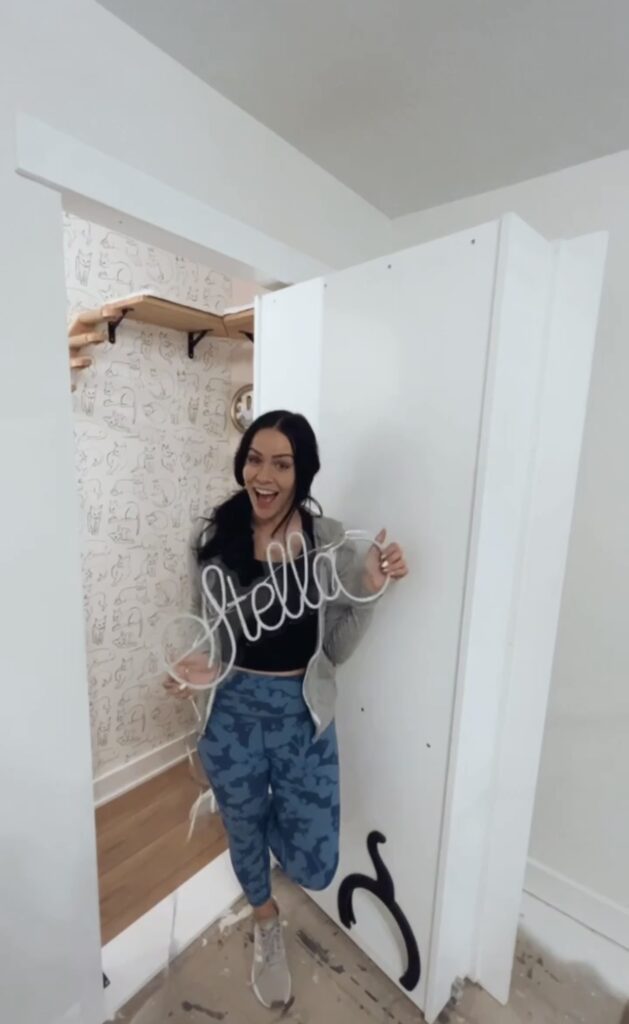
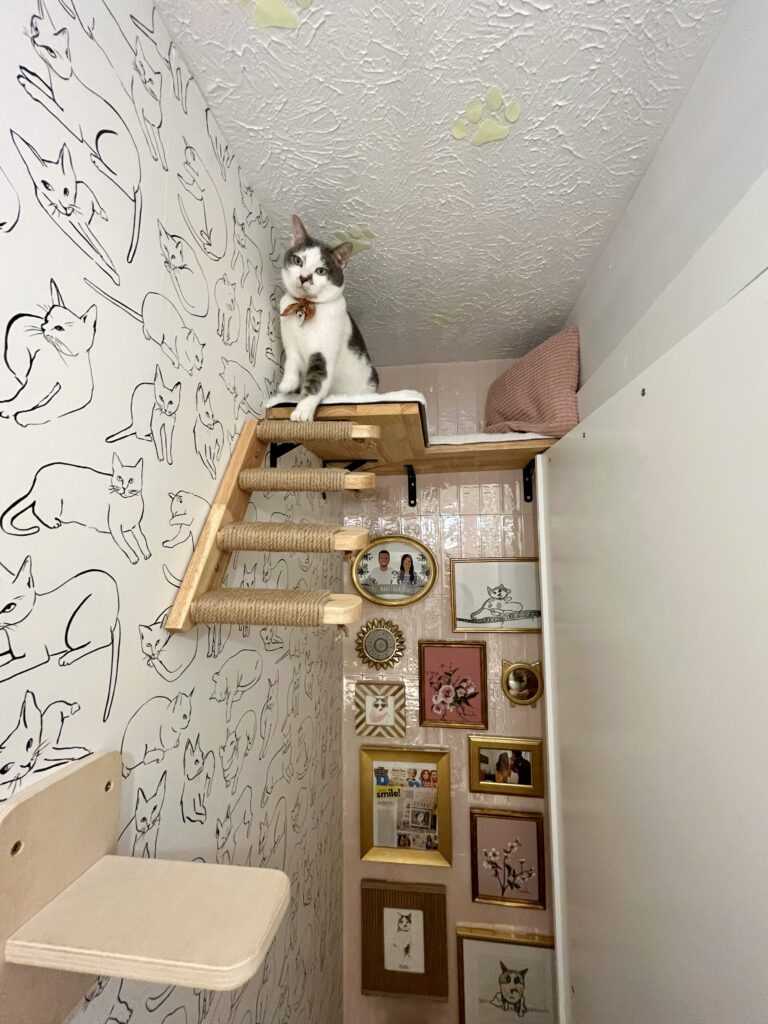
After installing the Murphy door bookcases we (very nervously!) cut into the bottom of one to install the KittyPass and create the entryway for Stella. We also added another KittyPass in her bedroom so that she could access her “bathroom”, where we keep her litter box, in the other closet. Next, we finished the floors by installing the same COREtec flooring we have in the rest of the room, and detailing by adding this cute pre-pasted wallpaper and tiling the side walls with a tile named Rosie Posie by Jeffrey Court (found at Home Depot).
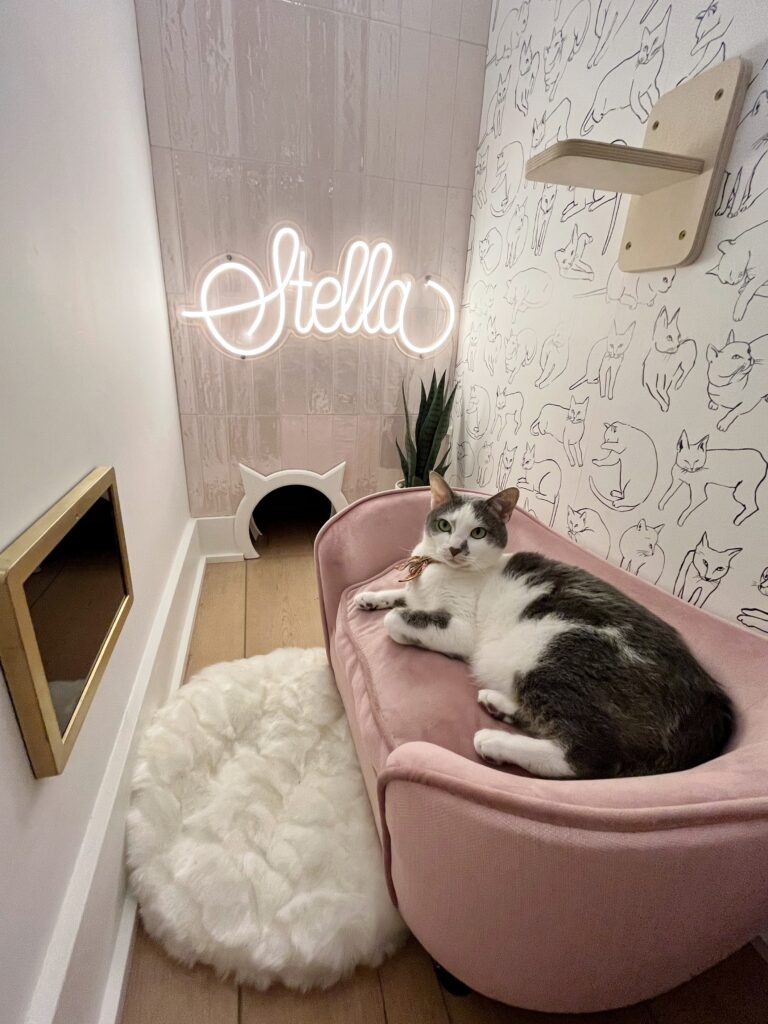
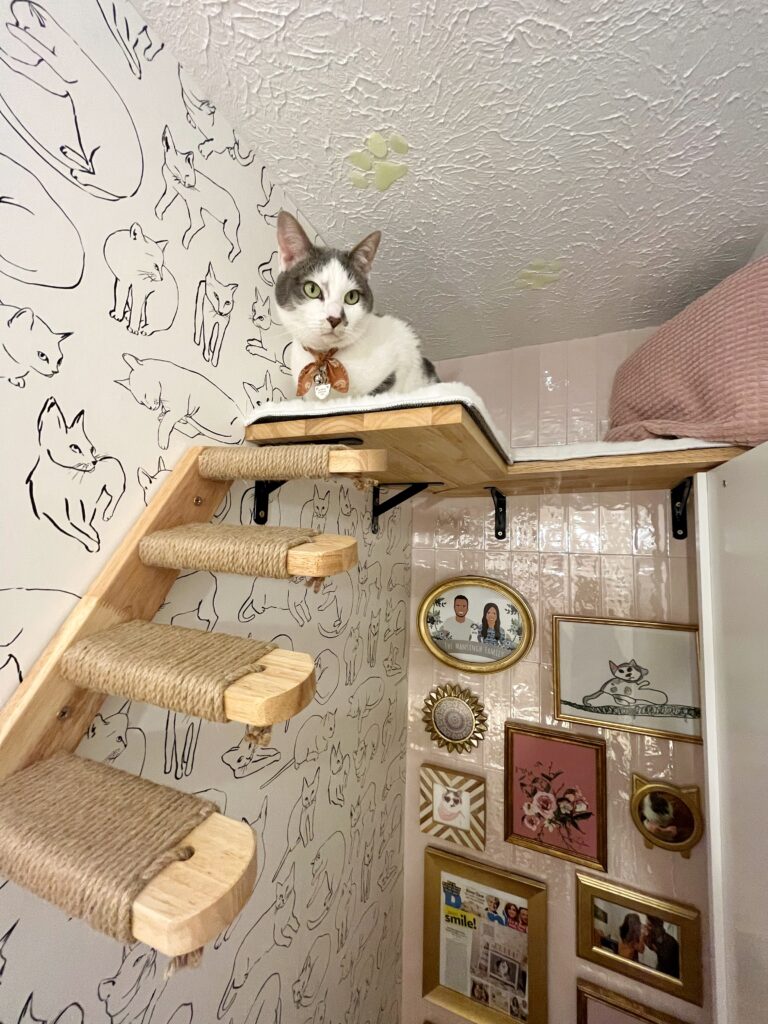
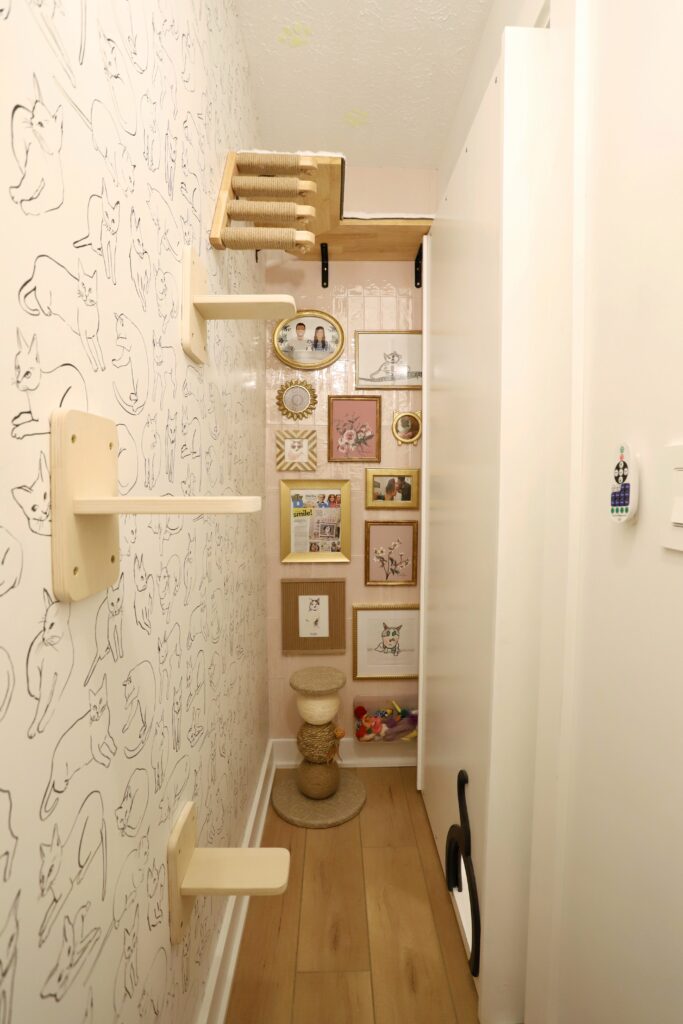
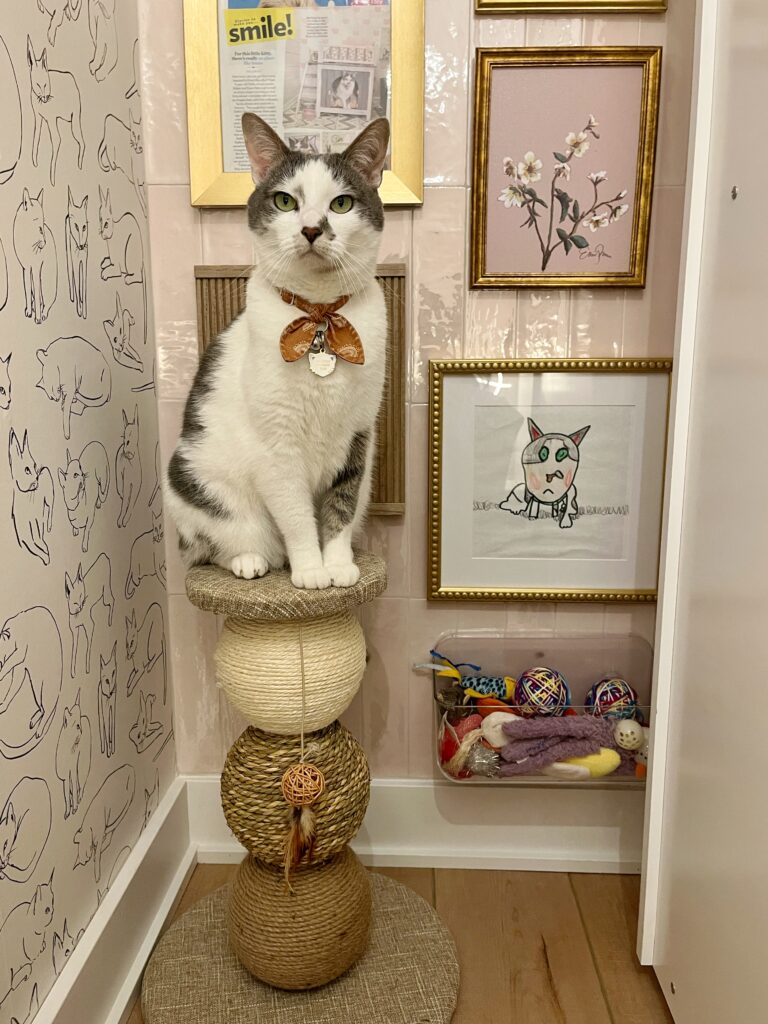
All that was left to do to on the bedroom side now was add the furniture and decor! First, we installed wall ledges, stairs and a wall mounted bed for Stella to climb and rest on. Next, we added a gallery wall with pictures, drawings and a magazine article in assorted gold frames to one of the tiled walls, as well as an acrylic basket for her toys and a scratch tower. On the other tiled wall we mounted Stella’s LED name sign right above the second KittyPass entry to her “bathroom”. We then installed a small chandelier and glow-in-the-dark paw prints to the ceiling. To finish things off in this room we placed a faux fur rug and velvet couch for Stella to lounge on right in front of an Amazon Fire tablet that we fashioned into a homemade frame TV!
Once her bedroom was finished, we installed the same COREtec flooring in the other closet, as well as tiled the walls and applied the wallpaper to the “ceiling” of her room. This “ceiling” was actually just a shelf we used to keep Stella from accessing the rest of the closet that we use for storage. Lastly, we placed her litter box and mounted a motion sensor light in both rooms. Once we moved in we introduced Stella to her new room and she absolutely loved it!
You can find links to all the tools we used to build this room here and all the decor here!
Leave a Reply
Grab our FREE download
Wanna know the 5 must have tools you need before you start?
Considering a DIY Project?


Be the first to comment